Decima WooCommerce WordPress Theme is fully compatible with UberMenu 3- The Ultimate WordPress Mega menu
Here will be shown how to recreate this menu:
First let’s start with checking the options for the plugin

Set UberMenu
Please remember to check Primary navigation otherwise menu won’t work correctly,
it can be done by going to Plugin and then clicking Control Panel in UberMenu 3 Plugin.

UberMenu Control Panel
After doing that we can start recreating the menu in Appearance – Menus section:
HOME
Let’s do the menu Home element with two menu sub items that are really easy to build.
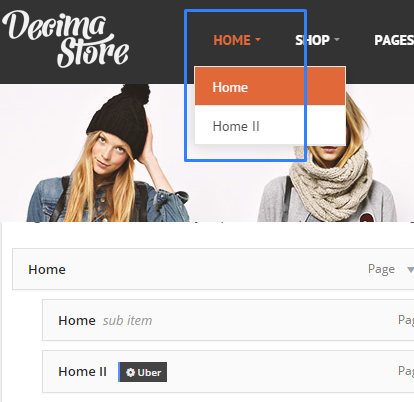
UberMenu Home Section
After checking the page we can notice that the position of the menu isn’t right as well as the the sub item apperance.
To fix it go to the Appearance – UberMenu. You need to change there two options in Main UberMenu Configuration:
- In Basic Configuration change the Skin to the None (Disable) option.

Basic Configuration Options
- In Position & Layout change Menu Bar Aligment from Full Width to Left.
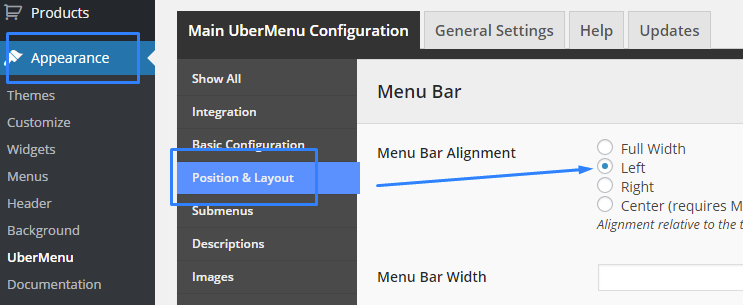
Position & Layout
- The last element change in Sumbenus. Change there Bound Submenu To option to Unbouded, you can read below that this option will let our menu be wider than the menu bar.
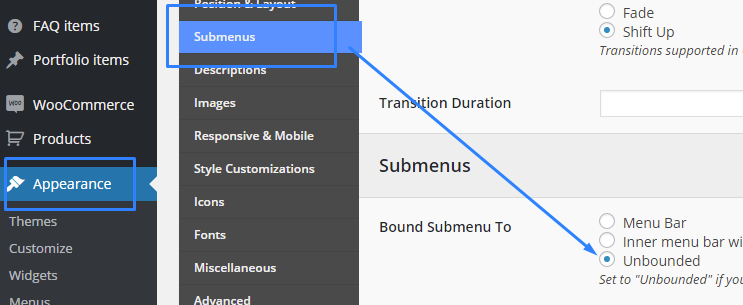
Submenus Option
How to fix the submenu items:
- To do this go to Appearance – Menus. Yes we are going back to place were we are creating all the menus.
- By hover over our main Home menu element you will notice a
 button. Let’s click it!
 - Choose the Submenu settings and change the Submenu Type from Automatic to Flyout Submenu. And don’t forget to save !
Now we have our pretty little part of this menu. Let’s try to make something bigger!
SHOP
As the first step we put all the structur element we will need in this big Shop menu section.
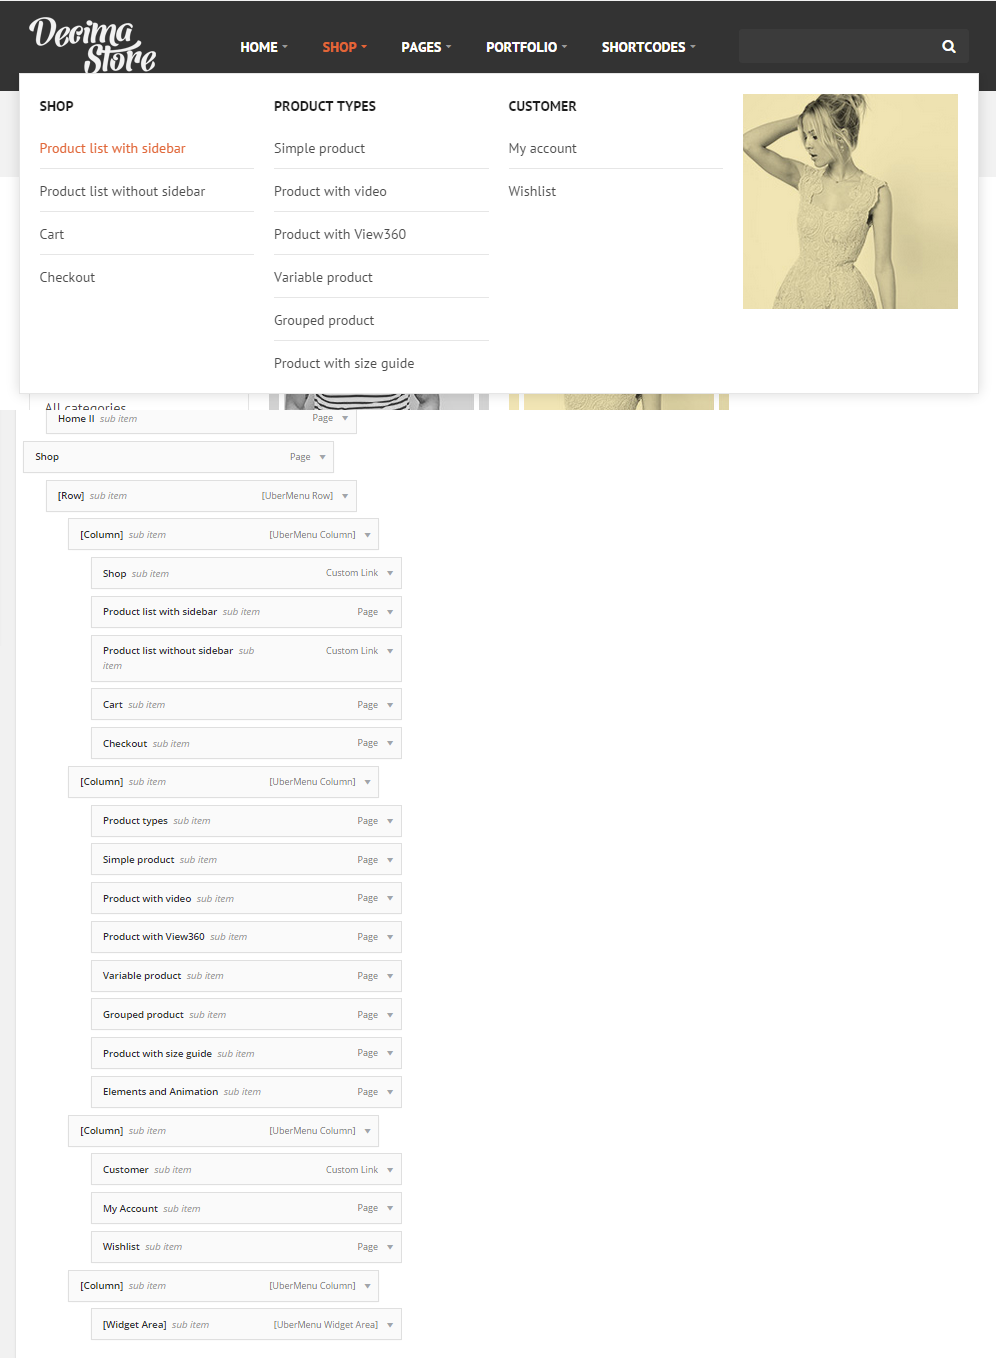
Shop Menu
This are all the elements that were used to create this menu part. Most of them are well know but there are few new used in UberMenu – [Row], [Column] and [Widget Area] that we used for Decima menu. They are all easy to found in UberMenu Advenced Items
- Row is able to wrap any kind of the item and it is very useful when we want to create submenu content.
- Column is used to place multiply block of items in a single row.
- Widget Area will let us put widget element in the UberMenu
But as usually the menu isn’t looking as it should by just adding this elements.
- Go to the UberMenu setting of main Shop element by clicking .
- In the Submenu – Submenu Type change from Automatic to Mega Submenu because this main menu element will have sub items put in 4 columns instead of 1.
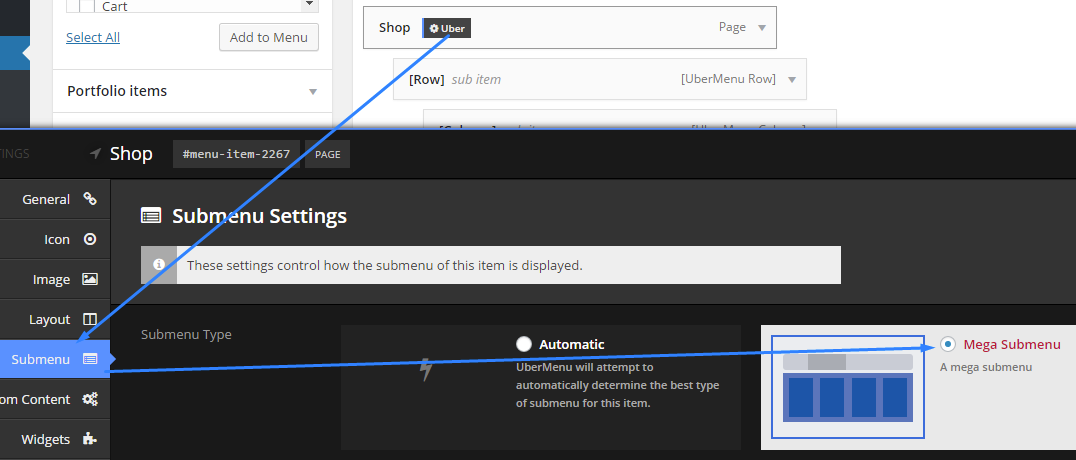
Submenus Option 2
- Next change Column sub item setting ( It need to be done for all of the [Columns] elements in this menu)
Use the Uber – Column Layout and change the Column Width there to 1/4 (Because shop menu will have 4 sub columns)
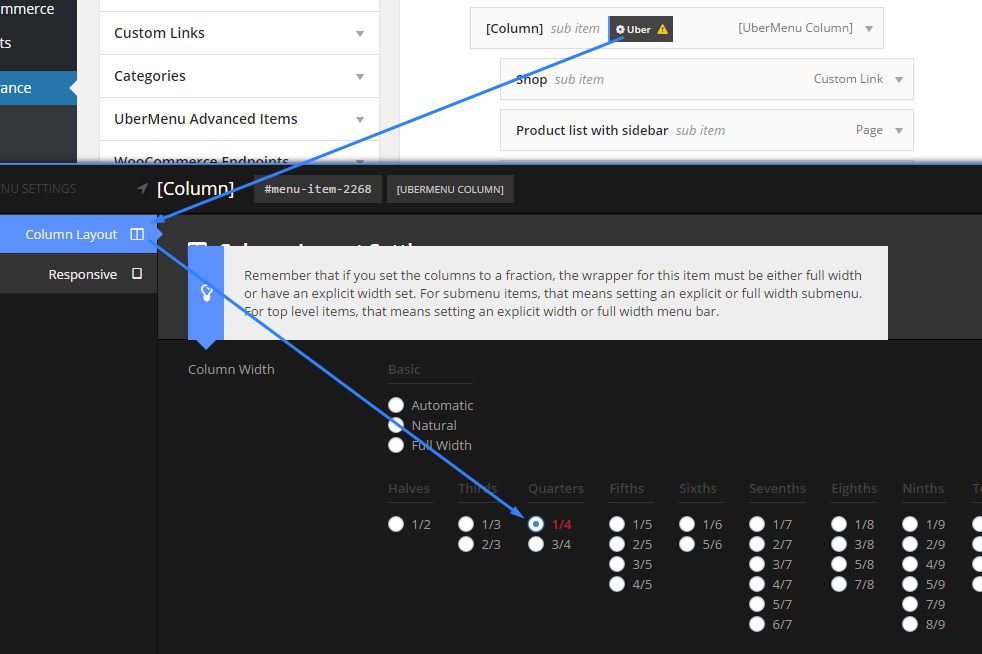
Column Layout
- Another step is to make few elements to work in our menu as a header.
For the example we are going to use sub item Shop. Let’s go to the Uber – General and then change the Item Display option to Header. Then check the Disable Link option. Then save the changes.
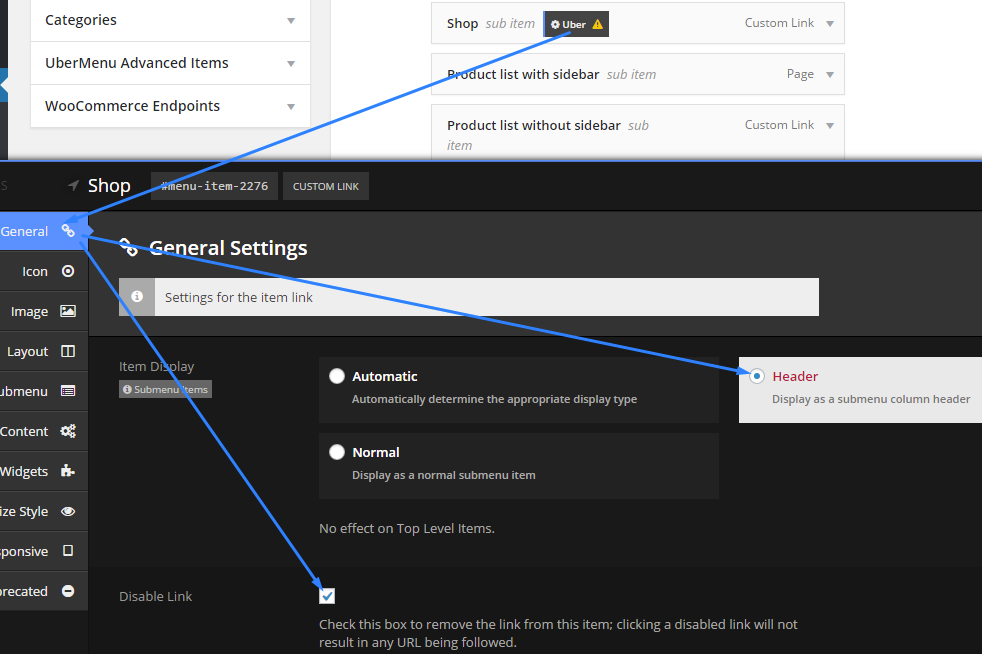
General Options
With all this information you will be able to style almost the whole menu.
The last thing that is needed to be done is Widget Area element.
- Click on Uber and then in Widgets choose a nice name for Custom Widget Area
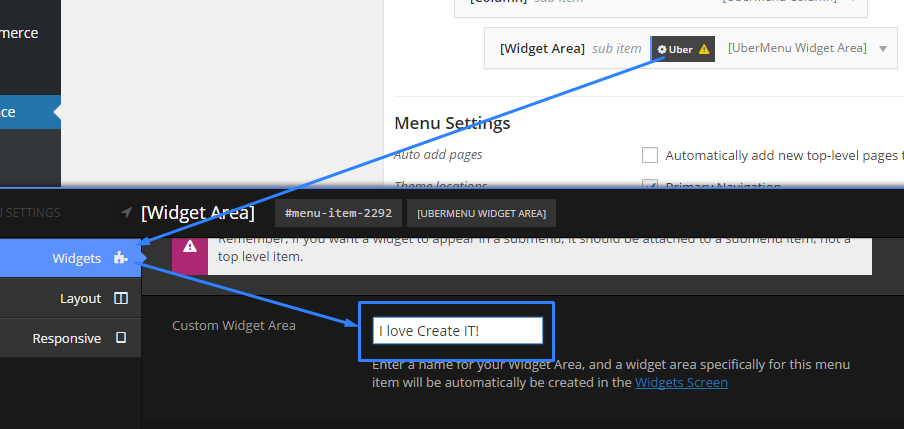
Widget Name
- After this go to the Widget Section in Appearance and put there anything we want in the [UberMenu] widget.
- For example we put a Text widget with some code (but you can put there wat you want). This code is nothing more that a href attribute with link to our shop page and source link to an image we have in media section.
Save changes.
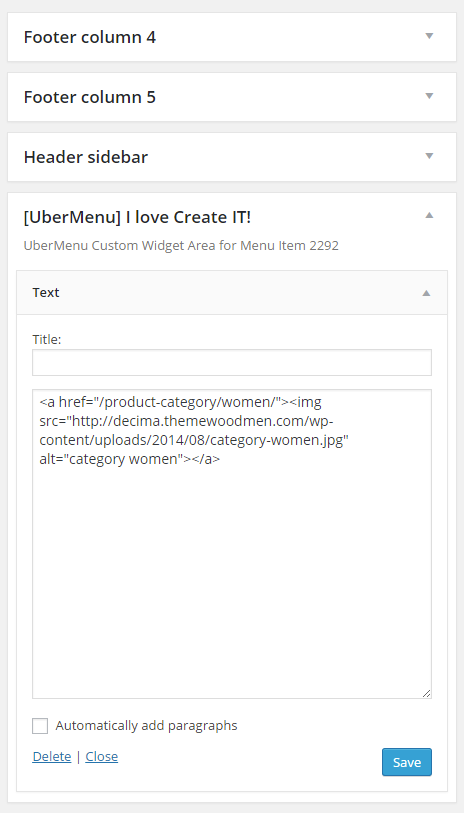
UberMenu Widget
With this knowledge there will be nothing to stop you from recreating Decima UberMenu!