General Information
Thank you for purchasing Brick! We’re very pleased that you have chosen our theme to build your website and we’re trying our best not to disappoint you! Before you get started, please check out these documentation pages. Brick can only be use with WordPress which we assume you already have installed and ready to go. If not, please check out WordPress Codex.
Was this article helpful ?
Requirements for Brick
Before using Brick, please meet the following requirements:
- essentials to run WordPress – here you can find more information – in case any doubts regarding the server, contact your host provider,
- latest version of WordPress, which you can download here,
- create secure FTP and Database.
Was this article helpful ?
Support
All of our items come with free support. For some help you can reach to our dedicated support forum. Free support is limited to questions regarding the themes features or problems. We provide premium support for code customizations or third-party plugins. If you need help with anything other than minor customizations of your theme, feel free to contact us on premium@createit.pl.
For free support, follow the steps below
- Step 1 – Click Here to create a free forum account. You’ll need your Themeforest purchase code, which can only be received when purchasing the theme from Themeforest.net.
- Step 2 – Enter your Themeforest Purchase Code, an e-mail and a password.
- Step 3 – Once you have an account, sign in to the forum and get started.
- Step 4 – Find your theme on a forum home page.
- Step 5 – Create new issue by clicking on a button at the right.
Before You Post On a Forum
We urge you to follow the steps below, before you post a new topic on the forum, to speed up your request. It’s in everyones interest and will benefit in making the entire forum more efficient:
- Step 1 – Always check the Documentation and the Knowledgebase Section. Most questions are already answered in those areas.
- Step 2 – Always use our Forum Search before you post, it’s possible that your issue has already been brought up and answered.
- Step 3 – If your question hasn’t been brought up, please post a new topic. Always be as specific as possible. Creating a topic requires entering the live URL to your home page or page that shows the issue in question. It also has bars for WP and FTP login info, which aren’t required, however, providing us with your login information can save a lot of time for both of us. Login credentials are securely stored and accessible only by our support staff.
- Step 4 – We usually answer questions in 24 hours on working days. However if you don’t get any answer in 72 hours bump up your question or send us an e-mail.
Our support hours: 10:00 AM – 6:00 PM UTC +1 on Monday to Friday.
Premium Support
We can create your website from scratch, redesign it or just extend the current ones. For more information, please take a look at our website.
Typical issues covered by Premium Support:
- Custom CSS
- Support for third party software and plug-ins
- WordPress Installation with Theme configuration
- Server configuration
- Site structure modifications
- Graphic adjustments, etc.
- WordPress general howto’s
Was this article helpful ?
What’s Included
When purchasing our theme from Themeforest, you need to download the Brick files from your Themeforest account. Navigate to downloads tab on Themeforest and find Brick. Below you’ll find a full list of what is included the .zip file, along with a brief description of each item.
Brick Folder contains:
- brick.zip – main installation folder
- {PSD_included}
Was this article helpful ?
Installation
There are two ways to install the theme: through WordPress, or via FTP. But first, you need to download the Brick files from your Themeforest account. Navigate to downloads tab on Themeforest and find Brick. Click the download button.
For more information check also this article from Knowledge Base.
Was this article helpful ?
Import demo content
The fastest and easiest way to import our demo content is to use Theme Options 1-click Demo Importer. It will import all pages and posts, several sample sliders, widgets, theme options, assigned pages, and more. We recommend this approach on a newly installed WordPress. It will not replace content such as posts, pages, portfolio, etc. and delete current menus, but configure them and replace theme options. By that, if you have created some posts, pages or portfolio content before an import, you won’t loose them.
To import our demo content, please follow the steps below:
- Step 1 – install and activate plugins listed in Recommended Plugins message {warning}
and WooCoomerce plugin, if you’d like to use shop functionalities.
- Step 2 – setup Media thumbnails sizes in Settings > Media to recommended values:
- Thumbnail size: 150 x 150px
- Medium size: 300 x 300px
- Large size: 1024 x 1024px
If you’re using WooCommerce product images sizes in WooCoomerce > Settings > Products
- Step 3 – navigate to Appearance > Theme Options > General – 1-click Demo Import
- Step 4 – click the Import demo content button with multipage or onepager version.
(WARNING:The image below is only an example of how the 1-Click Demo section might look like. Depending on the theme, the amount of images and/or tabs of the import demo contents, this option might look different.)
- Step 5 – importing can take a few minutes. Please be patient and wait for it to complete. Once it will be loading, you will see message with indicating progress.
Learn more:
Common errors with “1-Click Demo Import”
Was this article helpful ?
Installation via Administration Panel
If Brick files are downloaded from your Themeforest account, you can start an installation by using WordPress administration panel.
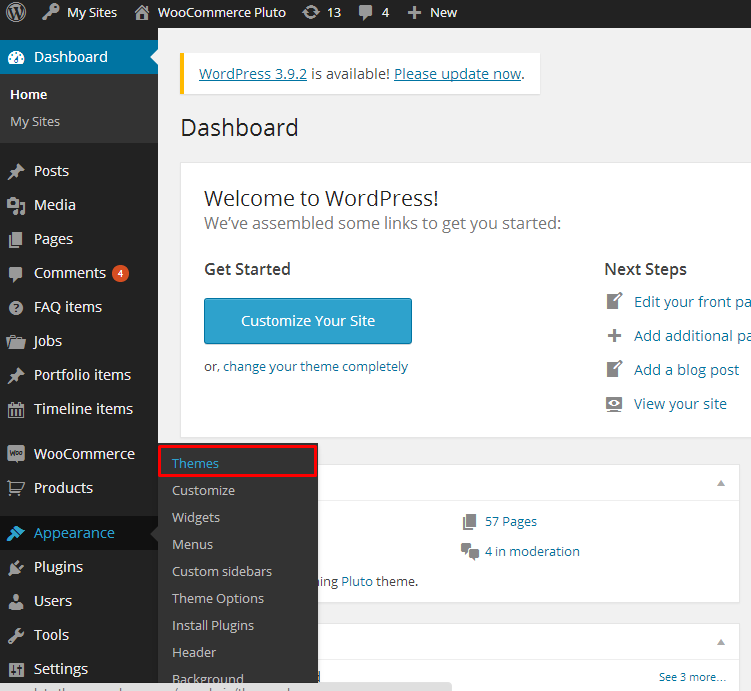
Once you’ve logged in to your administration panel go to Appearance > Themes. Depending on your version of WordPress you’ll see Add New or two other tabs: Manage Themes and Install Themes.
Here you’ll find instructions how to proceed with 3.9.0 and lower versions of WordPress.
If you’re using newer version, follow steps below to install the theme:
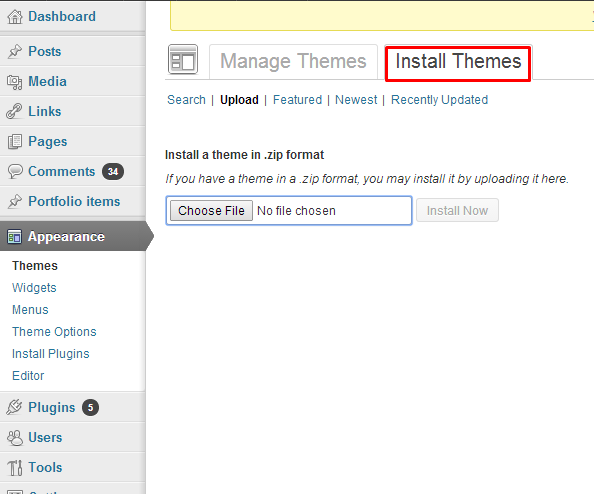
- Step 1 – click on Install Themes tab
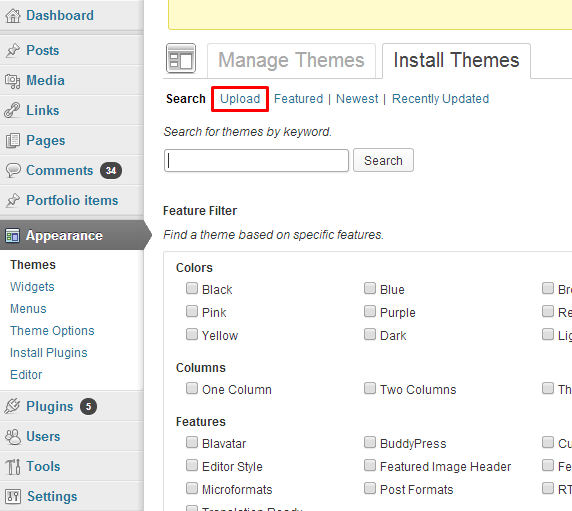
- Step 2 – choose Upload option to upload .zip file
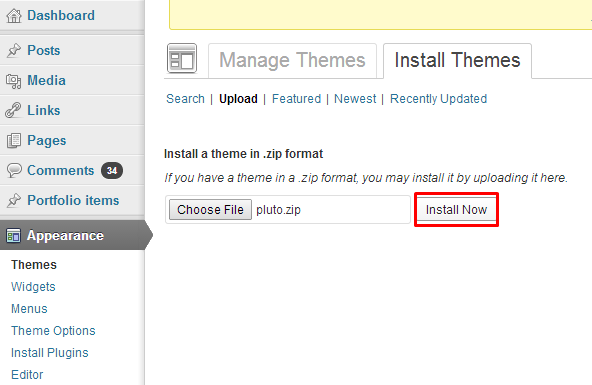
- Step 3 – choose brick.zip from you computer.
- Step 4 – once the file is chosen click Install Now
Common Install Error: Are You Sure You Want To Do This?
If you get the following question message when installing Brick.zip file via WordPress, it means, that you have an upload file size limit. Install the theme via FTP or call your hosting company and ask them to increase the limit.
Was this article helpful ?
Installation via FTP
To install Brick via FTP, follow steps below:
- Step 1 – Unarchive brick.zip file
- Step 2 – Access your host web server using FTP client
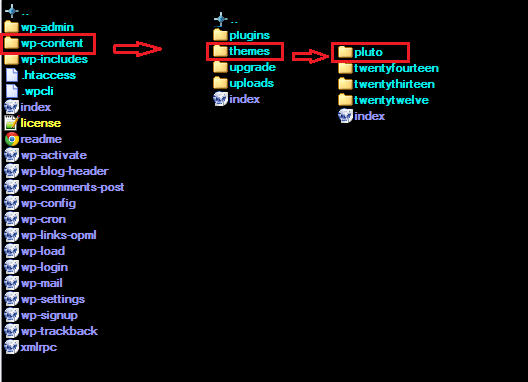
- Step 3 – Find directory wp-content > themes
- Step 4 – Put folder Brick in directory wp-content > themes
Learn more:
Was this article helpful ?
Pages
You can use Pages to organize and manage any content on your website. You can create multiple pages on your website for different types of content or setup onepager with scroll-to-section menu.
Was this article helpful ?
Homepage setup
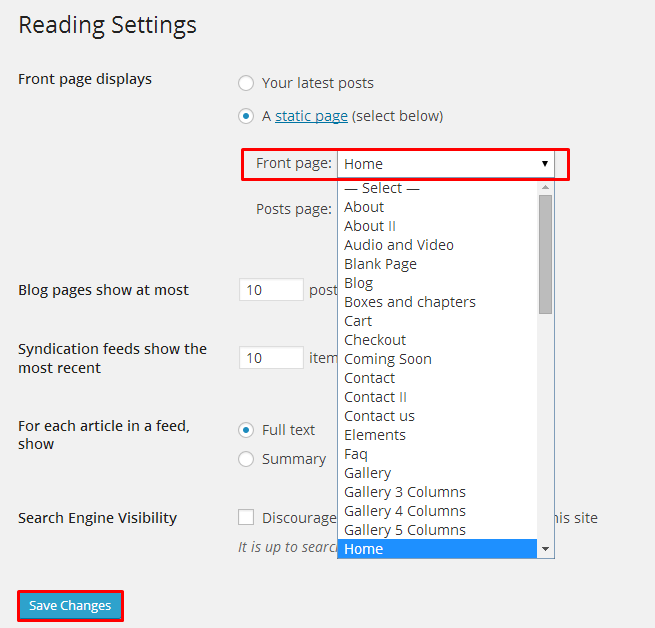
If you have added some pages via Pages > Add new you can choose one and set it up as a homepage. Use Static front page tool in Settings > Reading and choose from the list your homepage. Remember to click Save changes at the end of editing.
Was this article helpful ?
Onepager setup
Brick has the ability to make one page site with a scrolling to sections menu. Most sites are traditionally setup with individual pages, each page with its own content. One page site allows you to put all the content on one page, and the menu items will link to each different section of the page. Think of it as a full site but all on one page. Please read below for information on how to set this up.
Create A New Page With Your Content And Anchor Points
- Step 1 – Navigate to the Pages section of your admin and click Add New.
- Step 2 – Create page with all sections. Each section should begin with [chapter] shortcode or any other html element with unique id, for example :
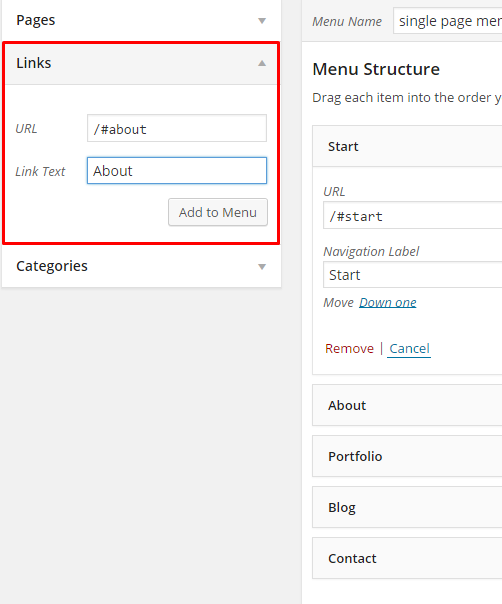
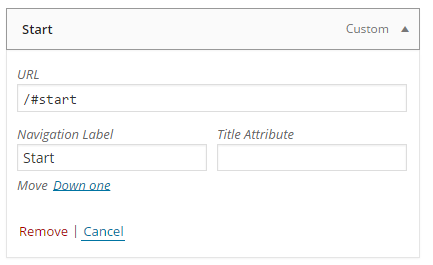
123456[chapter id="work"](...) content (...)[chapter id="services"](...) content (...)[chapter id="about"](...) content (...) - Step 3 – 2. In Appearance > Menus create new main menu (using Custom Links option), where URL will be section id with “/#” sign, for example : /#services or /#about.
And your onepager menu is ready. Remember to choose Theme Location Primary Navigation to your menu.
Was this article helpful ?
Brick Header Blocks
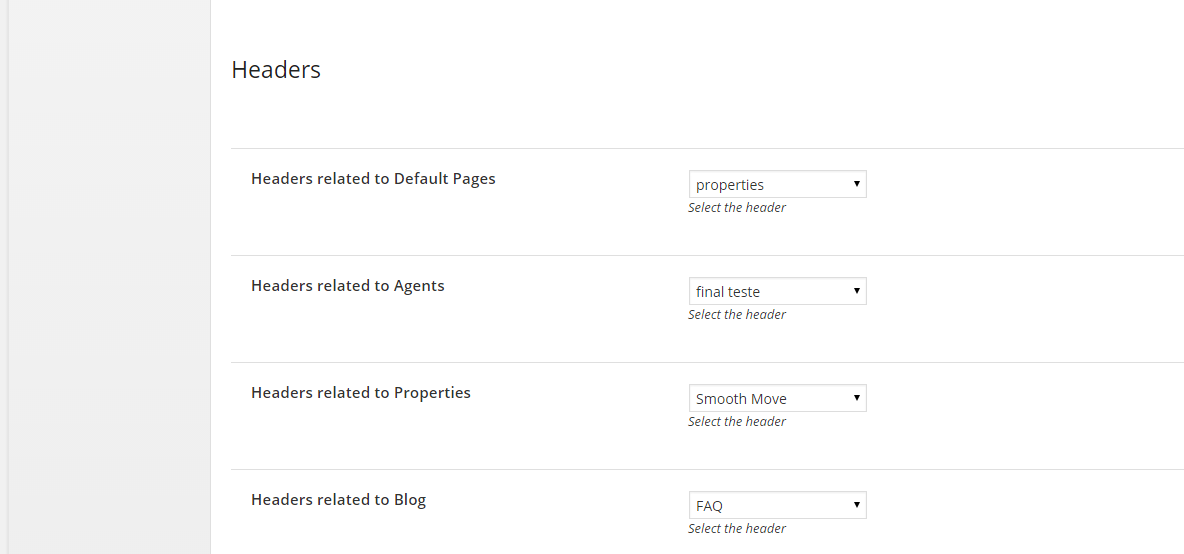
To create a standardized template for each page some of the settings you can set globally. You need to go to Appearance > Theme Options > Pages and choose from several options:
- Show/Hide title on pages
- Show/hide breadcrumbs on page
Using Brick allows you to add custom area above main content container. In this place you may display the selected Header Block. To main pages types you can assign separate Header Block in Appearance > Theme Options – Pages.
To create your blocks navigate in main admin menu to Header Blocks > Add New
Notice:
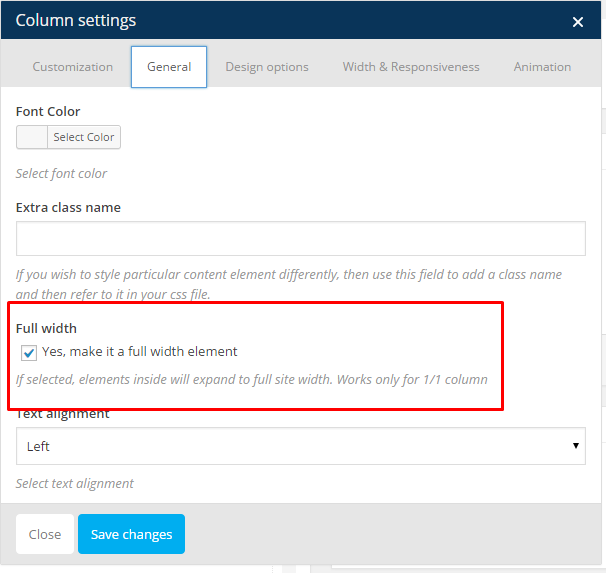
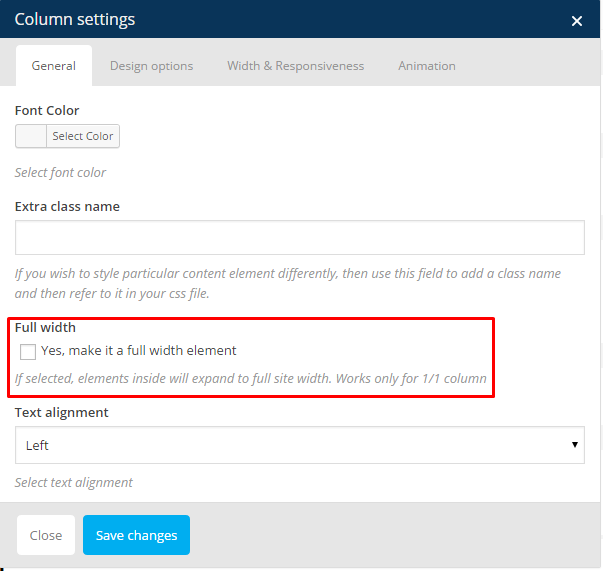
Using Full width option in column settings allows you to create full width Header Block
Remember to click Update once Header Block is assigned to page.
Was this article helpful ?
Creating properties
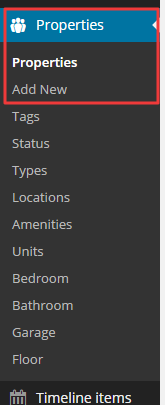
Brick comes with ability to creating Properties custom post types. To create new property navigate to Property > Add New
To every Property you can assign number of variables, which can be defined in Property menu (see attachemnt above) or added directly from Property edition page. You can define and assign the following variables:
- Tags
- Status
- Types
- Locations
- Amenitites (including featured amenities, like: number of Bedrooms, Bathrooms, Garage – which will be displayed on every property preview – you can define them separately)
- Property Floor
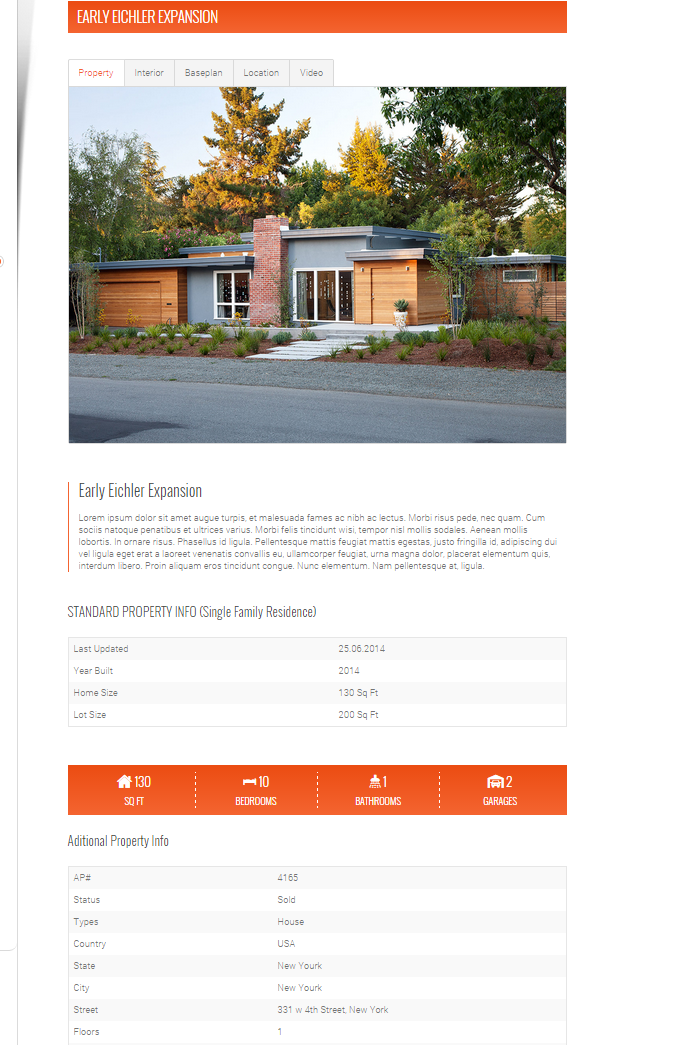
All information can be displayed in Property details page:
Was this article helpful ?
Properties Theme Options
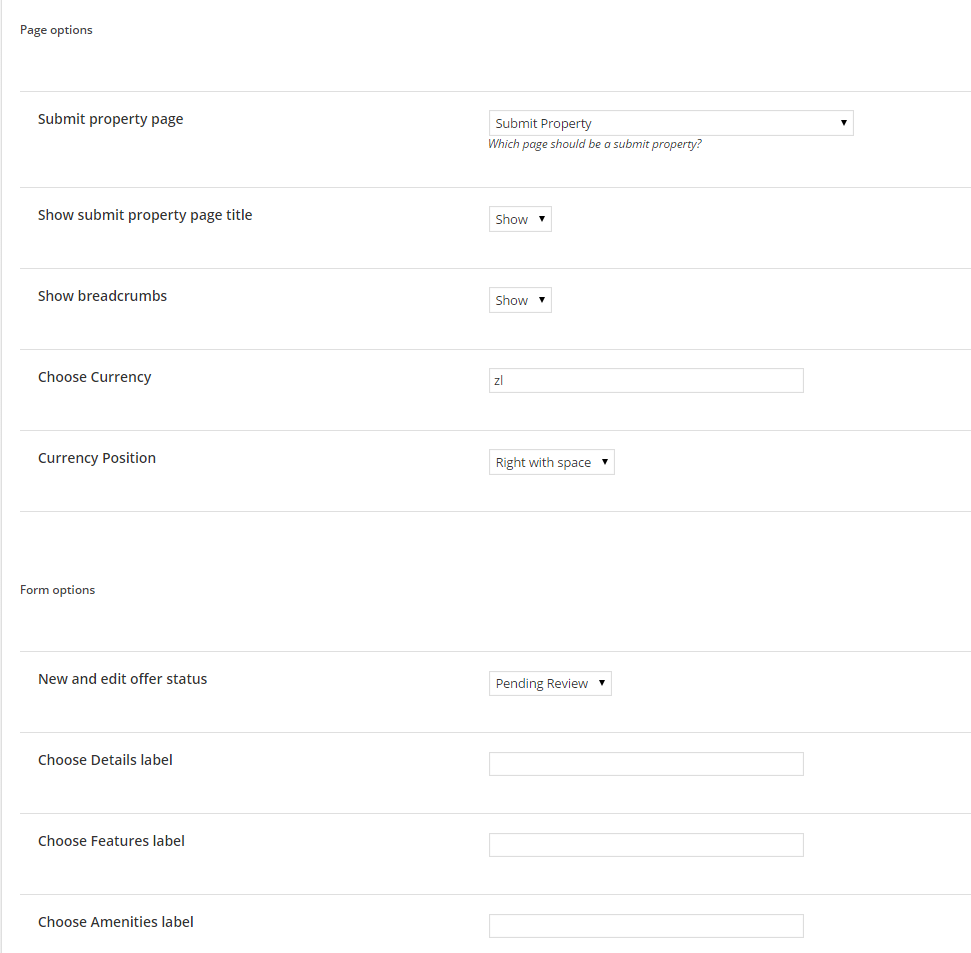
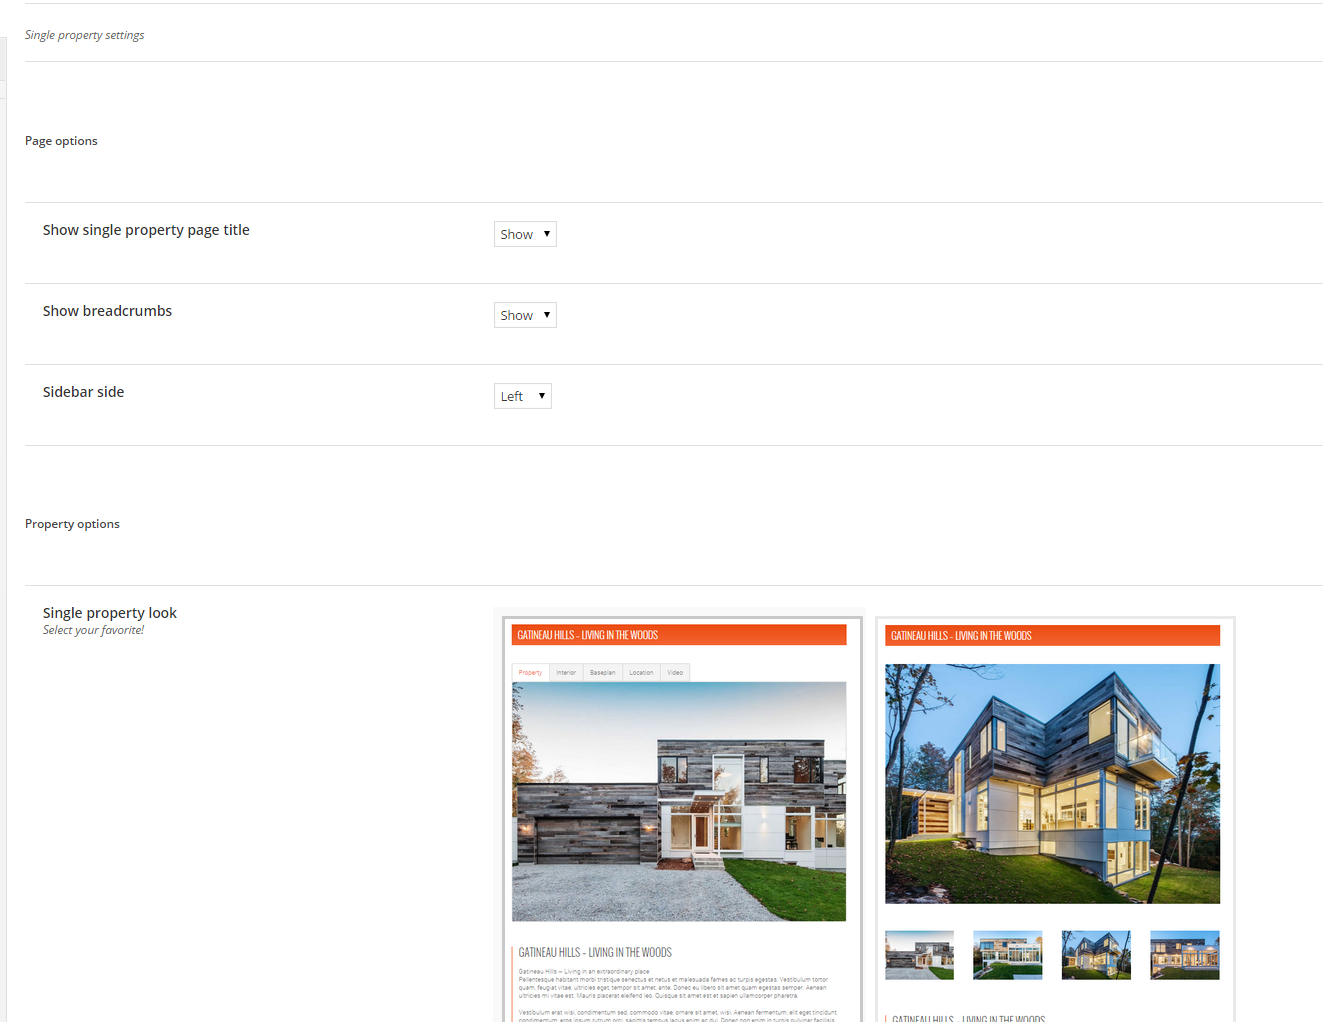
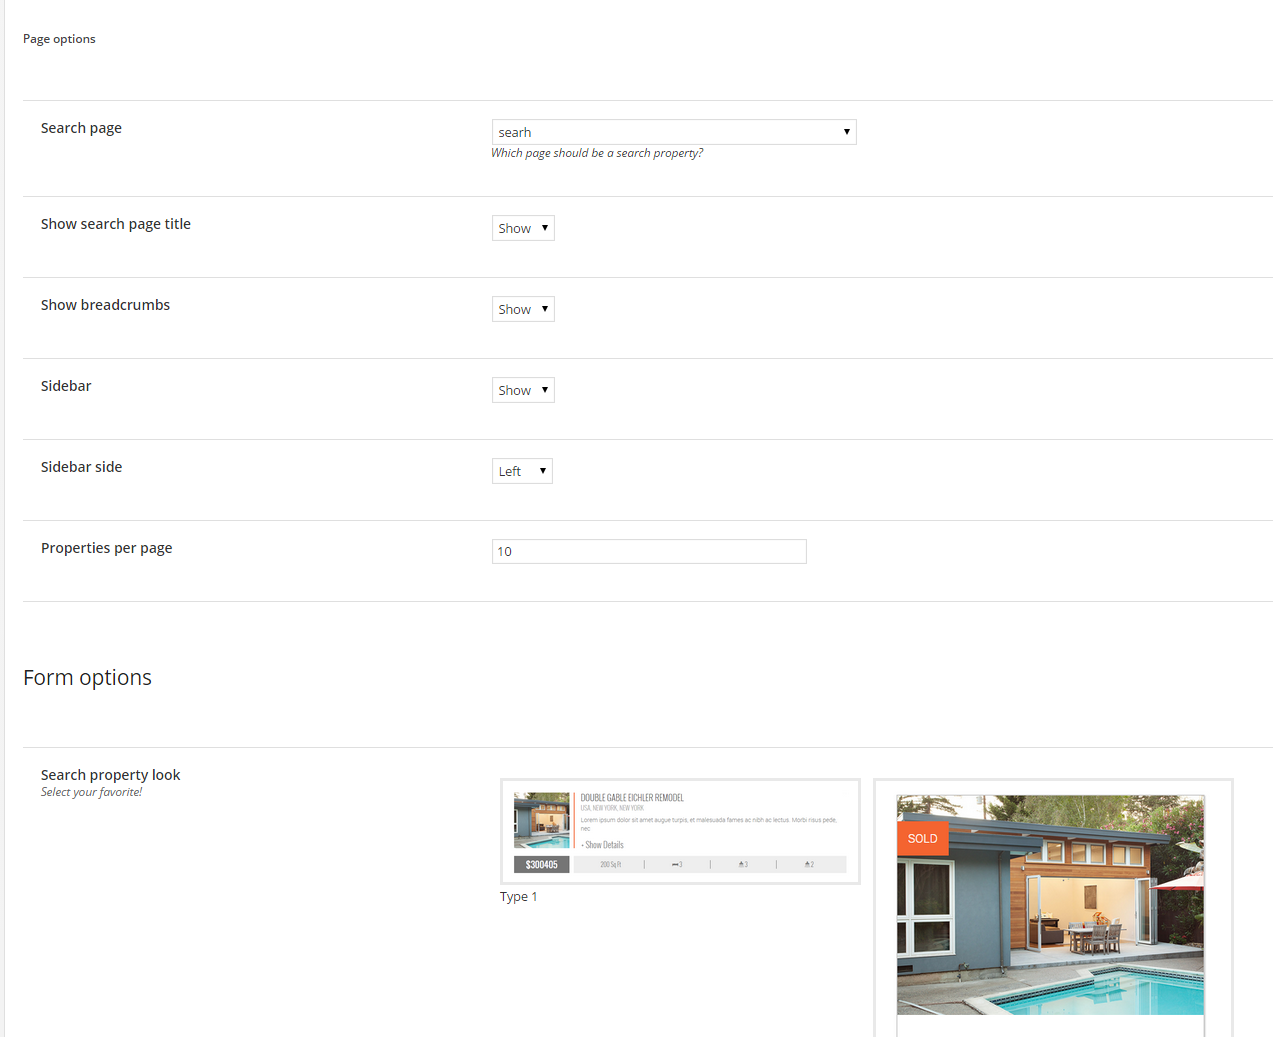
In Appearance > Theme Options – Property you will find three tabs, each with number of options for Properties pages:
- Form
- Single
Additionally in Single Property Theme Options you can decide, which of defined amenitites should be displayed on every Property page.
- Search:
Including additional options for available view types.
Was this article helpful ?
Creating agents
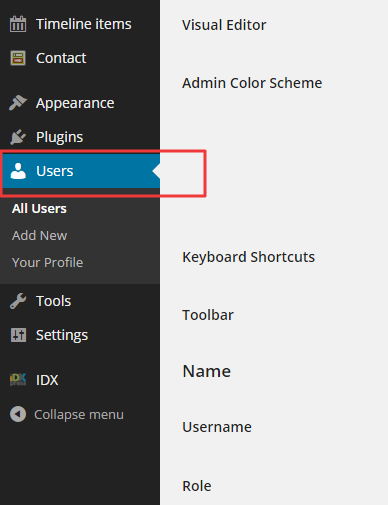
Brick is a real estate Theme, which allows you to create custom user accounts for Estate Agents. You can create Agent account via administration panel in Users section
Remember to select Agent role for every user created for estate agents.
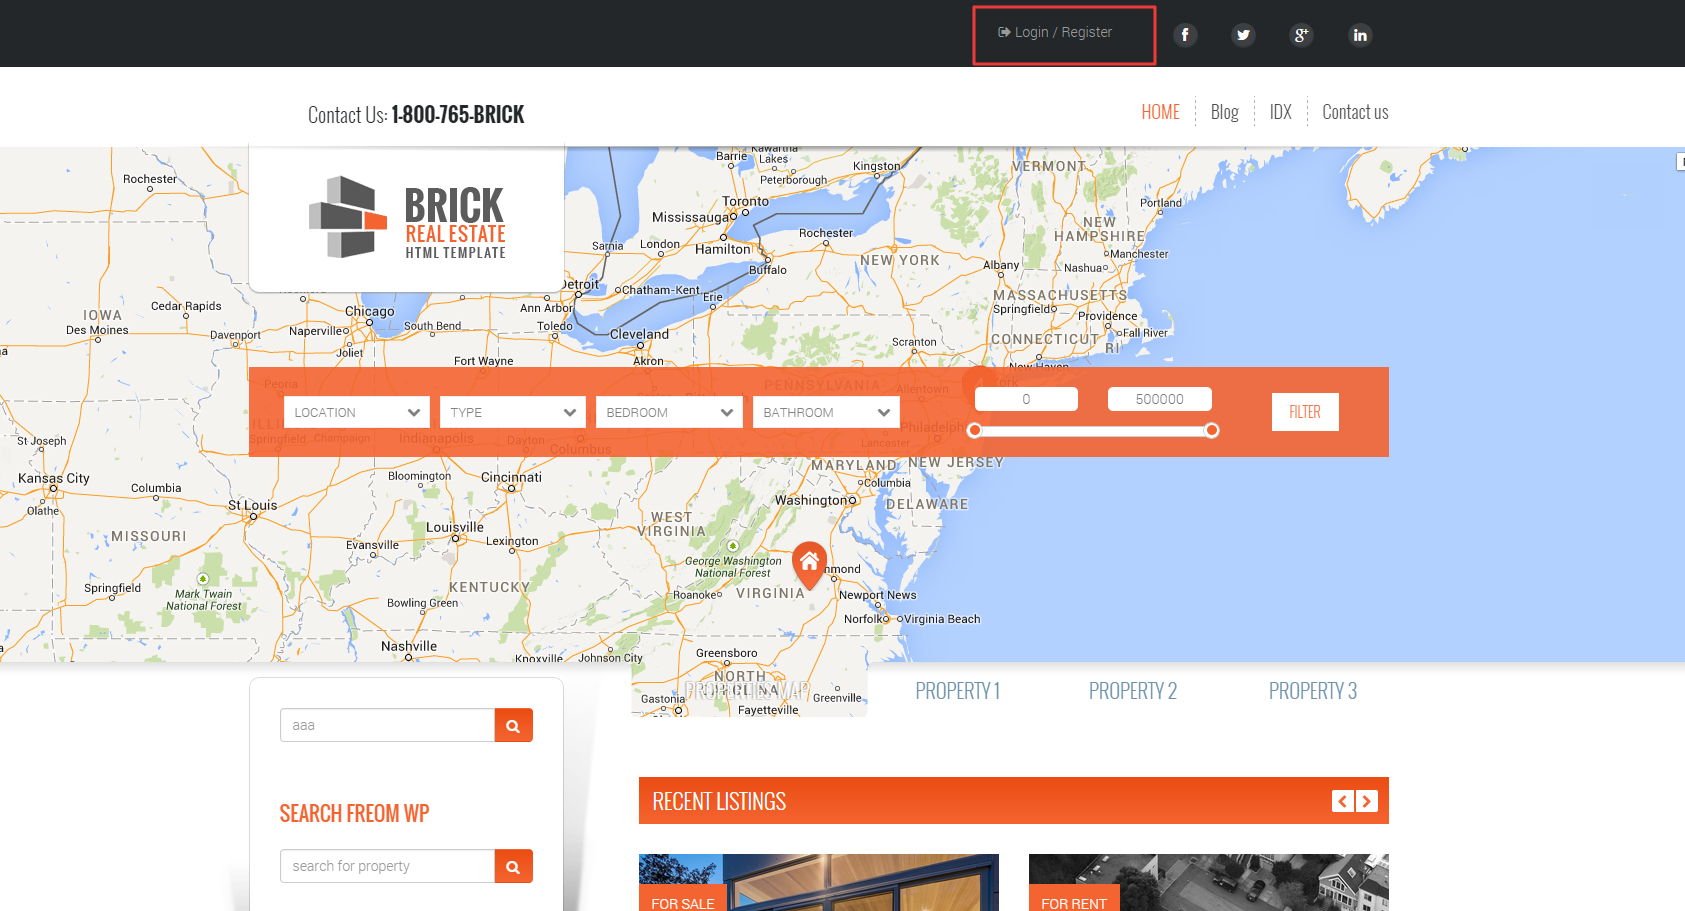
Users can also register via frontend button Login/Register
Notice:
Frontend registration will work only if you check Anyone can register in WordPress Settings > General:
We recommend you to setup New user default role to Agent
Was this article helpful ?
Blog
Brick is loaded with options for the blog. It offers many different options for you to present your blog posts, along with several different blog post layouts. In addition, there are numerous theme options and shortcode options that allow you to customize how posts are displayed.
There are several ways to display your blog posts, we will cover each method as well as describe blog post types, post options and theme options. The following sections will cover each of these aspects of the blog.
Was this article helpful ?
Blog index page
The most popular way of displaying blog posts is to setup blog index page. There all of your posts will be displayed and ordered by publish date.
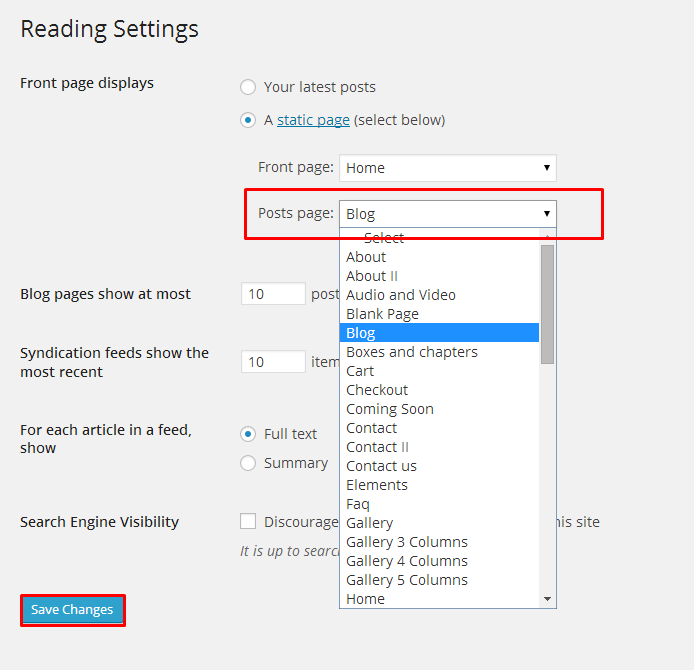
To set the page as your post page, navigate to Posts page tool in Settings > Reading and choose Blog index page from the ones you created.
Notice:
On Blog index page you will see only your posts, so don’t add any other content to it.
Was this article helpful ?
Creating blog posts
No matter which method you use to display your blog posts, first thing you need to do is create them.
Brick offers several blog post types:
- Standard
- Aside
- Image
- Video
- Audio
- Quote
- Link
- Gallery
Follow the steps below to create a blog post
- Step 1 – navigate to Posts in your WordPress admin.
- Step 2 – click on Add New to make a new post. Create a title and insert your post content in the editing field. You can use any of our VisualComposer elements inside the post.

Add new post
If you want to use some additional fields, choose them from screen options at the top of the screen.

Screen options
- Step 3 – add Categories from the right side. To assign it to the post, check the box next to the Category name.
- Step 4 – add Tags from the right side. Type the name of the tag in the field, separate multiple tags with commas.
- Step 5 – for a single image, click the Featured Image box, select an image and click Set Featured Image.
- Step 6 – for a Gallery, insert more than one Featured Image, each image will be a slide in the gallery slideshow. Slides will be order by the date when the images was added to Media
- Step 7 – for a video post, paste the iFrame embed into the Video Embed Code field, file url to M4V file url or OGV File URL or Direct video url from Youtube, Vimeo or Dailymotion
- Step 8 – create an excerpt – Excerpts are optional hand-crafted summaries of your content that can be used in your theme. Learn more about manual excerpts
- Step 9 – once you finished, click Publish to save the post.
Was this article helpful ?
Brick Blog Theme Options
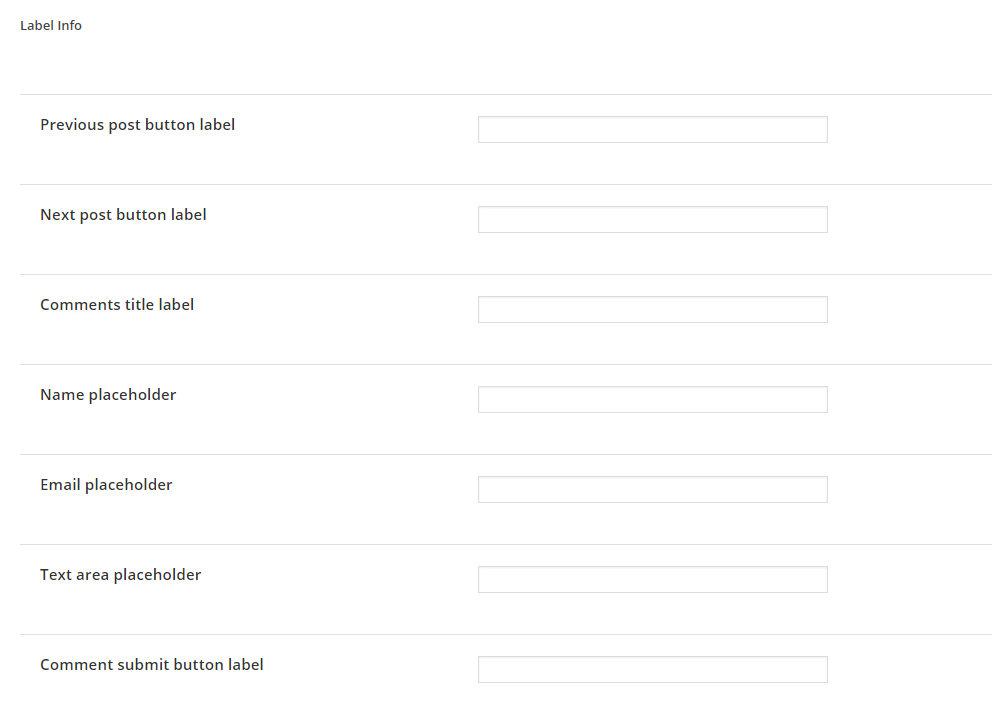
When using the assigned blog page as described above, all the options you can select for it are located in Appearance > Theme Options on the Posts tab. There are dozens of options to choose from like layout, categories, dates, etc. There are general blog options and single post page options. Each one has title and descriptions to help you better understand what they do. Any type of blog options you need to set will be set here in theme options when using the assigned blog page.
- Index – these are mainly for the assigned blog page, you change here:
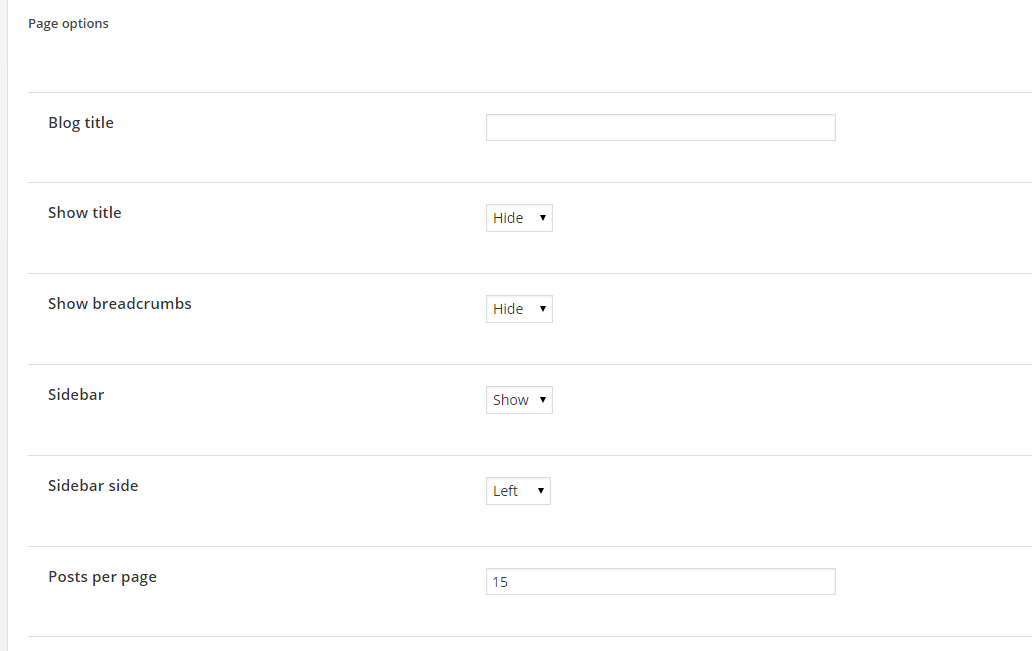
Main index page options:
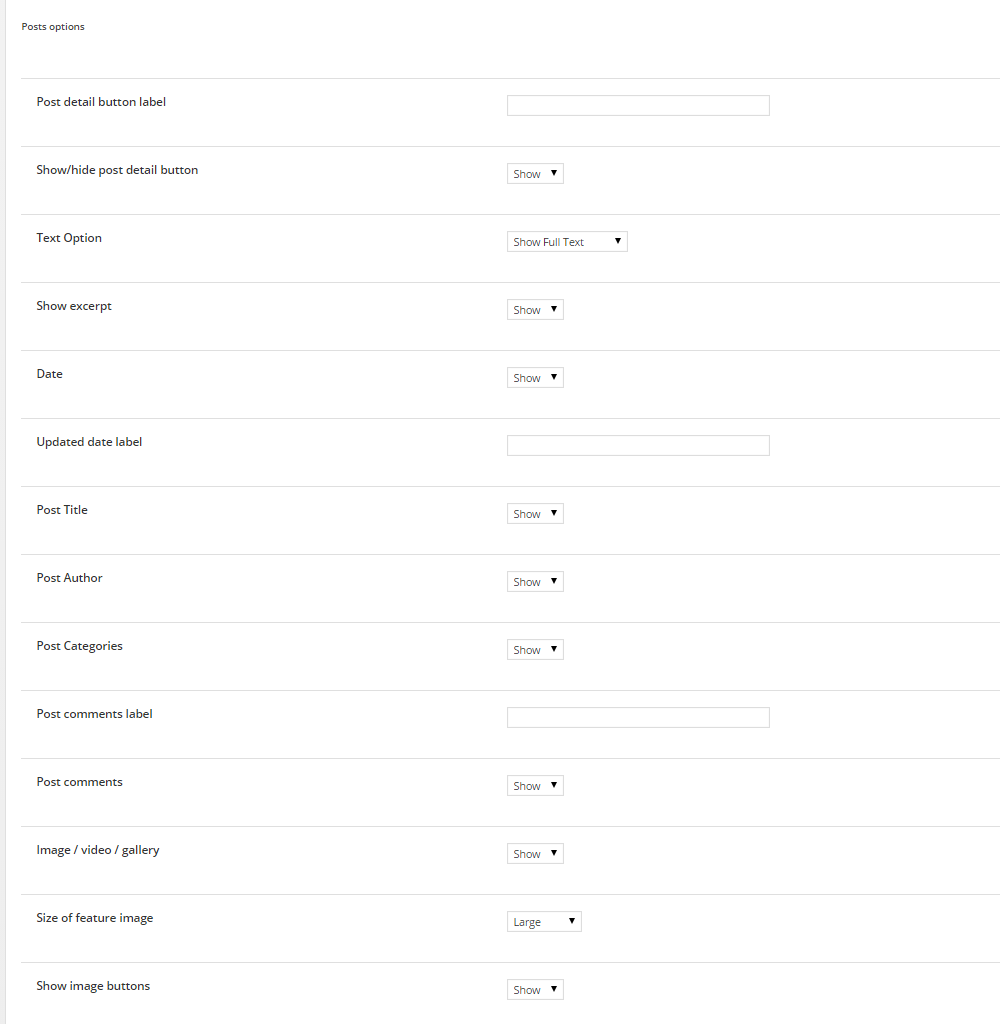
Main index posts options:
- Single – these options all apply to the single post page, not the main archive page.
Was this article helpful ?
Using shortcodes
Brick is build with shortcodes. Shortcode is a WordPress-specific code that lets you do nifty things with very little effort. Shortcodes can embed files or create objects in just one line, that would normally require lots of complicated and ugly code. Shortcode = shortcut.
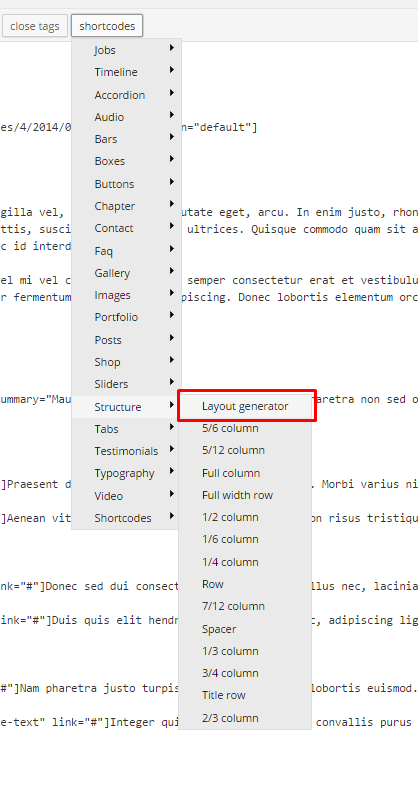
You don’t have to know Shortcodes list, syntax or available parameters, if you decide to create your website content using shortcode generator, which you can find in your window toolbar. Generator allows you to simply put your images, text and other content to input fields and choose display options from self-explanatory boxes.
In shortcode generator you will find shortcodes for any page content element that you can see on the demo page.
Below you will find description for a few basic shortcodes types, which should give you an idea of the shortcodes possibilities.
Structure
Page structure elements: columns, rows, spacers are shortcodes – check Structure section with shortcodes, which help you to create your page grid. Layout generator can be very useful here.
Typography
Do you want to add to your page sections headers, blockquotes, a list or simply a link? In section Typography you will find all options available in Brick to format text elements.
Contact
If you want to put any element to let your users contact or follow you or your profile inside your page content, you will find that in Contact shortcode section. You can easily configure elements like: Google Map, Contact form, Newsletter Form, Social buttons and put them anywhere on your page.
Sliders
Our themes come with several types of sliders. You can see preview for them on demo page. All available sliders are always in Sliders the section of shortcode generator.
In the shortcode generator you can find also several types for buttons, boxes, portfolio items, bars and other elements. We encourage you to experiment with all available options.
Was this article helpful ?
Using widgets
Widgets are small blocks of content, which you can find in theme footer or sidebar. They were originally designed to provide a simple and easy-to-use way of giving design and structure control of the WordPress Theme to the user, which is now available on WordPress Themes to include the header, footer, and elsewhere in the WordPress design and structure. Widgets require no code experience or expertise. They can be added, removed, and rearranged on the WordPress Administration Appearance > Widgets panel.
Just drag and drop the widgets you want, into the right hand side where your sidebars and footer widgets are listed. Simply drag your widgets over to the sidebar or footer column, and then populate the content.
There are various fields and settings you can choose for each individual widget and all are self explanatory. You can also use multiple widgets per footer column, just drag and drop them into place. And you can put as many widgets as you want inside sidebar. Once you have finished populating the widgets, always make sure to hit the Save button to save the settings.
Was this article helpful ?
Plugins
Some functionalities of the Brick are available because of plugins we used to create it. Once Brick is activated in your WordPress admin panel you should see notification about bundled plugins we recommend to install – they are included in Brick package – so you don’t have to do anything more than click install and activate.
Notice:
We can’t guarantee Brick’s compatibility with third party plugins. If you want to avoid unexpected bugs and errors use as little plugins as possible.
Below you will find the list of plugins we recommend you to use with Brick.
Was this article helpful ?
Visual Composer
Brick can be easily customized with Visual Composer.
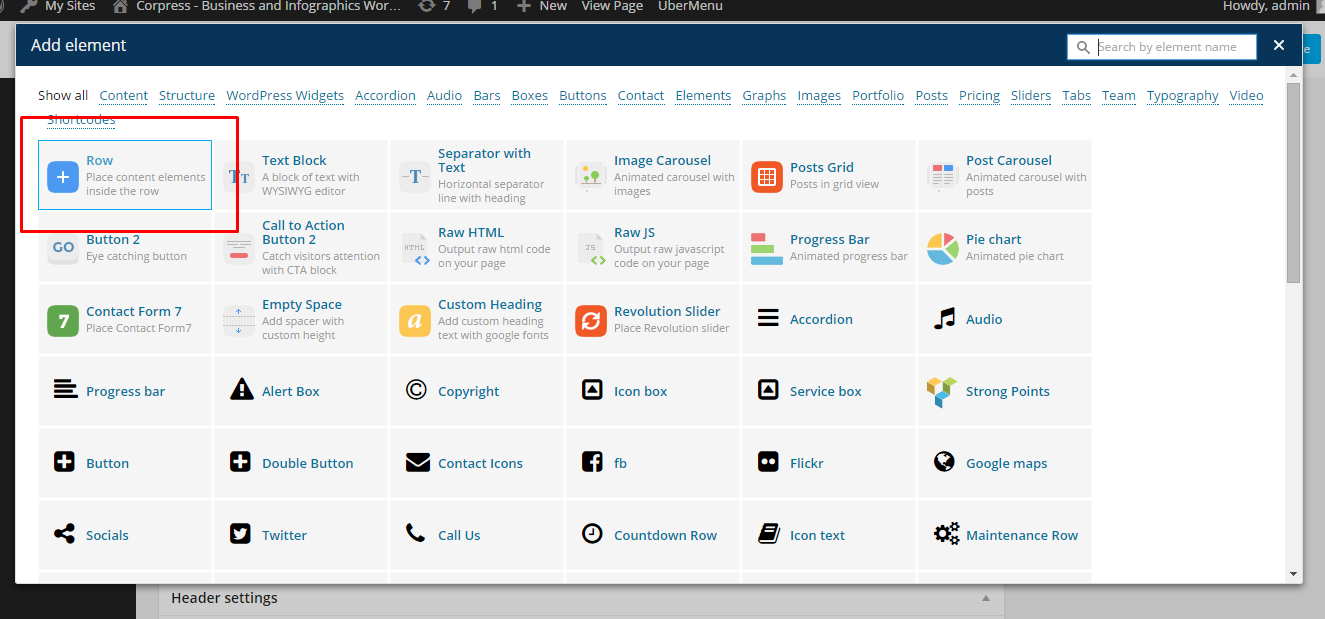
Simply drag and drop elements to build your page content. We prepared components which will help you determine main structure of the webpage – easily set up backgrounds, colors and styles for whole sections as well as lots of various smaller components which you can freely put wherever you want.
How to start?
We recommend you to use row as essential element of page structure.
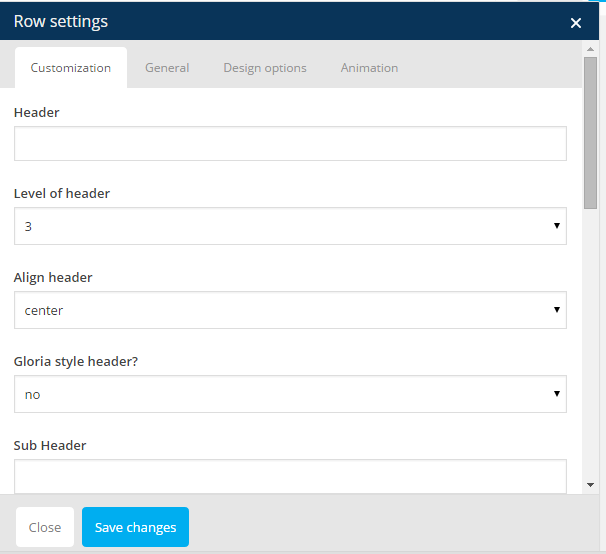
You can edit following row attributes:
- Header text
- Level of header
- Header alignment
- Header font style
- Section type – determines section background, you can choose from predefined color styles: white, grey, dark grey, dark blue, motive or effects: pattern, parallax, kenburns, video
- Padding – top, bottom or both
- Padding size – if you don’t want to have padding, choose None
- Section height
- Type of section layout – boxed or wide
- Onepager element and ID – if you want to use section for scroll-to-section navigation
- Custom class – if you want add custom CSS styles for element
You can also check additional options in tabs: General, Design Options and Animations
Once your section row is created you can choose number of columns in section, their width and optionally offset value.
If you want to create full_width element you need to choose 1 column greed in section and set it as full_width element.
Once you set up your section – you can put inside it as many components as you want.
Learn more:
For more information about Visual Composer, please check articles below:
How to install Visual Composer
Visual Composer demo
Visual Documentation
Was this article helpful ?
Taxonomy images
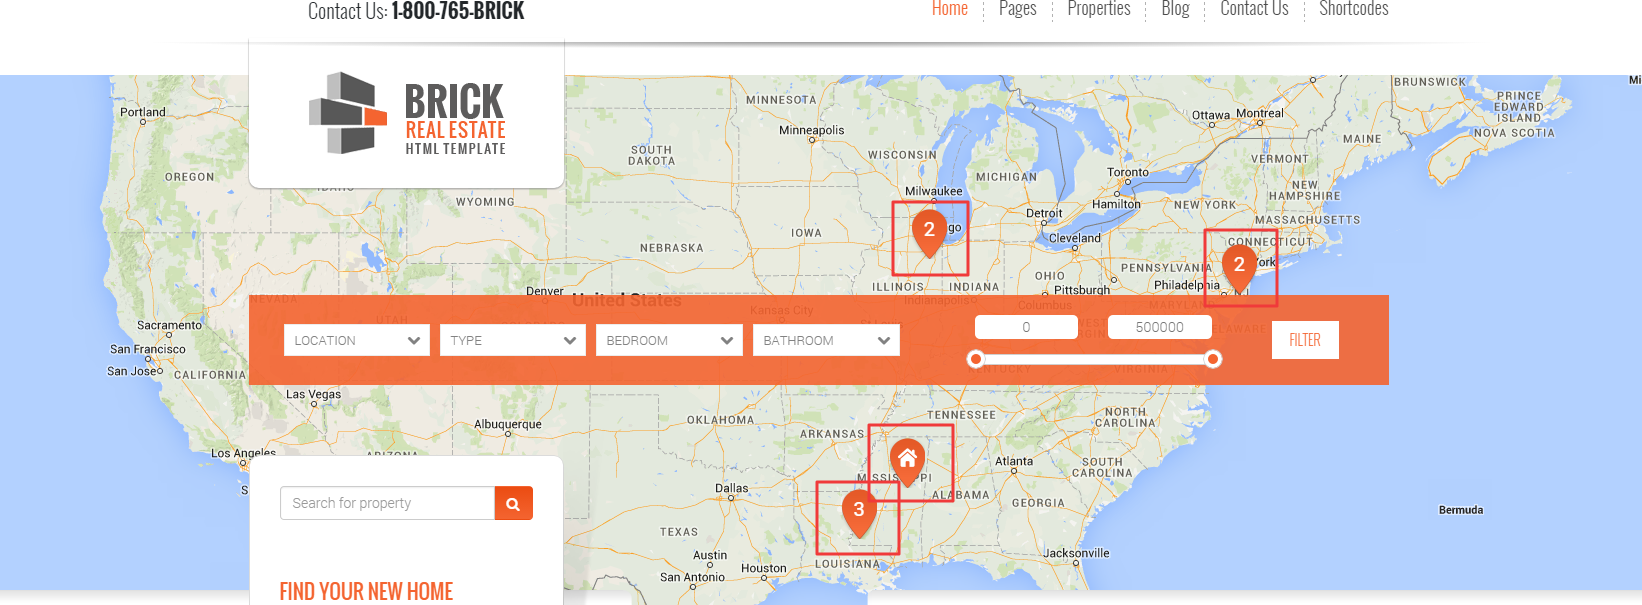
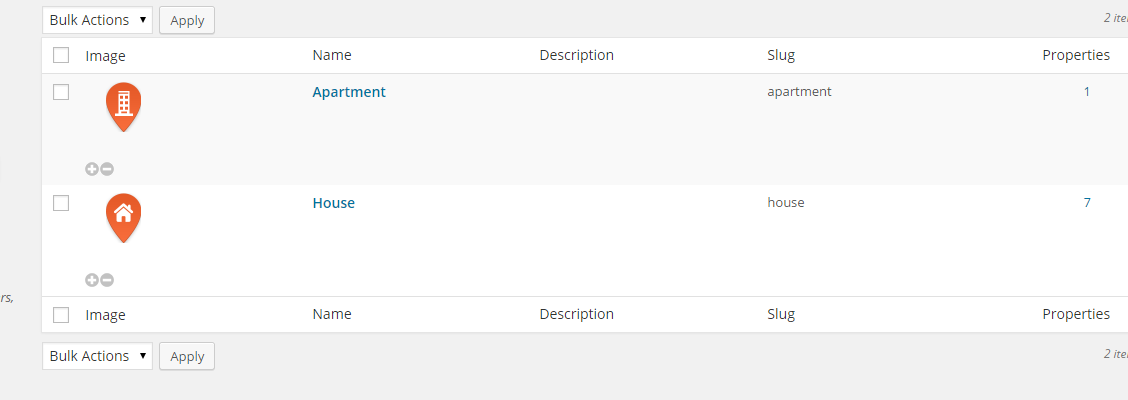
Our property map is created using Taxonomy Images plugin. Thanks to it you are able to define different map markers for Property types.
To define your custom markers navigate to Properties > Types and with “+” add new Map Marker image, which should be diplayed for selected Property type.
You can add new property type with Add New Property Types buttons.
Vistin plugin website for more information – here.
Was this article helpful ?
Contact Form 7
Creating forms was never that easy!
Contact Form 7 can manage multiple contact forms, plus you can customize the form and the mail contents flexibly with simple markup. The form supports Ajax-powered submitting, CAPTCHA, Akismet spam filtering and so on.
Visit plugin site for more information.
Was this article helpful ?
Customization
Brick appearance, which you can see on our demo page, is one of many available options. You have a couple of alternatives to customize the way you want it, except changing components’ appearance.
- Theme Customizer – navigate to Appearance > Themes and click Customize to open customization panel with options to change colors and backgrounds
- Use Custom CSS
- Create your own shortcodes
- Contact us – we can create your website from scratch, redesign it or just extend existing one – just send us an mail to premium@createit.pl
Was this article helpful ?


