Installation and activation
Installation via Administration Panel
When Catalog Mode files are downloaded from your CodeCanyon account. You can start installation using WordPress administration panel.
Once you’ve logged into your administration panel go to Plugins > Add New
Then:
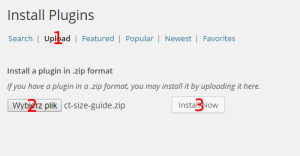
Chose Upload (1), click Select a file (2), ct-catalog.zip from your hard drive and click Install Now (3)
Installation via FTP
To install Catalog Mode via FTP follow step below:
- Step 1 – Unarchive ct-catalog.zip file
- Step 2 – Access your host web server using FTP client
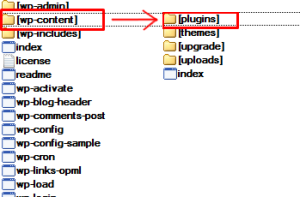
- Step 3 – Find directory wp-content > plugins
- Step 4 – Put folder ct-catalog.zip in directory wp-content > plugins
Was this article helpful ?
Settings
Upon plugin activation the Catalog Mode will be enabled. Every product will be by default displayed without Add to cart button, price and without any custom button for Catalog Mode information.
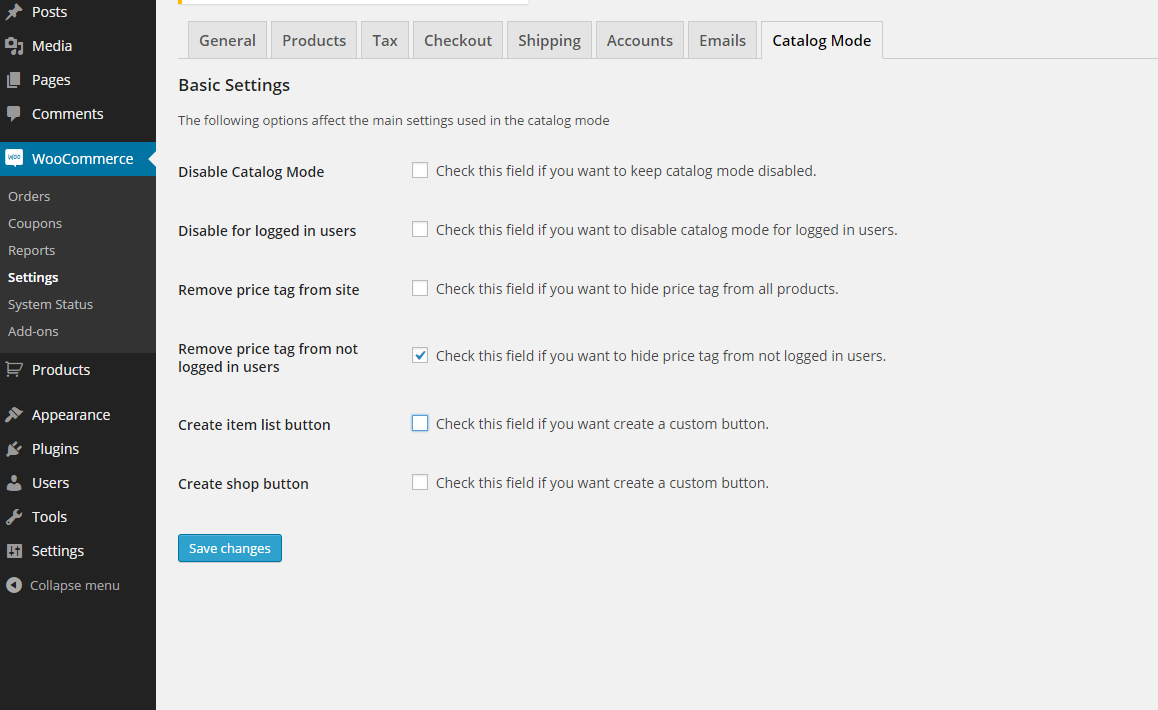
To change the catalog mode settings go to WooCommerce > Settings > Catalog mode tab.
Settings Options:
- Disable Catalog Mode – You can check this field to disable the catalog mode on all screens, the Add to cart button and all the cart functionalities will be enabled again.
- Disable for logged in users – Check this field if you want to disable catalog mode for logged in users.
- Remove Price Tag From Site – Remove the price from all products
- Remove price tag from not logged in users – Check this field if you want to hide price tag from not logged in users.
- Create Item list Button – Enable the single product button and his styles.
- Create shop list Button – Enable the shop list button and its styles.
Was this article helpful ?
Catalog Mode Button
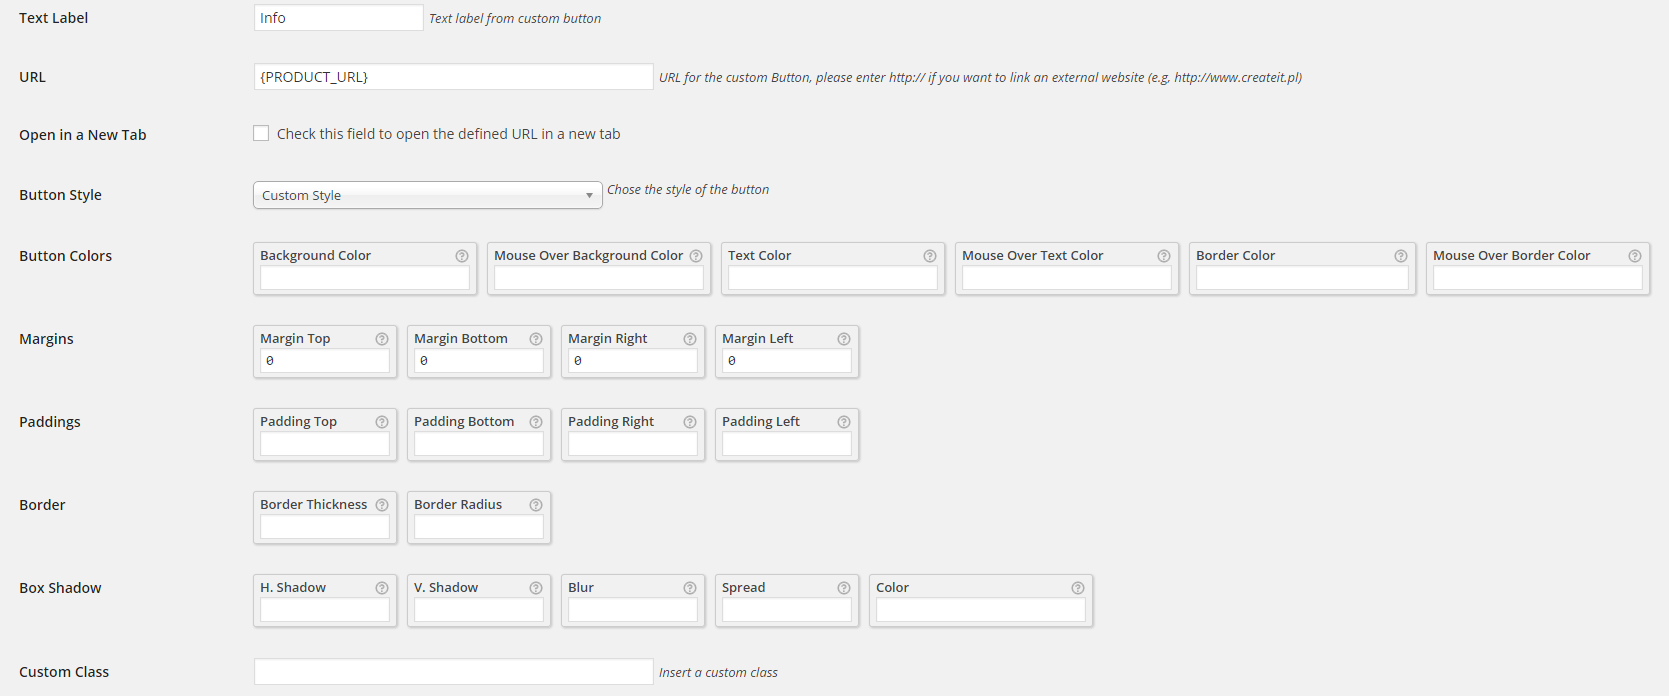
When the button is enabled the corresponding area will be displayed below the main settings.
Here you can add your custom styles for a button.
The style settings are the same for both item and shop buttons, but the values can be changed separately.
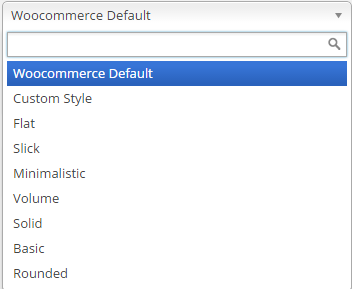
There are 8 buttons included on the plugin:
- WooCommerce Default – only supports margins, paddings and custom class,
- flat,
- minimalistic,
- basic,
- rounded,
- slick,
- volume
- solid
They can be selected from the field Button Style, it’s possible to change the default button’s styles by filling the desired field.
Was this article helpful ?
Custom style
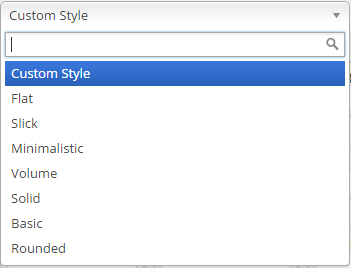
To add a custom style, the Custom style needs to be selected in Button style field.
After that fill the style fields and click Save.
All custom styles including the defaults from the plugin can be added with a custom class, simply add the class string to the Custom class field.
Was this article helpful ?
Single product settings
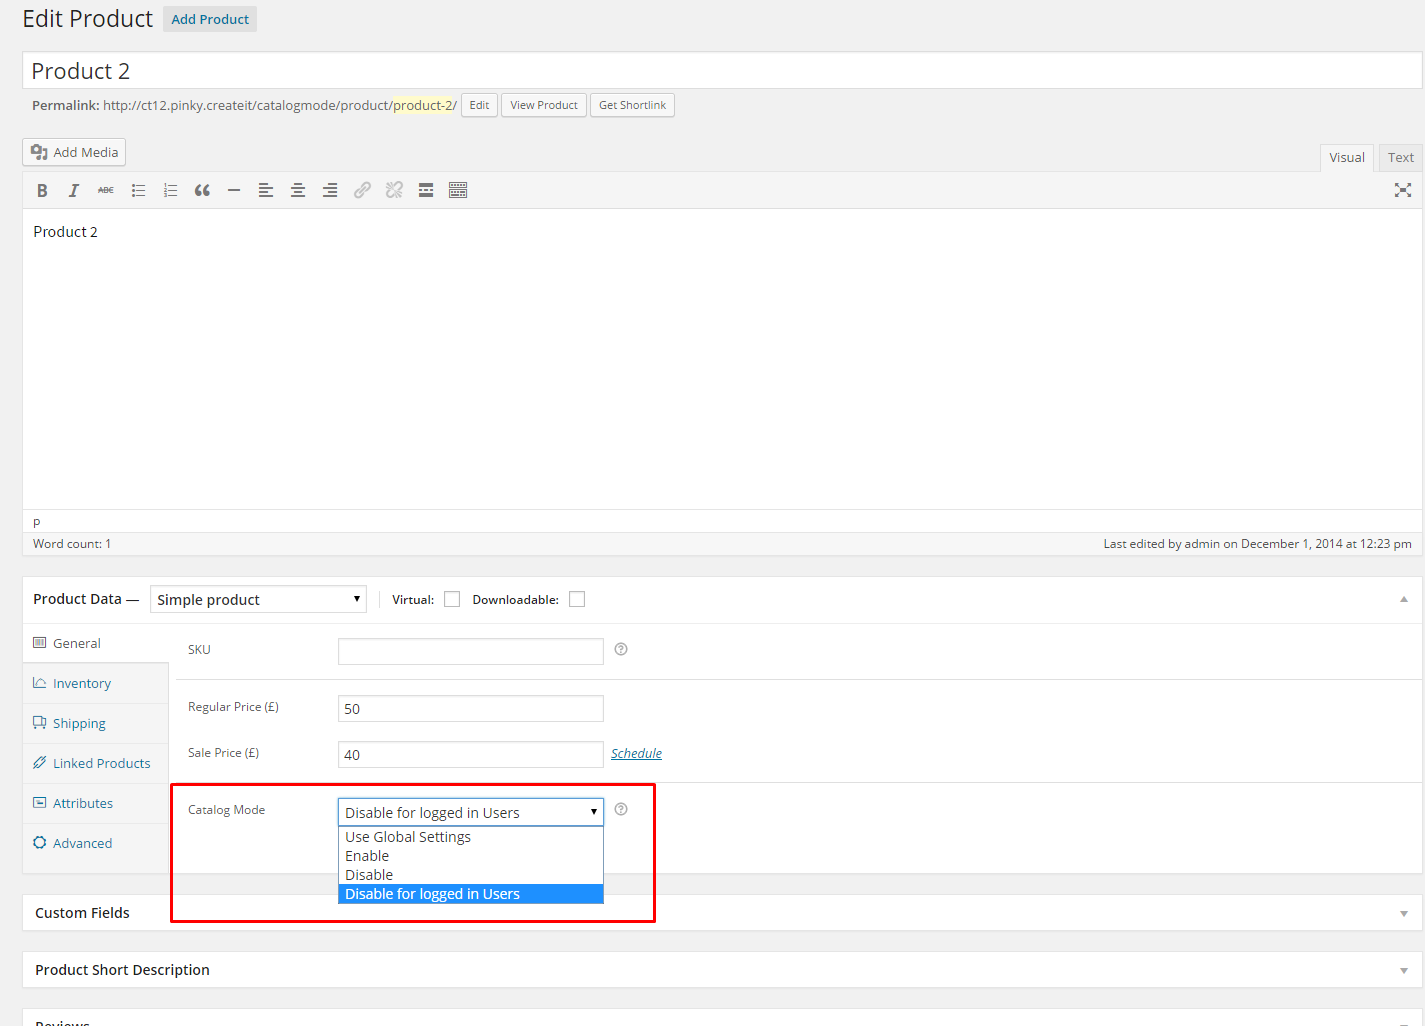
Every single product have the option to enable or disable catalog mode or use global settings from the woocommerce setting bar. You can also disable Catalog Mode for logged in users.
With this options the products will be differentiated, for example one product can have the “add to cart button” and the price enabled if the option of the catalog mode is set to disable and the other products will continue to have the normal settings.
Was this article helpful ?
Product category settings
Since version 1.4 Catalog Mode gives you an option to enable or disable the plugin for every product category or subcategory. By default all categories will get global settings, defined via WooCommerce > Settings – Catalog Mode. However you can change this settings per product category or subcategory.
To enable or disable Catalog Mode per product category you need to navigate to Products > Catogories and choose the category, that you want to edit.
On the left hand side, below the category Description you will find Catalog Mode settings:
You can choose one of:
- Use Global Settings – selected category will get settings from WooCoomerce > Settings – Catalog Mode;
- Enable – Catalog Mode for products from selected category will be enabled;
- Disable – Catalog Mode for products from selected cateogry will be disabled;
Notice: if you are editing subcategory instead of Use Global Settings you can choose Use Parents Settings – subcategory will use the closest parents settings then.
Notice:
If a product has more than one category, and assigned categories has different Catalog Mode settings (for example 1 category has enabled category and second one has disabled Catalog Mode) – Catalog Mode will be enabled.
Was this article helpful ?
PlugIn Hooks
The default button can be changed with the ct_catalog.css_template.default (path) hook
If you want to minify the buttons CSS this hook will do it for you,
|
1 |
ct_catalog.css.minify(true) |
by default the minify functionality is set to true.
Add custom template button
With the ct_catalog.css_template hook can be added new templates to the plugin
Example:
Lets add a new button style to the settings select list:
|
1 2 3 4 5 6 7 8 9 10 11 12 13 14 15 16 17 18 |
add_filter('ct_catalog.css_template.styles','addCatalogstyleSelect'); function 'addCatalogstyleSelect'($list){ $list['custom-style-name'] = __('New Button Style','custom'); return $list; } Once we have the button on the list lets add the path for the stylesheet file add_filter('ct_catalog.css_template','addCatalogStyle',10,2); function 'addCatalogStyle'($current,$name){ if ($name=='custom-style-name'){ $current ='http://www.example.com/assets/custom_style.css'; } return $current; } |
All done, now have button will have your custom stylsheet.
If for some reason the price need to be hidden or shown there is a hook for that too:
|
1 |
‘ct_catalog.price.enable’ |
On this example lets hide a price if the value is bigger than 5
|
1 2 3 4 5 6 7 8 9 10 11 |
add_filter('ct_catalog.price.enable', 'changePriceVisibility', 10, 2); function changePriceVisibility($status, $price) { $status = 'yes'; if ($price > 5) { $status = 'no'; } return $status; } |
Was this article helpful ?


