

Installation and activation
Installation via Administration Panel
When ctLocation files are downloaded from your CodeCanyon account. You can start installation using WordPress administration panel.
Once you logged into your administration panel go to Plugins > Add New
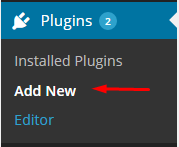
Add New plugin
Then choose Upload plugin:
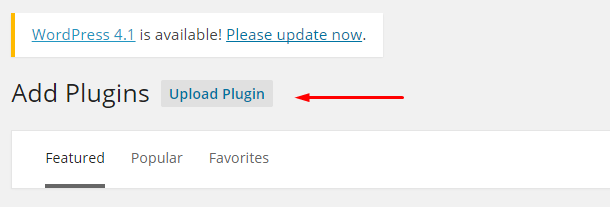
Upload plugin
Click Select a file and select ct-location.zip:
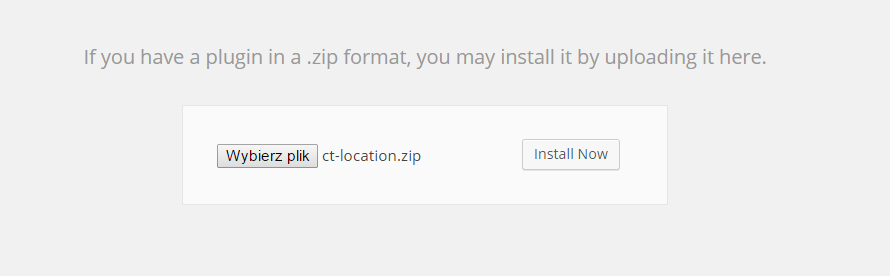
Select a file
And initialize installation via Install Now.
Installation via FTP
- Step 1 – Unarchive ct-location.zip file
- Step 2 – Access your host web server using FTP client
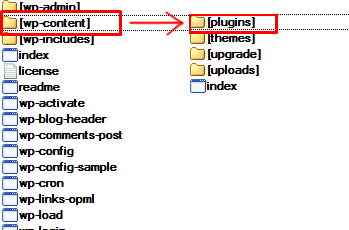
- Step 3 – Find directory wp-content > plugins
- Step 4 – Put folder ct-size-guide in directory wp-content > plugins
Was this article helpful ?
Creating a new map
You can display your map anywhere on the page by using a shortcode [ctlocation]. If you don’t define any map parammeters it will come with the defaults:
- ROADMAP style,
- width 100%,
- height 400px
- 3rd level of zoom,
- StreetView active
- centered on the city
Feel free to change any of the map parameters via shortcode attributes:
- MAPWIDTH
Example:You can use value in pixels or percents.1[ctlocation mapwidth="70%"] - MAPHEIGHT
Example:You can use value in pixels or percents.1[ctlocation mapheight="800px"] - CENTER
Example:Specify the point on which your map will centered after reloading the page.1[ctlocation center="lat_value, lng_value"] - ZOOM
Example:You can select values from 1 to 12.1[ctlocation zoom="10"] - CAT
Example:Define which markers should be displayed with assigned categories.1[ctlocation cat="europe"] - TAGS
Example:Define which markers should be displayed with assigned tag.1[ctlocation tags="creative"] - STREETVIEW
Example:1[ctlocation streetview="true"] - STREETVIEWNOW
Example:Enable or disbale StreetView option on your map with True and False attribute values.1[ctlocation streetview="true"] - TRAFFICLAYER
Example:Select True or False value. You can add next layer to your map to mark the most important roads.1[ctlocation trafficlayer="true"] - MAPTYPE
Example:Avalible map types: Hybrid, Roadmap, Satellite, Terrain. If you set different type than Roadmap, second button will be created at the top-right corner. If you set Terrain, there will be checkbox inside of default button.1[ctlocation maptype="Hybrid"] - GROUNDOVERLAY
Example:You can create new layer on your map to display an image. It is useful if you want to show how the displayed area had looked before or… how it looks now (for ex. if you set Satellite map type). Image_URL is a path to image, it could be web address. “NE” means top-right corner of image, “SW” is bottom-left corner.1[ctlocation groundoverlay="Image_URL, NE_Lat, NE_Lng, SW_Lat, SW_Lng]
All of these values are required. - POLYLINE
Example:You can draw a line on your map, which is based on declarated points. You can choose its color, visibility, and largeness. IMPORTANT! Remember about inserting Lat and Lng values for 2 points minimum.1[ctlocation polyline="Line_Color, Line_Visibility, Line_Largeness, 1_Lat, 1_Lng, 2_Lat, 2_Lng, ...."] - POLYGON
Example:You can draw a polygon on your map, which is based on declarated points. You can choose color, visibility, and largeness of its elements. IMPORTANT! Remember about inserting Lat and Lng values for minimum 3 points.1[ctlocation polylgon="Border_Color, Border_Visibility, Border_Largeness, Fill_Color, Fill_Visibility, 1_Lat, 1_Lng, 2_Lat, 2_Lng, 3_Lat, 3_Lng...."] - ROUTE
Example:Thanks to this attribute you can display a route from point A to point B.1[ctlocation route="Start_location; Final_location"]
IMPORTANT! Note that locations are separated with semicolon (” ; “), not with comma!
Notice:
Locations are separated with semicolon (” ; “), not with comma!
Was this article helpful ?
Adding markers
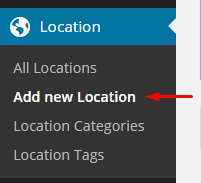
You finally have a map, but how to point something?
It is very simple. What you have to do is clicking on Location > Add new Location.
New Location
Was this article helpful ?
Address, Latitutde & Longitude
Obviously, you should write an address (1) or Latitude (2.1) & Longitude (2.2) values. You could set your location by clicking Get My Location button (3).

Markers settings
Was this article helpful ?
Categories & Tags
To display your marker it is required to attribute it to categories and tags.
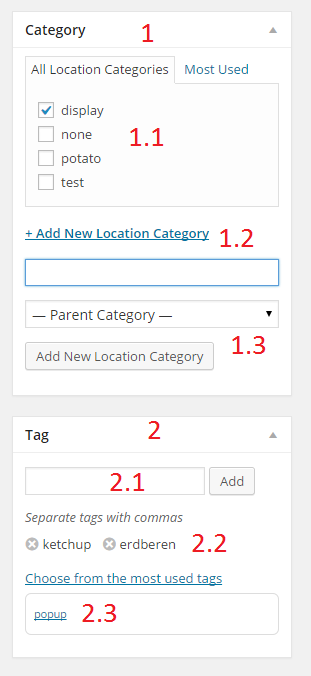
You can choose Category (1) from All Location Categories (1.1) or add New Location Category (1.2 & 1.3). Tags (2) are similar to categories. Add new Location Tag (2.1) or choose one of most used tags (2.3). Attributted tags are under most used ones.
Categories and Tags
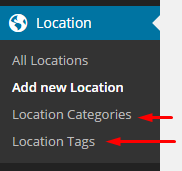
You can manage categories and tags in Location submenu.
Manage tags and categories
Was this article helpful ?
Marker icons
If you want to change default icon (1), which is automaticly added, to custom icon, go to Marker Icon at the bottom and click on Add New Marker Icon button (2).
Icon settings
If you have some images in Media Library and you want to use one of them go to Media Library (1), then select your image (2). You can resize your image by clicking Edit Image (3). After that click Add to gallery (4). Notice: You can select more than one image at once.
Select images from Media Library
You can also upload icon image directly from your computer via Upload Files tab.
We recommend to use maximum 60x60px images for icons, without background.
Was this article helpful ?
Pop Ups
You can add default or custom pop up to your Marker. How?
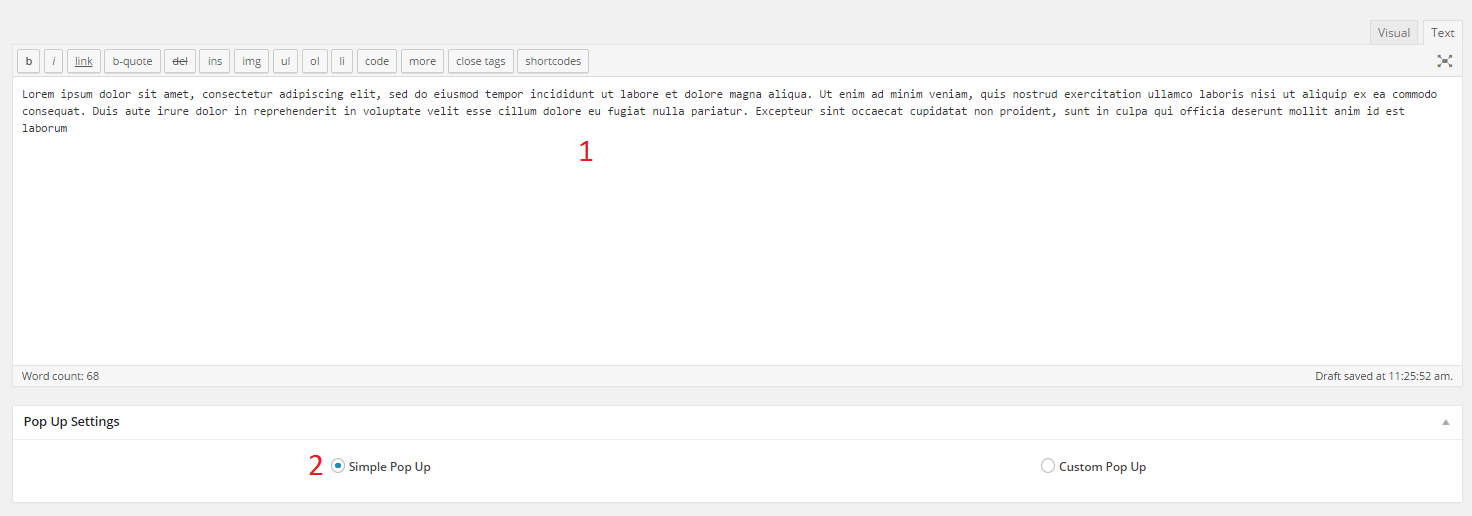
If you want the default pop up made by google just write your text (1) and mark Simple Pop Up option (default).
Shortcode example:
Simple pop up code
Result:
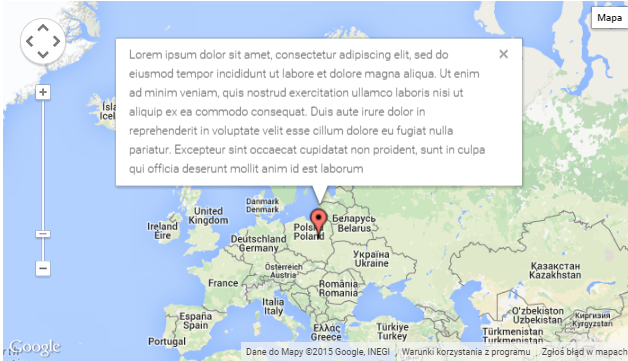
Simple pop up result
You can put HTML instead of text. It will be rendered inside of your Pop Up
Shortcode example:

Simple pop up with HTML shortcode
Result:
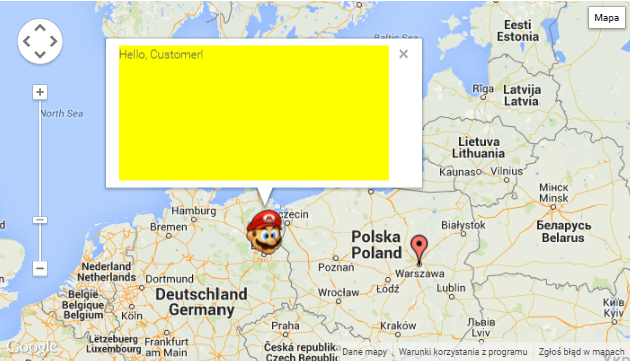
Simple popup with HTML result
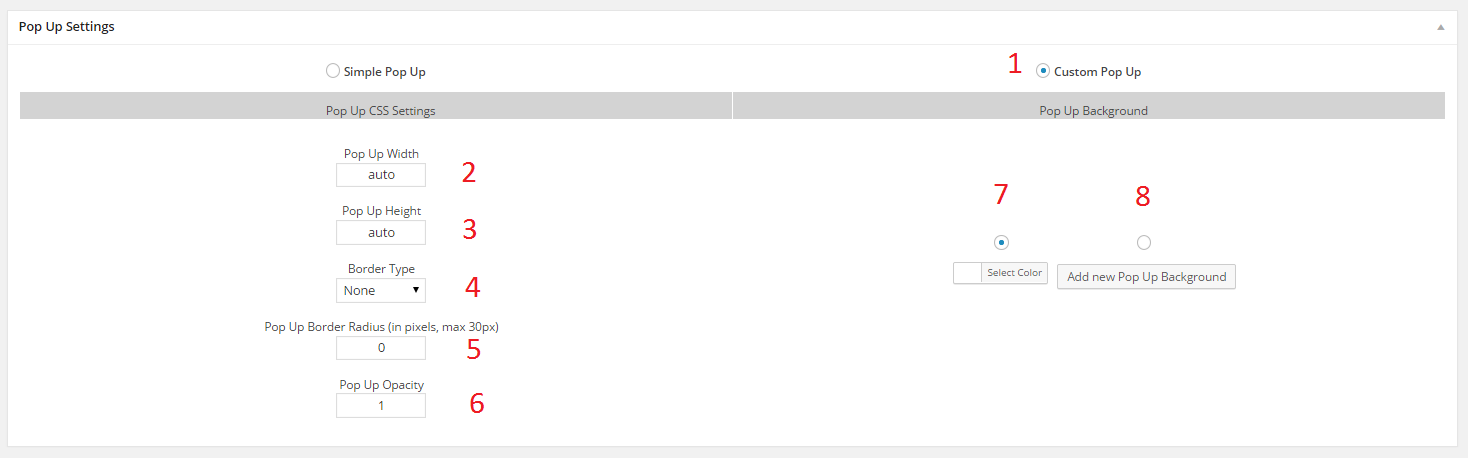
When you mark Custom Pop Up (1) option you will have whole panel to customize your Pop Up.
Here you have an example with default values:
– Pop Up width (2) (in pixels or “auto”)
– Pop Up height (3) (in pixels or “auto”)
– Pop Up Border Type (4) (None, Solid, Double, Ridge, Inset, Outset)
– Pop Up Border Radius (5) (up to 30px)
– Pop Up Visibility (6) (between 0 and 1)
– As a Pop Up Background you can choose a color (7) or an image (8)
Pop Up Settings
To set background color (it’t a default option), click on Select Color:
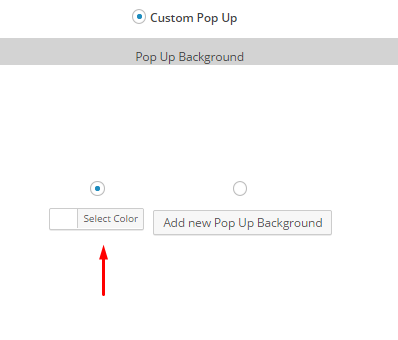
Background color
Then select a color (1) and press Current Color button (2):
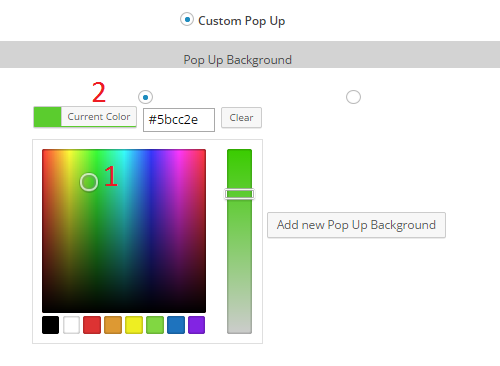
Select your color
If you want to use image as a background select Pop Up Background
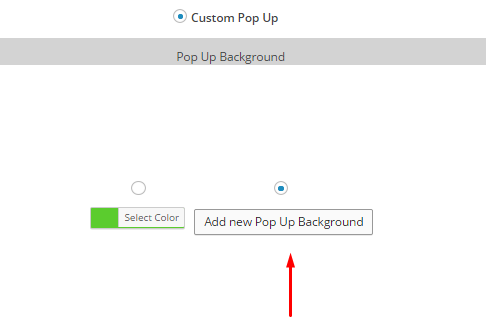
Background image
Select image in the same way you choose Marker Icon. The only difference is you can select only one image. After Adding to gallery you will have miniature of original image.
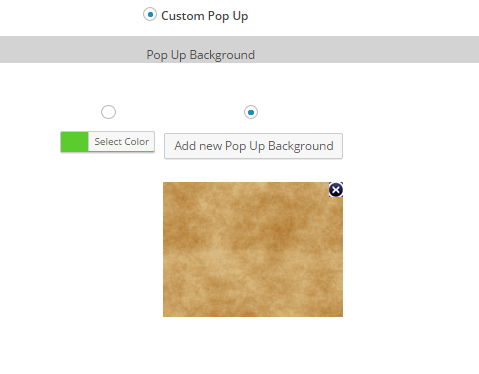
Select Pop Up background
Examples of usage:
Custom Pop Up with text
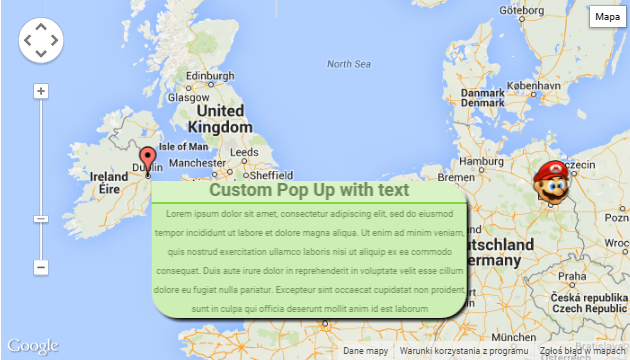
Custom Pop Up with text
Custom Pop Up with image
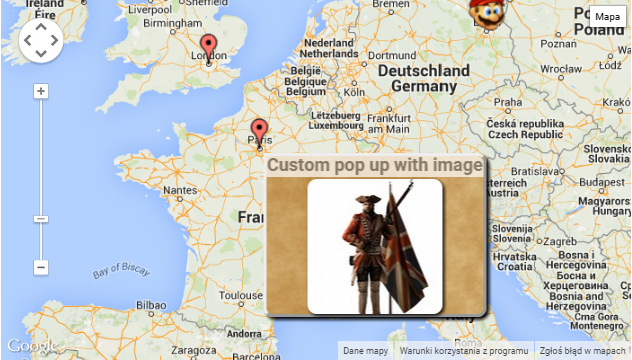
Custom pop up with image
Custom Pop Up with text and image
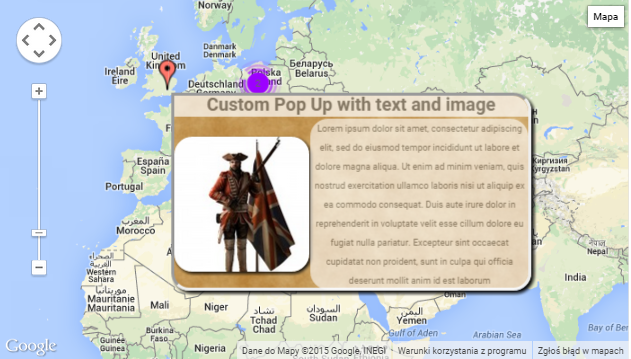
Custom pop up with text and image
Notice:
If you don’t want to use Pop up option – don’t modify Post Editor fields and don’t select Simple Pop Up options.
Was this article helpful ?