Intro
Thank you for purchasing this theme. If you have any questions that are beyond the scope of this help file, please feel free to start new ticket on this page. Thanks so much!
Was this article helpful ?
HTML Structure
Foodtruck Ghost is built upon bootstrap framework and is fully responsive. It adapts to window resolution and looks good on all devices including ipad and iphone.
If you would like to read more about bootstrap framework click HERE
Was this article helpful ?
GRID SYSTEM AND SINGLE ROW STRUCTURE
The default Bootstrap grid system utilizes 12 columns. It’s responsive grid and adapts to viewport. Below 767px viewports, the columns become fluid and stack vertically. The fluid grid system uses percents instead of pixels for column widths. Each row always include 12 columns (for example col-md-8 + col-md-4 = col-md-12).
BASIC GRID HTML:
|
1 2 3 4 5 6 7 8 9 10 11 12 13 14 15 16 17 18 19 20 21 22 23 24 25 26 27 |
<div class="row"> <div class="col-md-1">.col-md-1</div> <div class="col-md-1">.col-md-1</div> <div class="col-md-1">.col-md-1</div> <div class="col-md-1">.col-md-1</div> <div class="col-md-1">.col-md-1</div> <div class="col-md-1">.col-md-1</div> <div class="col-md-1">.col-md-1</div> <div class="col-md-1">.col-md-1</div> <div class="col-md-1">.col-md-1</div> <div class="col-md-1">.col-md-1</div> <div class="col-md-1">.col-md-1</div> <div class="col-md-1">.col-md-1</div> </div> <div class="row"> <div class="col-md-8">.col-md-8</div> <div class="col-md-4">.col-md-4</div> </div> <div class="row"> <div class="col-md-4">.col-md-4</div> <div class="col-md-4">.col-md-4</div> <div class="col-md-4">.col-md-4</div> </div> <div class="row"> <div class="col-md-6">.col-md-6</div> <div class="col-md-6">.col-md-6</div> </div> |
Was this article helpful ?
SECTION
Section is part of page with separate background, has several paramaters that can be changed:
- “bg-2” class – define background-color, you can also use “bg-1”
- “topOrnament” class – adds fancy strip at the top of section (just remove class to disable it)
- “repeated” class – it will repeat background image (like brick background in “story” section, it is optional)
- data-topspace – top padding for section
- data-bottomspace – bottom padding for section
- scroll=”scroll” – background will scroll instead be fixed (optional parameter)
- data-image – path to background image, best resolution is 1920px x 1200px
In Foodtruck Ghost we have 2 types of sections:
PARALLAX SECTION
HTML MARKUP:
|
1 2 3 4 5 6 7 8 9 |
<div class="bg-1 topOrnament section"> <div class="inner" data-image="./assets/images/demo-content/background-1.jpg"> <span class="html-tag"><div <span class="html-attribute-name">class</span>="<span class="html-attribute-value">container</span>"></span> [section content] </div> </div> </div> |
SECTION
HTML MARKUP:
|
1 2 3 4 5 6 7 8 9 |
<div class="bg-2 topOrnament section"> <div class="inner repeated" data-topspace="20" data-bottomspace="20" scroll="scroll" data-image="flavours/pizza/images/content/background-6.jpg"> <div class="container"> [section content] </div> </div> </div> |
Was this article helpful ?
Flavours
Theme includs 8 flavours. To activate certain flavour just add proper css file.
For example to activate “Coffee and Cream”:
|
1 2 3 4 5 6 |
<head> (..) <link rel="stylesheet" type="text/css" href="css/style.css"> <link rel="stylesheet" type="text/css" href="flavours/coffeecream/css/coffeecream.css"> (..) </head> |
|
1 2 3 4 5 6 |
<head> (..) <link rel="stylesheet" type="text/css" href="css/style.css"> <link rel="stylesheet" type="text/css" href="flavours/tacos/css/tacos.css"> (..) </head> |
Second added .css file will change page design.
Flavours files (images, fonts, etc) are placed in flavours/[flavour_name] directory, for example :
|
1 2 3 4 5 |
<!-- cupcake files --> /flavours/cupcake <!-- pizza files --> /flavours/pizza |
Avaiblable Flavours
- Burger Lover (default)
- Cupcake Wagon
- Tacos Locos
- Seabreeze
- Ribs & Dogs
- Bad Ass BBQ
- Coffee & Cream
- Pizza Revelation
Was this article helpful ?
Components
Special Headers
Predefined headers you can use by adding special class to header element (there is no difference which tag do you use : h1, h2 or h5),
for example :
|
1 2 3 4 5 6 7 |
<h1 class="hdr1">Example header 1</h1> <h2 class="hdr2">Example header 2</h2> <h3 class="hdr3">Example header 3</h3> <h5 class="hdr4">Example header 4</h5> <h1 class="hdr5">Example header 5</h1> <h2 class="hdr6">Example header 6</h2> <h3 class="hdr7">Example header 7</h3> |
Social Icons
You can use small, medium or big social icons.
We provided 24 icons
HTML MARKUP:
|
1 2 3 4 5 6 7 8 9 10 11 12 13 14 15 16 17 18 19 20 21 22 23 24 25 26 27 28 29 30 31 32 33 34 35 36 37 38 39 40 41 42 43 44 45 46 47 48 49 50 51 52 53 54 55 56 57 58 59 60 61 62 63 64 65 66 67 68 69 70 71 72 73 74 75 76 77 78 79 80 81 82 83 84 85 86 87 |
<!-- Small Icons --> <ul class="soc_list soc-small list-unstyled clearfix"> <li><a href="#" target="_blank" data-toggle="tooltip" data-placement="top" title="Bitbucket"><i class="fa fa-bitbucket"></i></a></li> <li><a href="#" target="_blank" data-toggle="tooltip" data-placement="top" title="Dribbble"><i class="fa fa-dribbble"></i></a></li> <li><a href="#" target="_blank" data-toggle="tooltip" data-placement="top" title="Dropbox"><i class="fa fa-dropbox"></i></a></li> <li><a href="#" target="_blank" data-toggle="tooltip" data-placement="top" title="Facebook"><i class="fa fa-facebook"></i></a></li> <li><a href="#" target="_blank" data-toggle="tooltip" data-placement="top" title="Flickr"><i class="fa fa-flickr"></i></a></li> <li><a href="#" target="_blank" data-toggle="tooltip" data-placement="top" title="Foursquare"><i class="fa fa-foursquare"></i></a></li> <li><a href="#" target="_blank" data-toggle="tooltip" data-placement="top" title="GitHub"><i class="fa fa-github-alt"></i></a></li> <li><a href="#" target="_blank" data-toggle="tooltip" data-placement="top" title="Gittip"><i class="fa fa-gittip"></i></a></li> <li><a href="#" target="_blank" data-toggle="tooltip" data-placement="top" title="Google+"><i class="fa fa-google-plus"></i></a></li> <li><a href="#" target="_blank" data-toggle="tooltip" data-placement="top" title="Instagram"><i class="fa fa-instagram"></i></a></li> <li><a href="#" target="_blank" data-toggle="tooltip" data-placement="top" title="LinkedIn"><i class="fa fa-linkedin"></i></a></li> <li><a href="#" target="_blank" data-toggle="tooltip" data-placement="top" title="Pinterest"><i class="fa fa-pinterest"></i></a></li> <li><a href="#" target="_blank" data-toggle="tooltip" data-placement="top" title="Renren"><i class="fa fa-renren"></i></a></li> <li><a href="#" target="_blank" data-toggle="tooltip" data-placement="top" title="RSS"><i class="fa fa-rss"></i></a></li> <li><a href="#" target="_blank" data-toggle="tooltip" data-placement="top" title="Skype"><i class="fa fa-skype"></i></a></li> <li><a href="#" target="_blank" data-toggle="tooltip" data-placement="top" title="Stack Exchange"><i class="fa fa-stack-exchange"></i></a></li> <li><a href="#" target="_blank" data-toggle="tooltip" data-placement="top" title="Stack Overflow"><i class="fa fa-stack-overflow"></i></a></li> <li><a href="#" target="_blank" data-toggle="tooltip" data-placement="top" title="Tumblr"><i class="fa fa-tumblr"></i></a></li> <li><a href="#" target="_blank" data-toggle="tooltip" data-placement="top" title="Twitter"><i class="fa fa-twitter"></i></a></li> <li><a href="#" target="_blank" data-toggle="tooltip" data-placement="top" title="Vimeo"><i class="fa fa-vimeo-square"></i></a></li> <li><a href="#" target="_blank" data-toggle="tooltip" data-placement="top" title="VKontakte"><i class="fa fa-vk"></i></a></li> <li><a href="#" target="_blank" data-toggle="tooltip" data-placement="top" title="Weibo"><i class="fa fa-weibo"></i></a></li> <li><a href="#" target="_blank" data-toggle="tooltip" data-placement="top" title="Xing"><i class="fa fa-xing"></i></a></li> <li><a href="#" target="_blank" data-toggle="tooltip" data-placement="top" title="YouTube"><i class="fa fa-youtube-play"></i></a></li> </ul> <!-- Medium Icons --> <ul class="soc_list soc-medium list-unstyled clearfix"> <li><a href="#" target="_blank" data-toggle="tooltip" data-placement="top" title="Bitbucket"><i class="fa fa-bitbucket"></i></a></li> <li><a href="#" target="_blank" data-toggle="tooltip" data-placement="top" title="Dribbble"><i class="fa fa-dribbble"></i></a></li> <li><a href="#" target="_blank" data-toggle="tooltip" data-placement="top" title="Dropbox"><i class="fa fa-dropbox"></i></a></li> <li><a href="#" target="_blank" data-toggle="tooltip" data-placement="top" title="Facebook"><i class="fa fa-facebook"></i></a></li> <li><a href="#" target="_blank" data-toggle="tooltip" data-placement="top" title="Flickr"><i class="fa fa-flickr"></i></a></li> <li><a href="#" target="_blank" data-toggle="tooltip" data-placement="top" title="Foursquare"><i class="fa fa-foursquare"></i></a></li> <li><a href="#" target="_blank" data-toggle="tooltip" data-placement="top" title="GitHub"><i class="fa fa-github-alt"></i></a></li> <li><a href="#" target="_blank" data-toggle="tooltip" data-placement="top" title="Gittip"><i class="fa fa-gittip"></i></a></li> <li><a href="#" target="_blank" data-toggle="tooltip" data-placement="top" title="Google+"><i class="fa fa-google-plus"></i></a></li> <li><a href="#" target="_blank" data-toggle="tooltip" data-placement="top" title="Instagram"><i class="fa fa-instagram"></i></a></li> <li><a href="#" target="_blank" data-toggle="tooltip" data-placement="top" title="LinkedIn"><i class="fa fa-linkedin"></i></a></li> <li><a href="#" target="_blank" data-toggle="tooltip" data-placement="top" title="Pinterest"><i class="fa fa-pinterest"></i></a></li> <li><a href="#" target="_blank" data-toggle="tooltip" data-placement="top" title="Renren"><i class="fa fa-renren"></i></a></li> <li><a href="#" target="_blank" data-toggle="tooltip" data-placement="top" title="RSS"><i class="fa fa-rss"></i></a></li> <li><a href="#" target="_blank" data-toggle="tooltip" data-placement="top" title="Skype"><i class="fa fa-skype"></i></a></li> <li><a href="#" target="_blank" data-toggle="tooltip" data-placement="top" title="Stack Exchange"><i class="fa fa-stack-exchange"></i></a></li> <li><a href="#" target="_blank" data-toggle="tooltip" data-placement="top" title="Stack Overflow"><i class="fa fa-stack-overflow"></i></a></li> <li><a href="#" target="_blank" data-toggle="tooltip" data-placement="top" title="Tumblr"><i class="fa fa-tumblr"></i></a></li> <li><a href="#" target="_blank" data-toggle="tooltip" data-placement="top" title="Twitter"><i class="fa fa-twitter"></i></a></li> <li><a href="#" target="_blank" data-toggle="tooltip" data-placement="top" title="Vimeo"><i class="fa fa-vimeo-square"></i></a></li> <li><a href="#" target="_blank" data-toggle="tooltip" data-placement="top" title="VKontakte"><i class="fa fa-vk"></i></a></li> <li><a href="#" target="_blank" data-toggle="tooltip" data-placement="top" title="Weibo"><i class="fa fa-weibo"></i></a></li> <li><a href="#" target="_blank" data-toggle="tooltip" data-placement="top" title="Xing"><i class="fa fa-xing"></i></a></li> <li><a href="#" target="_blank" data-toggle="tooltip" data-placement="top" title="YouTube"><i class="fa fa-youtube-play"></i></a></li> </ul> <!-- Big Icons --> <ul class="soc_list soc-big list-unstyled clearfix"> <li><a href="#" target="_blank" data-toggle="tooltip" data-placement="top" title="Bitbucket"><i class="fa fa-bitbucket"></i></a></li> <li><a href="#" target="_blank" data-toggle="tooltip" data-placement="top" title="Dribbble"><i class="fa fa-dribbble"></i></a></li> <li><a href="#" target="_blank" data-toggle="tooltip" data-placement="top" title="Dropbox"><i class="fa fa-dropbox"></i></a></li> <li><a href="#" target="_blank" data-toggle="tooltip" data-placement="top" title="Facebook"><i class="fa fa-facebook"></i></a></li> <li><a href="#" target="_blank" data-toggle="tooltip" data-placement="top" title="Flickr"><i class="fa fa-flickr"></i></a></li> <li><a href="#" target="_blank" data-toggle="tooltip" data-placement="top" title="Foursquare"><i class="fa fa-foursquare"></i></a></li> <li><a href="#" target="_blank" data-toggle="tooltip" data-placement="top" title="GitHub"><i class="fa fa-github-alt"></i></a></li> <li><a href="#" target="_blank" data-toggle="tooltip" data-placement="top" title="Gittip"><i class="fa fa-gittip"></i></a></li> <li><a href="#" target="_blank" data-toggle="tooltip" data-placement="top" title="Google+"><i class="fa fa-google-plus"></i></a></li> <li><a href="#" target="_blank" data-toggle="tooltip" data-placement="top" title="Instagram"><i class="fa fa-instagram"></i></a></li> <li><a href="#" target="_blank" data-toggle="tooltip" data-placement="top" title="LinkedIn"><i class="fa fa-linkedin"></i></a></li> <li><a href="#" target="_blank" data-toggle="tooltip" data-placement="top" title="Pinterest"><i class="fa fa-pinterest"></i></a></li> <li><a href="#" target="_blank" data-toggle="tooltip" data-placement="top" title="Renren"><i class="fa fa-renren"></i></a></li> <li><a href="#" target="_blank" data-toggle="tooltip" data-placement="top" title="RSS"><i class="fa fa-rss"></i></a></li> <li><a href="#" target="_blank" data-toggle="tooltip" data-placement="top" title="Skype"><i class="fa fa-skype"></i></a></li> <li><a href="#" target="_blank" data-toggle="tooltip" data-placement="top" title="Stack Exchange"><i class="fa fa-stack-exchange"></i></a></li> <li><a href="#" target="_blank" data-toggle="tooltip" data-placement="top" title="Stack Overflow"><i class="fa fa-stack-overflow"></i></a></li> <li><a href="#" target="_blank" data-toggle="tooltip" data-placement="top" title="Tumblr"><i class="fa fa-tumblr"></i></a></li> <li><a href="#" target="_blank" data-toggle="tooltip" data-placement="top" title="Twitter"><i class="fa fa-twitter"></i></a></li> <li><a href="#" target="_blank" data-toggle="tooltip" data-placement="top" title="Vimeo"><i class="fa fa-vimeo-square"></i></a></li> <li><a href="#" target="_blank" data-toggle="tooltip" data-placement="top" title="VKontakte"><i class="fa fa-vk"></i></a></li> <li><a href="#" target="_blank" data-toggle="tooltip" data-placement="top" title="Weibo"><i class="fa fa-weibo"></i></a></li> <li><a href="#" target="_blank" data-toggle="tooltip" data-placement="top" title="Xing"><i class="fa fa-xing"></i></a></li> <li><a href="#" target="_blank" data-toggle="tooltip" data-placement="top" title="YouTube"><i class="fa fa-youtube-play"></i></a></li> </ul> |
Rounded Image
Just paste img tag inside roundedImg div, and it will be circle shape.
- data-size – it is cicle radius
|
1 2 3 |
<div class="roundedImg" data-size="54"> <img class="media-object" src="images/content/product-small-1.jpg" alt=" "> </div> |
Buttons
We prepare 2 type of buttons. Example HTML markup:
|
1 2 3 |
<a href="#" class="btn btn-primary btn-sm">order now!</a> <input class="btn btn-default" type="submit" value="Submit"> |
menuBox
This is box to present menu from certain category. It is available in 4 types (different paper graphics). Just add type2, type3 or type4 class to change version.
|
1 2 3 4 5 6 7 8 9 10 11 12 13 14 15 16 17 18 19 20 21 22 23 24 25 26 27 28 29 30 31 32 33 34 35 |
<div class="menuBox type2"> <div class="top"> <img src="images/content/icon-1.png" alt=" "> <span>Starters</span> </div> <div class="inner"> <div class="media"> <a class="pull-left" href="images/content/product-small-1.jpg" data-rel="prettyPhoto[menu1]"> <div class="roundedImg" data-size="54"> <img class="media-object" src="images/content/product-small-1.jpg" alt=" "> </div> </a> <div class="media-body"> <span class="title">Fried Scallops</span> <p>Lorem ipsum dolor sit amet, consectetur adipisicing elit.</p> <span class="price"> <em>$</em>7 </span> </div> </div> <!-- / item --> <hr> <div class="media"> [second item] </div> <!-- / item --> <div class="media"> [third item] </div> <!-- / item --> </div> </div> <!-- / menuBox --> |
Was this article helpful ?
MAIN MENU STRUCTURE
Just change address, fill in social page urls and upload your logo to images/content/logo.png file and you’re ready to go!
HTML MARKUP:
|
1 2 3 4 5 6 7 8 9 10 11 12 13 14 15 16 17 18 19 20 21 22 23 24 25 26 27 28 29 30 31 32 33 34 35 36 37 38 39 40 |
<nav class="navbar navbar-default"> <div class="inner"> <div class="container"><!-- Brand and toggle get grouped for better mobile display --> <div class="navbar-header"><button class="navbar-toggle btn btn-primary" type="button" data-toggle="collapse" data-target=".navbar-ex1-collapse"> <span class="sr-only">Toggle navigation</span> </button> <div class="text-center"> <p class="address">Seabreeze - Atlantic Avenue 1234, New York, +66 87 65 43 21</p> </div> <a class="small-brand" href="/" data-width="119" data-top="58"><img src="{{@blog.logo}}" alt="Logo" /></a> <a class="phoneIcon" style="display: none;" href="tel:66-87-65-43-21">+66 87 65 43 21</a> <a class="locationIcon" style="display: none;" href="http://goo.gl/maps/IUzKJ" target="_blank">http://goo.gl/maps/IUzKJ</a> <ul class="smallSocials"> <li class="fb"><a href="#"><img src="{{asset " alt="Facebook" /></a></li> <li class="tw"><a href="#"><img src="{{asset " alt="Twitter" /></a></li> <li class="gg"><a href="#"><img src="{{asset " alt="Google+" /></a></li> <li class="rss"><a href="#"><img src="{{asset " alt="RSS" /></a></li> </ul> </div> <!-- Collect the nav links, forms, and other content for toggling --> <div class="collapse navbar-collapse navbar-ex1-collapse"> <ul class="nav navbar-nav text-center" data-type="margin-top" data-pos="145"> <li><a href="/">Home</a></li> <li><a href="/menu-card/">Menu card</a></li> <li><a href="/events/">Events</a></li> <li><a href="/rss">Rss</a></li> <li><a href="/contact/">Contact</a></li> </ul> </div> <!-- /.navbar-collapse --> </div> <!-- / container --> <div class="btm"></div> </div> |
SCREENSHOT:
Was this article helpful ?
MAIN SLIDER
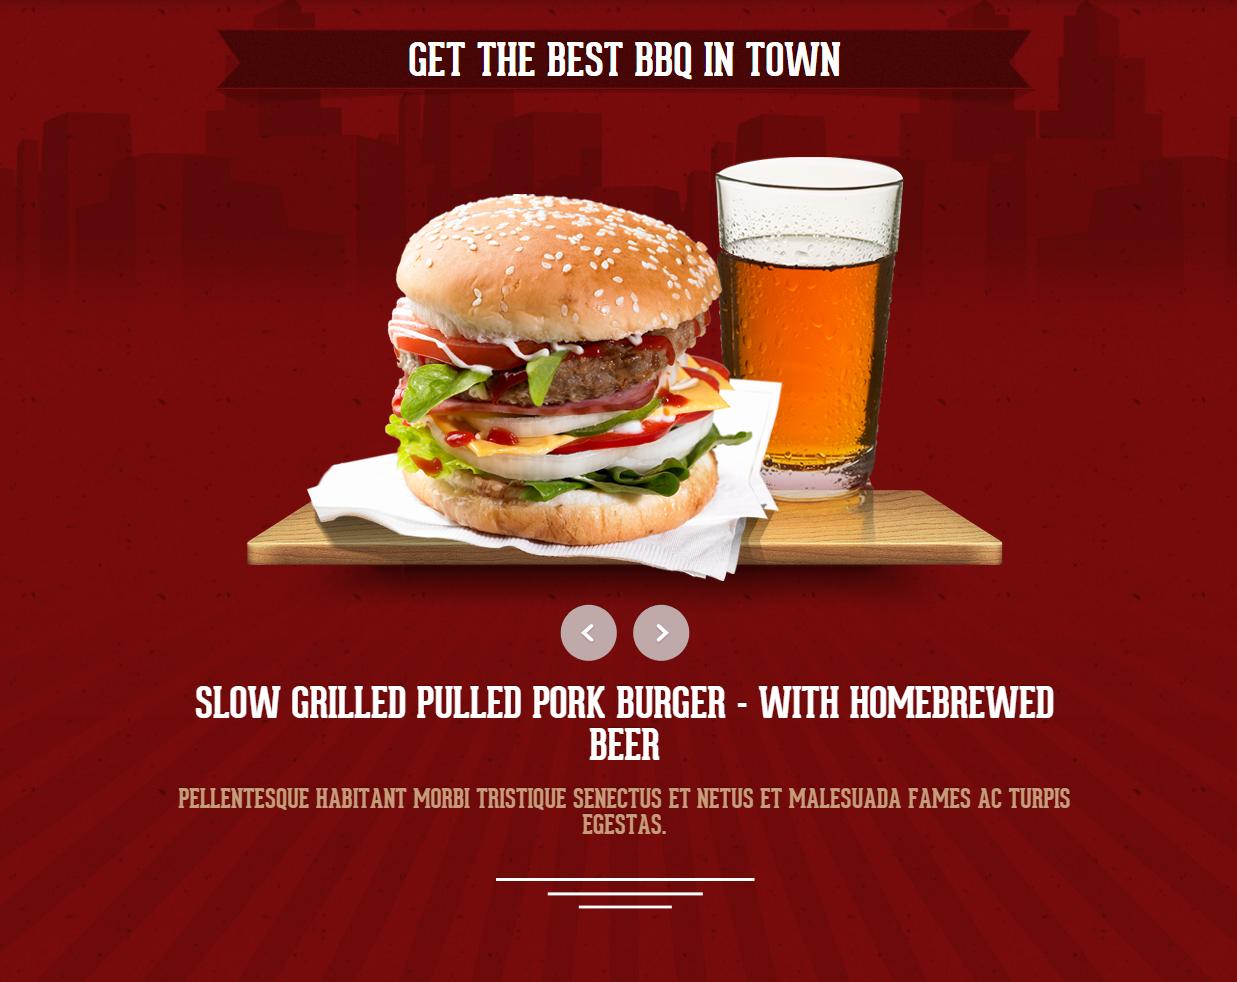
It is fullwidth slider of any content. We use flexsldier plugin. Just paste your content into li tags.
HTML MARKUP:
|
1 2 3 4 5 6 7 8 9 10 11 12 13 14 15 16 17 18 19 |
<!-- ************************* --> <!-- ** FULL PRODUCT SLIDER ** --> <div class="flexFull flexslider loading-slider text-center"> <ul class="slides"> <li> <div class="container"> <img src="images/content/sliderphoto-1.png" alt=" "> [any content] </div> </li> <li> <div class="container"> <img src="images/content/sliderphoto-1.png" alt=" "> [any content] </div> </li> </ul> </div> <!-- / flexslider --> |
And js initialization (js/main.js file),
there you can change slider parameters :
JS:
|
1 2 3 4 5 6 7 8 9 10 11 12 13 14 15 16 17 18 19 20 21 22 23 24 25 26 27 28 29 30 31 32 33 34 35 36 37 38 39 40 41 42 43 44 45 46 47 48 49 50 51 52 53 54 55 56 57 58 59 60 61 |
jQuery(window).load(function () { // flexfull slider init jQuery('.flexslider.flexFull').flexslider({ animation: "slide", //String: Select your animation type, "fade" or "slide" easing: "easeInOutExpo", //{NEW} String: Determines the easing method used in jQuery transitions. jQuery easing plugin is supported! // easing types : // swing, easeInQuad, easeOutQuad, easeInOutQuad, easeInCubic, easeOutCubic, // easeInOutCubic, easeInQuart, easeOutQuart, easeInOutQuart, easeInQuint, // easeOutQuint, easeInOutQuint, easeInSine, easeOutSine, easeInOutSine, // easeInExpo, easeOutExpo, easeInOutExpo, easeInCirc, easeOutCirc, // easeInOutCirc, easeInElastic, easeOutElastic, easeInOutElastic, easeInBack, // easeOutBack, easeInOutBack, easeInBounce, easeOutBounce, easeInOutBounce direction: "horizontal", //String: Select the sliding direction, "horizontal" or "vertical" reverse: false, //{NEW} Boolean: Reverse the animation direction animationLoop: true, //Boolean: Should the animation loop? If false, directionNav will received "disable" classes at either end smoothHeight: false, //{NEW} Boolean: Allow height of the slider to animate smoothly in horizontal mode startAt: 0, //Integer: The slide that the slider should start on. Array notation (0 = first slide) slideshow: false, //Boolean: Animate slider automatically slideshowSpeed: 7000, //Integer: Set the speed of the slideshow cycling, in milliseconds animationSpeed: 1100, //Integer: Set the speed of animations, in milliseconds initDelay: 0, //{NEW} Integer: Set an initialization delay, in milliseconds randomize: false, //Boolean: Randomize slide order // Primary Controls controlNav: false, //Boolean: Create navigation for paging control of each clide? Note: Leave true for manualControls usage directionNav: true, //Boolean: Create navigation for previous/next navigation? (true/false) prevText: "Previous", //String: Set the text for the "previous" directionNav item nextText: "Next", //String: Set the text for the "next" directionNav item // Usability features pauseOnAction: true, //Boolean: Pause the slideshow when interacting with control elements, highly recommended. pauseOnHover: true, //Boolean: Pause the slideshow when hovering over slider, then resume when no longer hovering touch: true, //{NEW} Boolean: Allow touch swipe navigation of the slider on touch-enabled devices video: true, //{NEW} Boolean: If using video in the slider, will prevent CSS3 3D Transforms to avoid graphical glitches useCSS: true, //{NEW} Boolean: Slider will use CSS3 transitions if available // Secondary Navigation keyboard: true, //Boolean: Allow slider navigating via keyboard left/right keys multipleKeyboard: false, //{NEW} Boolean: Allow keyboard navigation to affect multiple sliders. Default behavior cuts out keyboard navigation with more than one slider present. mousewheel: false, //{UPDATED} Boolean: Requires jquery.mousewheel.js (https://github.com/brandonaaron/jquery-mousewheel) - Allows slider navigating via mousewheel pausePlay: false, //Boolean: Create pause/play dynamic element pauseText: 'Pause', //String: Set the text for the "pause" pausePlay item playText: 'Play', //String: Set the text for the "play" pausePlay item // Callback API start: function () { jQuery(".flexslider.flexFull").removeClass("loading-slider"); }, before: function () { }, //Callback: function(slider) - Fires asynchronously with each slider animation after: function () { }, //Callback: function(slider) - Fires after each slider animation completes end: function () { }, //Callback: function(slider) - Fires when the slider reaches the last slide (asynchronous) added: function () { }, //{NEW} Callback: function(slider) - Fires after a slide is added removed: function () { } //{NEW} Callback: function(slider) - Fires after a slide is removed }); }) |
SCREENSHOT:
Was this article helpful ?
BLOG SCTRUCTURE
BLOG PAGE
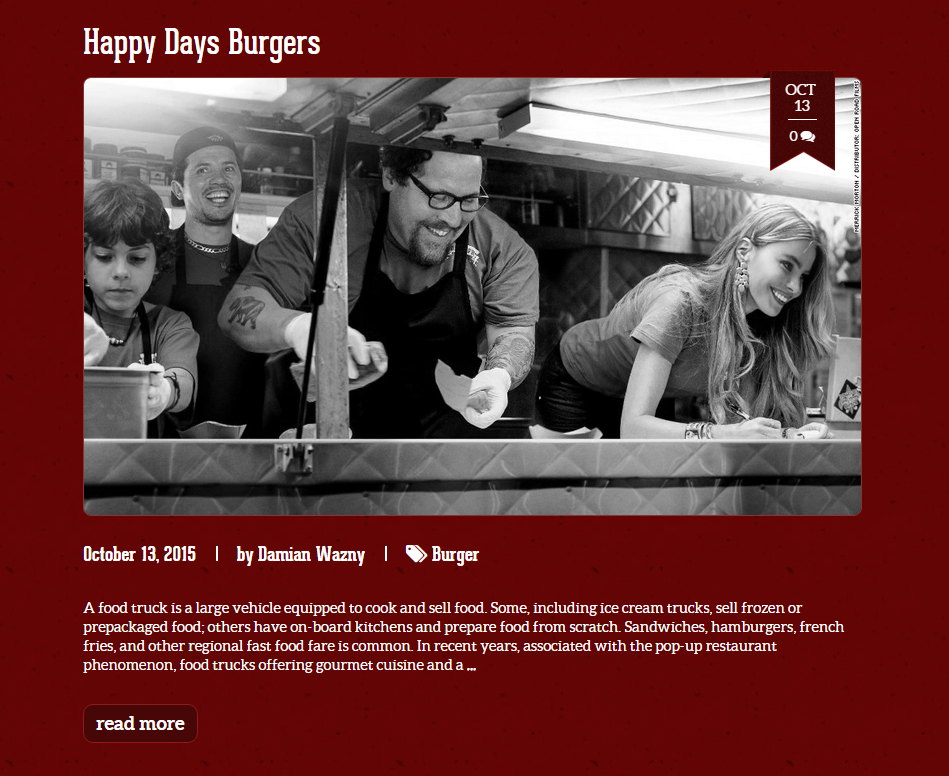
This sections in Foodtruck Ghost show method of displaying the posts as a BLOG LIST.
HTML MARKUP:
|
1 2 3 4 5 6 7 8 9 10 11 12 13 14 15 16 17 18 19 20 21 22 23 24 25 26 27 28 29 30 31 32 33 34 35 36 37 38 39 40 41 42 43 44 45 46 47 48 49 50 51 52 53 54 55 56 57 58 59 60 61 62 63 |
<div class="bg-1 section"> <div class="inner" data-topspace="75" style="padding-top: 75px; background-image: none;"> <div class="container"> <h3 class="hdr1">Blog Page</h3> <div class="blog-list"> <div class="row"> <div class="col-md-10 col-md-offset-1 col-sm-10 col-sm-offset-1 blog-main"> <div class="inner"> {{#foreach posts}} <article class="blog-post blog-default-page {{post_class}}"> <h3 class="blog_title"><a href="{{url}}">{{{title}}}</a></h3> <div class="blog-thumbnail mbslider responsiveVideo"> <span class="ribbon_details"> <span class="ribbon_details_date">{{date published_at format="MMM"}} <br>{{date published_at format="DD"}}</span> <a href="{{url}}#disqus_thread" class="ribbon_details_comments"></a> </span> {{#if image}} <a href="{{url}}"><img src="{{image}}" alt="{{title}}"></a> {{else}} <a href="{{url}}" title="{{title}}">{{content words="0"}}</a> {{/if}} </div> <div class="meta_box"> <span class="meta_date">{{date published_at format="MMMM DD, YYYY"}}</span> <span class="meta_author">by <a href="{{author.website}}">{{author}}</a></span> {{#if tags}} <span class="meta_categories"> <i class="fa fa-tags"></i> {{tags separator=", "}} </span> {{/if}} </div> <div class="mbslider-source" style="display:none"> {{content}} </div> <p class="ct-excerpt"> {{excerpt words="60"}} {{!okresla liczbe slow wyswietlanych postow bez czytania dalej}} </p> <a href="{{url}}" class="btn btn-primary btn-sm btn-blog">read more</a> </article> <hr class="dashed-separator"> {{/foreach}} {{#if pagination}} {{{pagination}}} {{/if}} </div> <!-- / inner --> </div> </div> </div> </div> </div> </div> |
SCREENSHOT:
PAGINATION
To move between blog pages we are using pagination buttons:
HTML MARKUP:
|
1 2 3 4 5 6 7 8 9 10 11 12 13 14 15 16 17 18 19 |
<!--Pagination--> <!--this is essential for moving beetween the post--> <div class="text-center"> <ul class="pagination"> {{#if prev}} <li><a href="{{page_url prev}}#blog"><i class="fa fa-arrow-left"></i>Previous Page</a></li> {{else}} <li class="disabled"><a href="#blog"><i class="fa fa-arrow-left"></i>Previous Page</a></li> {{/if}} <li><a href="#">{{page}}</a></li> <li><a href="#">of </a></li> <li><a href="#">{{pages}}</a></li> {{#if next}} <li><a href="{{page_url next}}#blog">Next Page<i class="fa fa-arrow-right"></i></a></li> {{else}} <li class="disabled"><a href="#blog">Next Page<i class="fa fa-arrow-right"></i></a></li> {{/if}} </ul> </div> |
SCREENSHOT:
AUTOR PAGE
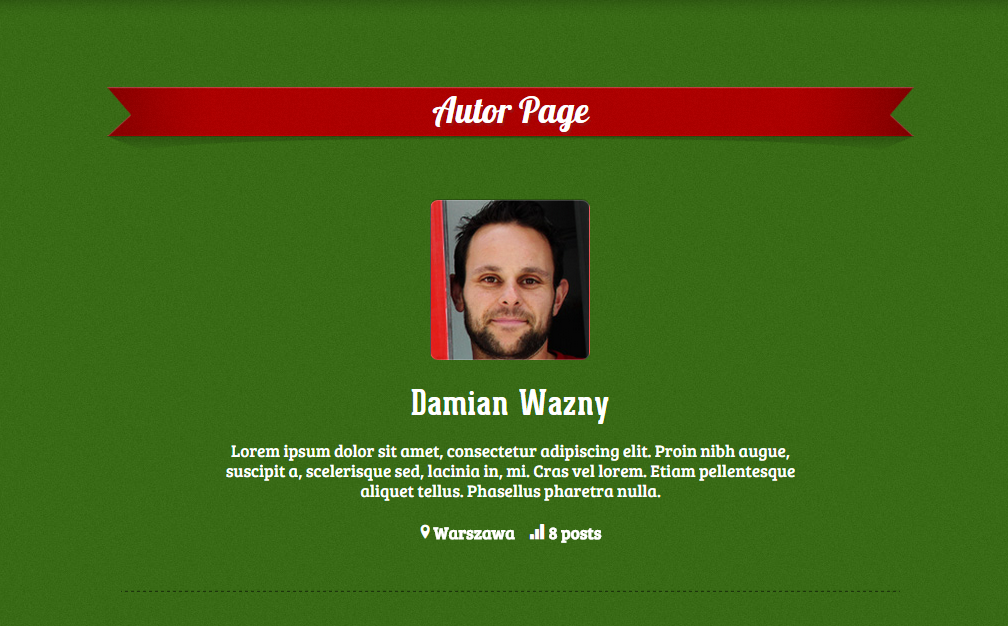
In Foodtruck Ghost you can check all the information about the autor of the post like some short info about him and ammount of post he created.
HTML MARKUP:
|
1 2 3 4 5 6 7 8 9 10 11 12 13 14 15 16 17 18 19 20 21 22 23 24 25 26 27 28 29 30 31 32 33 34 35 36 37 38 39 40 41 42 43 44 45 46 47 48 49 50 51 52 53 54 55 56 57 58 59 60 61 62 63 64 65 66 67 68 69 70 71 72 73 74 75 76 |
{{!< default}} <div class="bg-1 section"> <div class="inner" data-image="{{asset "images/bg-1.jpg"}}" data-scroll="scroll" data-topspace="75"> <div class="container"> <h3 class="hdr1">Autor Page</h3> <div class="blog-list"> <div class="row"> <div class="col-md-10 col-md-offset-1 col-sm-10 col-sm-offset-1 blog-main"> <div class="inner"> {{#author}} <section class="author-profile inner"> {{#if image}} <figure class="author-image"> <div class="img author-box" style="background-image: url({{image}})"><span class="hidden">{{name}}'s Picture</span></div> </figure> {{/if}} <h1 class="author-title">{{name}}</h1> {{#if bio}} <h2 class="author-bio">{{bio}}</h2> {{/if}} <div class="author-meta"> {{#if location}}<span class="author-location icon-location">{{location}}</span>{{/if}} {{#if website}}<span class="author-link icon-link"><a href="{{website}}">{{website}}</a></span>{{/if}} <span class="author-stats"><i class="icon-stats"></i> {{plural ../pagination.total empty='No posts' singular='% post' plural='% posts'}}</span> </div> </section> <hr class="dashed-separator"> {{/author}} {{#foreach posts}} <article class="blog-post blog-default-page {{post_class}}"> <h3 class="blog_title"><a href="{{url}}">{{{title}}}</a></h3> <div class="blog-thumbnail mbslider responsiveVideo"> <span class="ribbon_details"> <span class="ribbon_details_date">{{date published_at format="MMM"}} <br>{{date published_at format="DD"}}</span> <a href="{{url}}#disqus_thread" class="ribbon_details_comments"></a> </span> {{#if image}} <a href="{{url}}"><img src="{{image}}" alt="{{title}}"></a> {{else}} <a href="{{url}}" title="{{title}}">{{content words="0"}}</a> {{/if}} </div> <div class="meta_box"> <span class="meta_date">{{date published_at format="MMMM DD, YYYY"}}</span> <span class="meta_author">by <a href="{{author.website}}">{{author}}</a></span> {{#if tags}} <span class="meta_categories"> <i class="fa fa-tags"></i> {{tags separator=", "}} </span> {{/if}} </div> <div class="mbslider-source" style="display:none"> {{content}} </div> <p class="ct-excerpt"> {{excerpt words="60"}} {{!okresla liczbe slow wyswietlanych postow bez czytania dalej}} </p> <a href="{{url}}" class="btn btn-primary btn-sm btn-blog">read more</a> </article> <hr class="dashed-separator"> {{/foreach}} {{! Previous/next page links - displayed on every page }} {{pagination}} </div> </div> </div> </div> </div> </div> </div> |
SCREENSHOT:
Was this article helpful ?
Contact/Newsletter Form
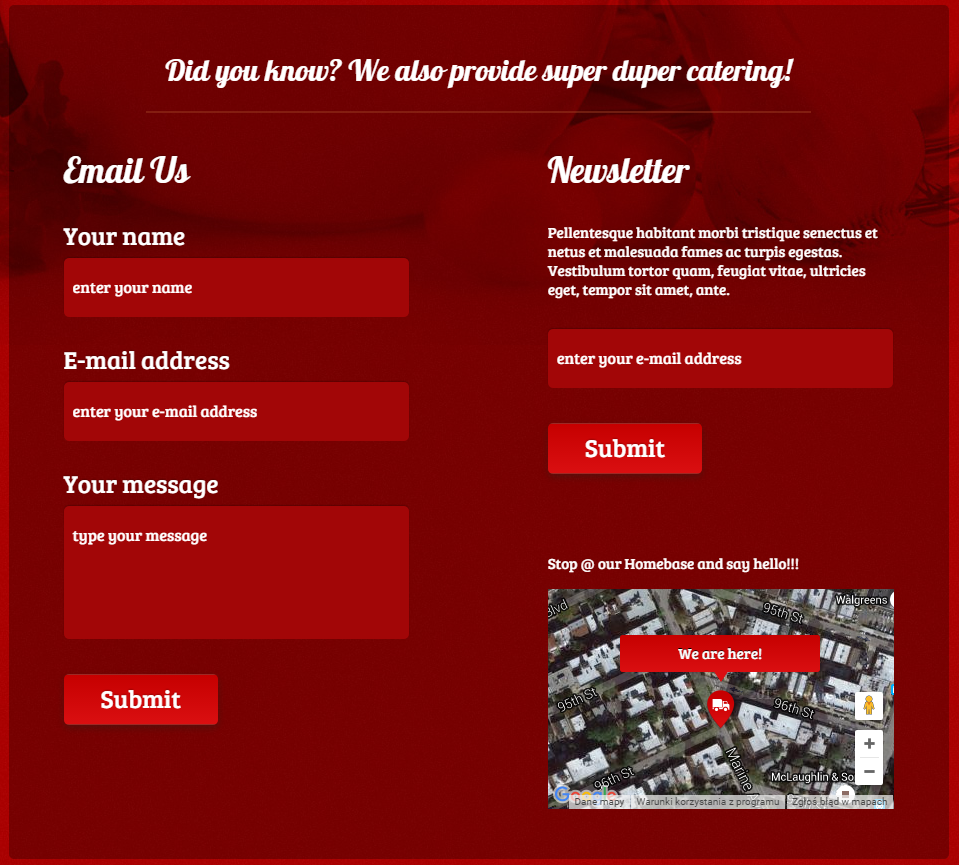
Template comes with ready to use:
- Contact Form
- Newsletter Form
All needed files are in /form directory.
Remember to includeon page.
To configure form just edit form/form.php and change e-mails to your own :
|
1 2 |
$to = "mail@example.com"; $from = "mail@example.com"; |
That’s it!
Contact Form
HTML MARKUP:
|
1 2 3 4 5 6 7 8 9 10 11 12 13 14 15 16 17 18 19 20 21 22 23 24 25 |
<form class="simpleForm" action="form/form.php" method="post"> <fieldset> <div class="form-group"> <label>Your name</label> <input type="text" class="form-control" name="field_[]" placeholder="enter your name"> </div> <div class="form-group"> <label>E-mail address</label> <input type="email" required class="form-control" name="email" placeholder="enter your e-mail address"> </div> <div class="form-group"> <label>Your message</label> <textarea class="form-control" rows="5" name="field_[]" placeholder="type your message"></textarea> </div> <input type="hidden" name="msg_subject" value="Contact Form"> <input type="hidden" name="field_[]" value=" "> <input class="btn btn-default" type="submit" value="Submit"> </fieldset> </form> <div class="successMsg" style="display:none;"> Message has been sent successfully! </div> <div class="errorMsg" style="display:none;"> An error occurred, please try again later. </div> |
— How to add more fields to form ?
Just add another form-group section, for example additional phone and fax :
HTML MARKUP:
|
1 2 3 4 5 6 7 8 |
<div class="form-group"> <label>Your Phone</label> <input type="text" class="form-control" name="field_[]" placeholder="enter your phone"> </div> <div class="form-group"> <label>Your Fax</label> <input type="text" class="form-control" name="field_[]" placeholder="enter your fax"> </div> |
Newsletter Form
HTML MARKUP:
|
1 2 3 4 5 6 7 8 9 10 11 12 13 14 15 16 |
<form class="newsletterForm simpleForm" action="form/form.php" method="post"> <fieldset> <div class="form-group"> <input class="form-control" type="email" name="email" required placeholder="enter your e-mail address"> </div> <input type="hidden" name="msg_subject" value="New Newsletter subscription"> <input type="hidden" name="field_[]" value=" "> <input class="btn btn-default" type="submit" value="Submit"> </fieldset> </form> <div class="successMsg" style="display:none;"> Your e-mail has been added to our list! </div> <div class="errorMsg" style="display:none;"> Error, please try again later. </div> |
Options (can be changed in HTML) :
- Mail Subject – just change value in : <input type=”hidden” name=”msg_subject” value=”Contact Form”>
- Success Message – change successMsg div content (below form)
- Error Message – change errorMsg div content (below form)
Was this article helpful ?
DISQUS
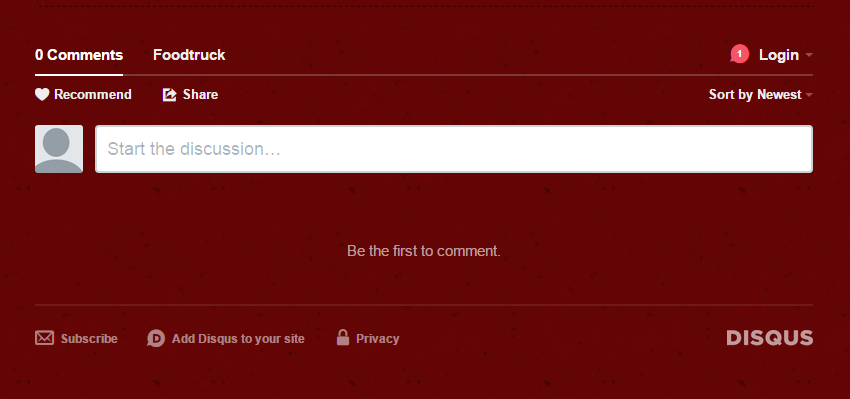
DISQUS is a networked community platform we are using in Foodtruck Ghost . It is a feature-rich comment system complete with social network integration, advanced administration and moderation options, and other extensive community functions.
All the comments are keept on DISQUS account because of that use the DISQUS plugin on your page you need register your website with Disqus
HTML MARKUP:
|
1 2 3 4 5 6 7 8 9 10 11 12 13 |
<div id="disqus_thread"></div> <script type="text/javascript"> /* * * CONFIGURATION VARIABLES * * */ var disqus_shortname = 'foodtruck'; /* * * DON'T EDIT BELOW THIS LINE * * */ (function() { var dsq = document.createElement('script'); dsq.type = 'text/javascript'; dsq.async = true; dsq.src = '//' + disqus_shortname + '.disqus.com/embed.js'; (document.getElementsByTagName('head')[0] || document.getElementsByTagName('body')[0]).appendChild(dsq); })(); </script> <noscript>Please enable JavaScript to view the <a href="https://disqus.com/?ref_noscript" rel="nofollow">comments powered by Disqus.</a></noscript> |
SCREENSHOT:
For more information please check DISQUS home page.
Was this article helpful ?
CSS Files and Structure
We’ve included style.css file, which contains default styles.
- Bootstrap CSS Framework v.3
- Font Face
- General Styles
- typography
- buttons
- main menu
- google map
- socials links
- section
- flexslider
- menuBox
- rounded image
- eventBox
- gallery
- forms
- footer
- media queries, adjustments
- @media (min-width: 990px) {}
- @media (max-width: 990px) {}
- @media (min-width: 767px) and (max-width: 990px) {}
- @media (max-width: 767px) {}
- @media (max-width: 480px) {}
If you want to modify or add new styles please find this lines in style.css :
|
1 2 3 4 |
/* *************** */ /* GENERAL STYLES */ /* *************** */ /* START EDIT HERE */ |
Main /css/style.css includes “Burger Love” styles
Each FLAVOUR style (for example flavours/cupcake/css/cupcake.css) overwrite “main styles” with his own.
Was this article helpful ?
Typography
We use google font service to include fonts or font face sets.
- Burger Lover (default)
– geared slab regular
– geared slab bold
– aleo bold
– aleo regular - Cupcake Wagon
– Grand Hotel
– Patua One - Tacos Locos
– El Rio Lobo
– Kaushan Script
– Bree Serif - Seabreeze
– Kaushan Script
– Bree Serif - Ribs & Dogs
– Kaushan Script
– Bree Serif - Bad Ass BBQ
– Carnivalee Freakshow
– Kaushan Script
– Bree Serif - Coffee & Cream
– Grand Hotel
– Kaushan Script
– Bree Serif - Pizza Revelation
– Lobster
– Kaushan Script
– Bree Serif
Credits:
Geared Font
Aleo Font
Grand Hotel Font
Patua One Font
El Rio Lobo Font
Kaushan Script Font
Bree Serif Font
Carnivalee Freakshow Font
Lobster Font
Chunk Five Font
Was this article helpful ?
JavaScript
All javascripts are placed in folder /js. In main.js file we implement all functions calls.
This theme uses following Javascript files:
- Bootstrap v 3 framework (powerful front-end framework for faster and easier web development)
- jQuery v1.10.2
- Flexslider 2
- Arctext.js (A jQuery plugin for curved text)
- GMAP3 5.1.1 – plugin to use google maps
Curved Text (arctext.js)
You can enable curved text for element by adding “curved” class to it.
Remember thatlibrary should be included. As example there is curved header on fullwidth map. Credits: http://tympanus.net/codrops/2012/01/24/arctext-js-curving-text-with-css3-and-jquery/
data-radius – it is radius of curve
data-direction – direction of effect
HTML MARKUP:
|
1 |
<h4 class="hdr6 curved" data-radius="600" data-direction="1">Wheres the truck?</h4> |
JAVASCRIPT MARKUP:
|
1 2 3 4 5 6 7 8 9 10 11 12 13 14 15 16 17 18 19 20 21 22 23 |
jQuery(document).ready(function () { /* rotate text */ if(jQuery().arctext) { jQuery(".curved").each(function () { $this = jQuery(this); var radius = $this.data("radius"); var direction = $this.data("direction"); if ((validateDataAttr(radius)) && (validateDataAttr(direction))) { jQuery($this).arctext({ radius: radius, dir: direction, // 1: curve is down, // -1: curve is up rotate: true // if true each letter should be rotated. }) } }) } }) |
Google Map (GMAP3 Plugin)
This is google map with custom marker, you can define couple parameters:
- data-location – address to show
- data-text – text in bubble overlay
- data-height – map height (if undefined height will be 220px)
- data-offset – by how many map should be repositioned from marker center point (default -30)
It uses gmap3 plugin.
Documentation: here
HTML MARKUP:
|
1 |
<div class="googleMap" data-location="Junipers Blvd. 380 Queens, NY 11379, USA" data-text="Junipers Blvd. 380 Queens, NY 11379, USA" data-height="480" data-offset="-80"></div> |
|
1 |
<div class="googleMap" data-latitude="52.13" data-longitude="21.135540" data-text="We are here!"></div> |
|
1 2 3 4 5 6 7 8 9 10 11 12 13 14 15 16 17 |
function initmap() { jQuery(".googleMap").each(function () { var atcenter = ""; var $this = jQuery(this); var location = $this.data("location"); var text = $this.data("text"); var offset = -30; if (validateDataAttr($this.data("offset"))) { offset = $this.data("offset"); } if (validateDataAttr(location)) { (..) } |
Was this article helpful ?
Sources and Credits
The following sources and files have been used to build up this theme
- Twitter Bootstrap – http://twitter.github.com/bootstrap/
- jQuery – http://www.jquery.com
Was this article helpful ?


