Farm Fresh – Responsive HTML5 Template
Thank you for purchasing this theme. If you have any questions that are beyond the scope of this help file, please feel free to start new ticket on this page. Thanks so much!
Scope of free support
We can help you with:
- Responding to questions or problems regarding the item and its features
- Fixing any discovered item’s bugs
- Providing updates to ensure compatibility with new software versions
Was this article helpful ?
HTML Structure
This theme is built upon bootstrap framework and is fully responsive. It adapts to window resolution and looks good on all devices including iPad and iPhone.
See for yourself (resize your browser).
If you would like to read more
about bootstrap framework click here :
Grid System and Single row structure
The default Bootstrap grid system utilizes 12 columns. It’s responsive grid and adapts to viewport. Below 767px viewports, the columns become fluid and stack vertically. The fluid grid system uses percents instead of pixels for column widths. Each row always include 12 columns (for example col-md-8 + col-md-4 = col-md-12).
Bootstrap documentation: here
Basic grid HTML:
|
1 2 3 4 5 6 7 8 9 10 11 12 13 14 15 16 17 18 19 20 21 22 23 24 25 26 27 |
<div class="row"> <div class="col-md-1">.col-md-1</div> <div class="col-md-1">.col-md-1</div> <div class="col-md-1">.col-md-1</div> <div class="col-md-1">.col-md-1</div> <div class="col-md-1">.col-md-1</div> <div class="col-md-1">.col-md-1</div> <div class="col-md-1">.col-md-1</div> <div class="col-md-1">.col-md-1</div> <div class="col-md-1">.col-md-1</div> <div class="col-md-1">.col-md-1</div> <div class="col-md-1">.col-md-1</div> <div class="col-md-1">.col-md-1</div> </div> <div class="row"> <div class="col-md-8">.col-md-8</div> <div class="col-md-4">.col-md-4</div> </div> <div class="row"> <div class="col-md-4">.col-md-4</div> <div class="col-md-4">.col-md-4</div> <div class="col-md-4">.col-md-4</div> </div> <div class="row"> <div class="col-md-6">.col-md-6</div> <div class="col-md-6">.col-md-6</div> </div> |
Page structure
Below you will find default page structure :
|
1 2 3 4 5 6 7 8 9 10 11 12 13 14 15 16 17 18 19 20 21 22 23 24 25 26 27 28 29 30 31 32 33 34 35 36 |
<!DOCTYPE html> <html> <head> [css] </head> <body> [header] [main menu] <!-- main container --> <div id="wrapper"> [component 1] <!-- fullwidth element --> </div> [fullwidth parallax] <div class="container"> <!-- / fullwidth element --> [component 6] </div> <!-- / main container --> [footer] [javascripts] </body> </html> |
Was this article helpful ?
CSS Files and Structure
If you would like to edit the color, font, or style of any elements, you would do the following:
|
1 |
#primaryContent a {color: #someColor;} |
If you find that your new style is not overriding, it is most likely because of a specificity problem. Scroll down in your CSS file and make sure that there isn’t a similar style that has more weight.
I.E.
|
1 |
#wrap #primaryContent a {color: #someColor;} |
So, to ensure that your new styles are applied, make sure that they carry enough “weight” and that there isn’t a style lower in the CSS file that is being applied after yours.
Colors
The theme includes a css file wich you can use to edit the colors.
You just need to add the corresponding CSS file to the head of the page like this:
|
1 2 3 4 5 |
<head> (..) <link rel="stylesheet" type="text/css" href="css/motive.css"> (..) </head> |
Main Menu structure
Just change brand name, upload your logo to images/content/ folder and you’re ready to go!
|
1 2 3 4 5 6 7 8 9 10 11 12 13 14 15 16 17 18 19 20 21 22 23 24 25 26 27 28 29 30 31 32 33 |
<nav class="navbar ct-navbar navbar-default yamm ct-navbar--fadeIn" role="navigation"> <div class="container"> <div class="ct-navbarContainer"> <div class="navbar-header"> <a class="navbar-brand" href="index.html"><img id="ct-js-logo" src="assets/images/demo-content/logo.png" alt="FISHtank"></a> <!-- + --> </div> <ul class="nav navbar-nav"> <li role="presentation" class="dropdown"> <a class="dropdown-toggle" href="about.html" role="button" aria-expanded="true"> Home <span class="caret"></span> </a> <ul class="dropdown-menu"> <li> <div class="yamm-content"> </div> </li> </ul> </li> <li><a href="contact.html">Contact Us</a></li> </ul> <ul class="nav navbar-nav yamm ct-navbar--right"> <li><a href="login.html">My Account</a></li> </ul> </div> </div> </nav> |
In order to create mega menus read the documentation here:
Icons
We’ve included 360+ font icons.
Awesome Icons – http://fontawesome.io/icons/
HTML markup:
|
1 2 |
<!-- Awesome Icons --> <i class="fa fa-cog"></i> |
CSS Files & Structure
We’ve included 2 files.
bootstrap.css contains Bootstrap 3 Library.
style.css file contains general styles.
1. Variables
2. Bootstrap
3. Mixins
4. Animate
5. Magnific
6. Animate
7. Typography
8. Maps
9. Menu
10. Social Icon
11. Image Box
12. Headline
13. Slick
14. Newsletter
15. Footer
16. Form
17. Modal
18. Buttons
19. Breadcrumbs
20. Blog
21. Divider
22. Pagination
23. Media Object
24. Widget
25. Blockquote
26. Comment
27. Portfolio
28. Info Box
29. Accordion
30. Tabs
31. Table
32. Event
33. Tweet
34. Icon Box
35. Pricing Tables
36. Progress Bar
37. Counters
Utilities
Utility classes are low-level structural and positional traits. Utilities can be applied directly to any element, multiple utilities can be used tohether and utilities can be used alongsie component classes.
Utilities are intended for frequently used CSS properties and patterns, like: floats, containing floats, vertical alignemnt, text tryncation. Relying on utilities can help to reduce repetition and provide consistend implementations.
- Farm Fresh uses utilities for the following categories:
- Typography
- Display Types
- Paddings
- Margins
- Line height
- Borders
- Colors
- Transform
- Section elements
Was this article helpful ?
Slider
Farm Fresh comes with two main types of sliders. Each type can be additionally customized by data-attributes.
Simple slider
HTML markup for slider:
|
1 2 3 4 5 6 7 8 9 10 11 12 13 14 15 16 17 18 19 |
<section class="ct-js-slick ct-slick ct-slick-arrow--type3 ct-u-marginBottom30" data-animations="true" data-autoplay="false" data-arrows="true" data-items="1" data-XSitems="1" data-SMitems="1" data-MDitems="1"> <div class="item"> [content] </div> <div class="item"> [content] </div> <div class="item"> [content] </div> </section> |
You can edit arrows types by adding one of the following classes to <section>:
- ct-slick-arrow–type1
- ct-slick-arrow–type2
- ct-slick-arrow–type3
- ct-slick-arrow–type4
- ct-slick-arrow–type5
- ct-slick-arrow–type6
There are also two types of image hover effect, which can be edited analogously, with the following classes:
- ct-slick-thumbnailHover–type1
- ct-slick-thumbnailHover–type2
Synch Slider
HTML markup:
|
1 2 3 4 5 6 7 8 9 10 11 12 13 14 15 16 |
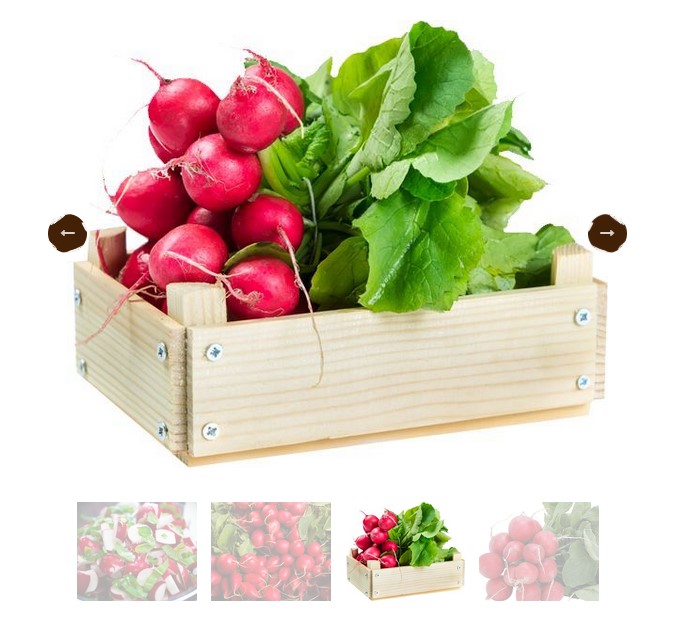
<div id="synced-1" class="ct-slick--synced ct-slick--synced--type2"> <div class="ct-slick ct-js-slick ct-js-slick-for" data-items="1" data-arrows="false" data-draggable="false" data-touchMove="false"> <div class="item"><img src="assets/images/demo-content/radish01.jpg" alt=""/></div> <div class="item"><img src="assets/images/demo-content/radish02.jpg" alt=""/></div> <div class="item"><img src="assets/images/demo-content/radish03.jpg" alt=""/></div> <div class="item"><img src="assets/images/demo-content/radish04.jpg" alt=""/></div> <div class="item"><img src="assets/images/demo-content/radish05.jpg" alt=""/></div> </div> <div class="ct-slick ct-js-slick ct-js-slick-nav ct-slick-arrow--type4 ct-slick-thumbnailHover--type2" data-items="1" data-centerMode="true" data-centerPadding="0" data-asNavFor="#synced-1 .ct-js-slick-for" data-XSitems="2" data-SMitems="4" data-focusOnSelect="true"> <div class="item"><img src="assets/images/demo-content/radish01.jpg" alt=""/></div> <div class="item"><img src="assets/images/demo-content/radish02.jpg" alt=""/></div> <div class="item"><img src="assets/images/demo-content/radish03.jpg" alt=""/></div> <div class="item"><img src="assets/images/demo-content/radish04.jpg" alt=""/></div> <div class="item"><img src="assets/images/demo-content/radish05.jpg" alt=""/></div> </div> </div> |
You can edit synch slider arrow positions with the following classes:
- ct-slick–synced–type1
- ct-slick–synced–type2
Both sliders require using the following scripts:
|
1 2 |
<script src="assets/plugins/slick/slick.min.js"></script> <script src="assets/plugins/slick/init.js"></script> |
Was this article helpful ?
Breadcrumbs
Farm Fresh allows you to easily create Breadcrumbs with page navigation and background image. Image source and element height can be edited via data-attributes:
- data-bg-image
- data-height
Of course you need to use first basic HTML markup:
|
1 2 3 4 5 |
<div class="ct-breadcrumbs ct-js-breadcrumbs ct-u-marginTop50 ct-u-marginBottom70" data-bg-image="assets/images/demo-content/breadcrumbs1.png" data-height="260"> <div class="ct-breadcrumbs-title"> [title] </div> </div> |
The following script is responsible for Breadcrumbs:
|
1 2 3 4 5 6 7 8 9 10 11 12 |
var $breadcrumbs = $('.ct-js-breadcrumbs'); $breadcrumbs.each(function(){ var $this = $(this); var $breadcrumbsHeight = $this.attr("data-height"); var $breadcrumbsImage = $this.attr("data-bg-image"); $this.css({ "background-image": "url(\"" + $breadcrumbsImage + "\")", "height": $breadcrumbsHeight + "px" }); }); |
Was this article helpful ?
Event
Create event on your website with the following HTML markup:
|
1 2 3 4 5 6 7 8 9 10 11 12 13 14 15 16 17 18 19 20 21 22 23 24 25 26 27 28 29 30 31 32 33 34 35 36 37 38 39 40 41 42 43 44 45 46 47 |
<article class="ct-event-item ct-event-item--type1"> <header> <h2 class="ct-u-hideText">Event 1</h2> </header> <div class="ct-event-item-outer"> <div class="ct-event-item-media"> <figure> [media] </figure> </div> <div class="ct-event-item-wrapper"> <div class="ct-imagedata ct-imagedata--left"> <span class="ct-imagedata-day">2</span> <span class="ct-imagedata-month">Mar</span> </div> <div class="ct-event-item-inner"> <section> <div class="ct-event-title"> <a href="single-event.html"> <h6><span>mixed freshly harvested mushrooms</span></h6> </a> </div> <div class="ct-event-text"> <p> [text] </p> </div> <div class="text-left"> <a href="single-event.html" class="btn ct-btn-image btn-warning"><span>learn more</span></a> <a href="#" class="btn ct-btn-image btn-default"><span>buy tickets</span></a> </div> </section> </div> </div> </div> <div class="clearfix"></div> </article> |
You can select one of two type of events by changing type number in class name:
- ct-event-item–type1
- ct-event-item–type2
Was this article helpful ?
Map
You can embed google map to your website with simple HTML markup:
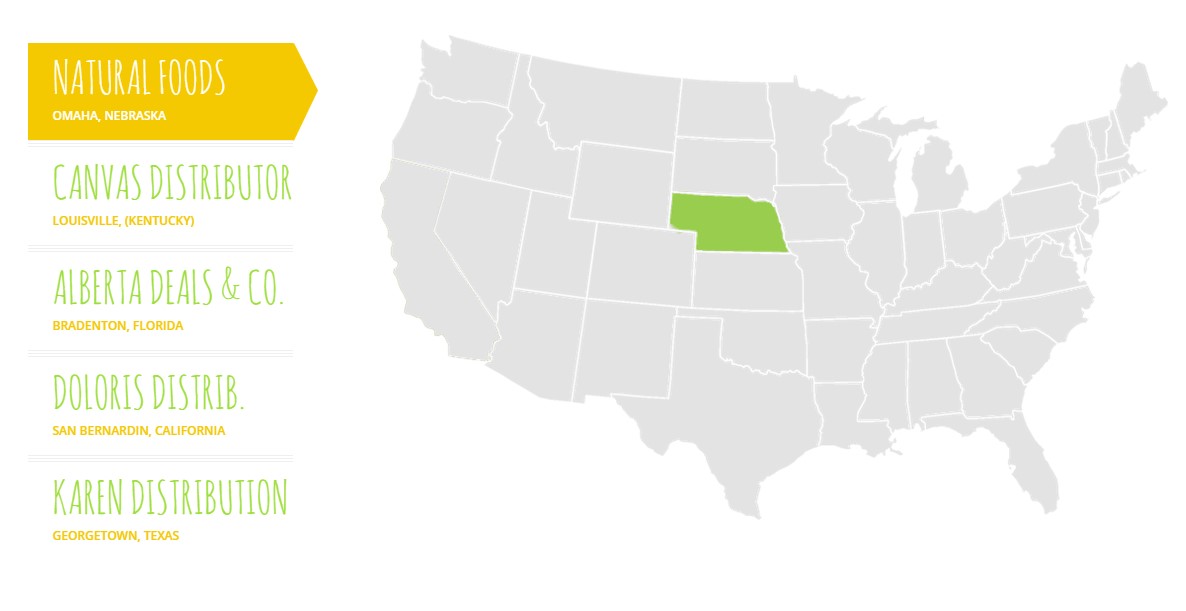
|
1 2 3 |
<div class="ct-googleMap-contsainer"> <div class="ct-googleMap" data-height="172" data-location="Narbutta 24, Warsaw" data-zoom="14"></div> </div> |
Parameters like: map height, location address and map zoom, can be edited with the following data-attributes:
- data-height,
- data-location,
- data-zoom
Don’t forget to include the following scripts to page with map:
|
1 2 |
<script src="http://maps.google.com/maps/api/js?sensor=false"></script> <script src="assets/js/gmap/gmap3.min.js"></script> |
Was this article helpful ?
Forms
We preapred for you several types of forms – all available options can be found here.
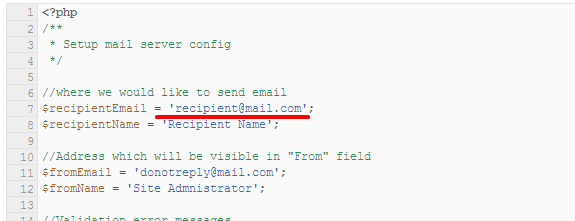
Email address, where we should send messages from Newsletter can be edited via HTML/assets/form/config.php file. Just use your email address instead of recipient@mail.com
Newsletter HTML markup:
|
1 2 3 4 5 6 7 8 9 10 11 12 13 14 15 16 17 18 19 20 21 22 23 24 25 26 27 28 29 30 31 32 |
<div class="ct-newsletter"> <div class="text-center"> <header> <h2><span class="ct-u-colorBrownDark ct-u-ff--2 text-lowercase"><span class="ct-u-colorMotive text-capitalize">Why We Love Us?</span> Subscribe To Us!</span></h2> <h6><span class="ct-u-colorGray ct-u-ff--1">We are developing the most innovative, nutritious, free-form and organic foods ever. The futre of health food is right here.</span></h6> </header> </div> <div class="successMessage alert alert-success alert-dismissible" role="alert"> <button type="button" class="close" data-dismiss="alert" aria-label="Close"><span aria-hidden="true">×</span></button> <strong>Success!</strong> Congratulation, mission success </div> <div class="errorMessage alert alert-danger alert-dismissible" role="alert"> <button type="button" class="close" data-dismiss="alert" aria-label="Close"><span aria-hidden="true">×</span></button> <strong>Danger!</strong> You did something wrong </div> <form class="validateIt" role="form" action="assets/form/send.php" method="POST"> <div class="row"> <div class="col-md-9"> <div class="form-group"> <label class="sr-only" for="newsletter-email">Your Email Address</label> <input type="email" class="form-control ct-input--type1" id="newsletter-email" placeholder="Your Email Address" required="" name="field[]"> </div> </div> <div class="col-md-3"> <button type="submit" class="btn btn-block ct-btn-default btn-default"><span>Subscribe Today</span></button> </div> </div> </form> </div> |
Was this article helpful ?
Tabs
There are two available types of tabs.
Tab type can be switched by changing the type class name to the following:
- ct-tabs–type1
- ct-tabs–type2
For both types the rest of HTML markup is the same:
|
1 2 3 4 5 6 7 8 9 10 11 12 13 14 15 16 17 18 19 20 21 22 23 24 25 26 27 28 |
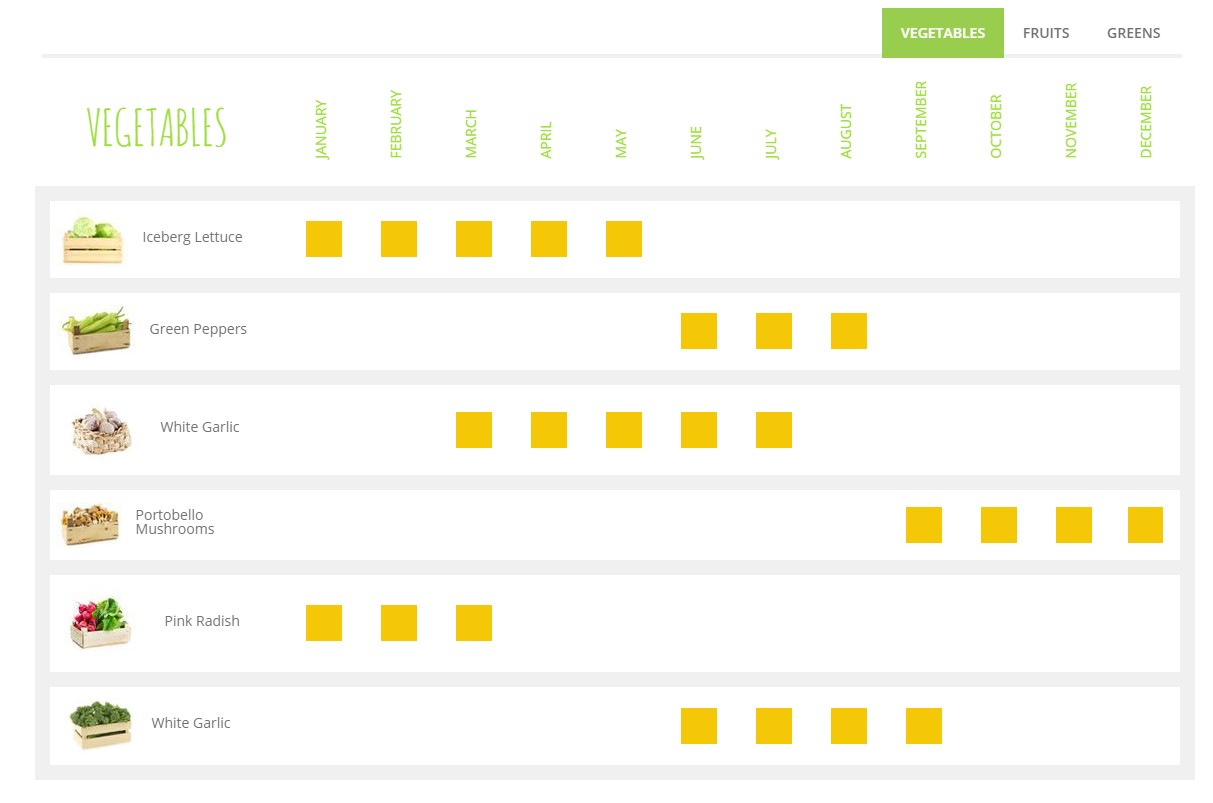
<div role="tabpanel" class="ct-tabs ct-tabs--type1"> <!-- Nav tabs --> <ul class="nav nav-tabs ct-tabs-nav" role="tablist" id="productGuide"> <li role="presentation" class="active"><a href="#vegetables" aria-controls="vegetables" role="tab" data-toggle="tab">Vegetables</a></li> <li role="presentation"><a href="#fruits" aria-controls="fruits" role="tab" data-toggle="tab">Fruits</a></li> <li role="presentation"><a href="#greens" aria-controls="greens" role="tab" data-toggle="tab">Greens</a></li> </ul> <!-- Tab panes --> <div class="tab-content ct-tabs-content"> <div role="tabpanel" class="tab-pane active ct-tabs-panel" id="vegetables"> [content] </div> <div role="tabpanel" class="tab-pane ct-tabs-panel" id="fruits"> [content] </div> <div role="tabpanel" class="tab-pane ct-tabs-panel" id="greens"> [content] </div> </div> </div> |
Was this article helpful ?
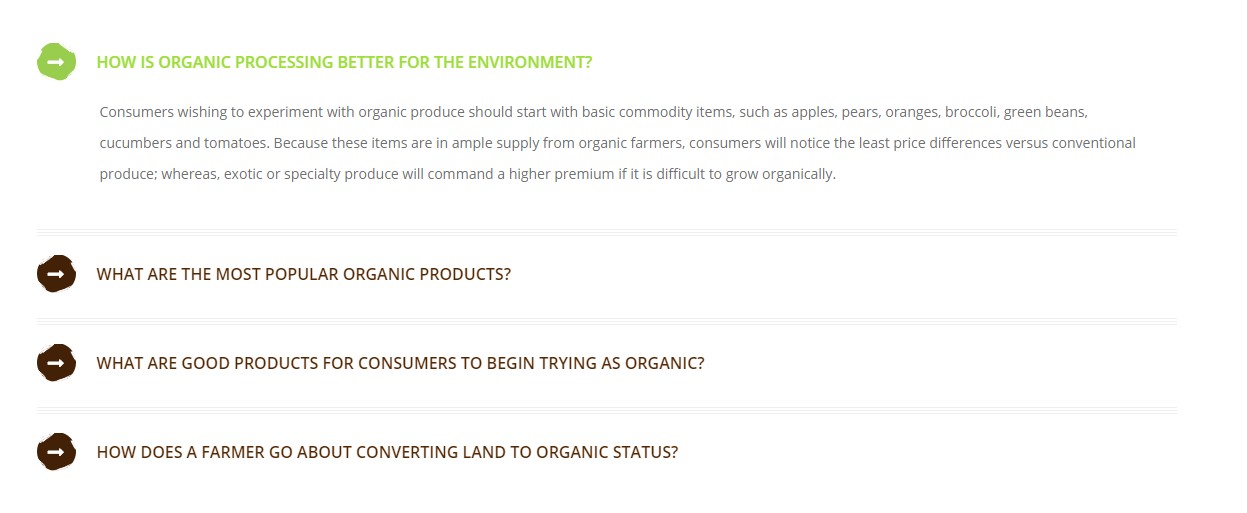
Accordion
There are two types of accordions in Farm Fresh
You can select each type by using proper CSS class in HTML markup.
Classes to select:
– ct-accordion
- ct-accordion–type1
- ct-accordion–type2
HTML markup:
|
1 2 3 4 5 6 7 8 9 10 11 12 13 14 15 16 17 18 19 20 |
<div class="panel-group ct-accordion ct-accordion--type1" id="accordion"> <div class="panel panel-default ct-accordion-panel"> <div class="panel-heading ct-accordion-heading"> <h4 class="panel-title ct-accordion-title"> <a data-toggle="collapse" data-parent="#accordion" href="#collapseOne"> [content] </a> </h4> </div> <div id="collapseOne" class="panel-collapse collapse in ct-accordion-collapse"> <div class="panel-body ct-accordion-body"> [contentTarget] </div> </div> </div> </div> |
Was this article helpful ?
Blog
Create a blog page with simple HTML markup:
|
1 2 3 4 5 6 7 |
<div class="ct-blog-container ct-blog-masonry ct-blog-masonry--col3 ct-gallery"> <article class="ct-blog-item ct-gallery-item ct-gallery-item--type1"> [content] </article> </div> |
If you would like to use Masonry layout for the blog, don’t forget to use the following scripts on blog page:
|
1 2 3 |
<script src="assets/js/portfolio/jquery.isotope.min.js"></script> <script src="assets/js/portfolio/imagesloaded.js"></script> <script src="assets/js/portfolio/init.js"></script> |
You can modify blog columns settings with following CSS variations:
– ct-blog-container
- ct-blog-masonry
- none – it’s not required to use ‘masonry’ option
- ct-blog-masonry–col2
- ct-blog-masonry–col3
- ct-blog-masonry–col4
You can also select single post appearance with the following classes:
- ct-gallery-item–type1
- ct-gallery-item–type2
- ct-gallery-item–type3
Was this article helpful ?
Pagination
To add pagination, use the simple HTML markup:
|
1 2 3 4 5 6 7 8 9 10 11 12 13 14 15 16 |
<div class="ct-pagination text-center ct-u-marginBottom80"> <ul class="list-unstyled list-inline"> <li> <a href="#" class="active">1</a> </li> <li> <a href="#">2</a> </li> <li> <a href="#">3</a> </li> <li> <a href="#">4</a> </li> </ul> </div> |
Was this article helpful ?
Comments
Every blog page or blog single post looks better if you add there users comments. You can do it with the following HTML markup:
|
1 2 3 4 5 6 7 8 9 10 11 12 13 14 15 16 17 18 19 20 21 22 23 24 25 26 27 28 29 30 31 32 33 34 35 36 37 38 39 40 41 42 43 44 45 46 47 48 49 50 51 52 53 54 55 56 57 58 59 60 61 |
<div class="ct-comments"> <div class="ct-comment"> <div class="media ct-media"> <div class="media-left"> <a href="#"> <img class="media-object ct-media-object" src="assets/images/demo-content/commentPerson.png" alt=""> </a> </div> <div class="media-body ct-media-body"> <div class="ct-media-bodyHeader"> <div class="ct-media-body-title"> <span><a href="#"><h6 class="media-heading ct-media-heading">Catherine Zeta</h6></a> says:</span> </div> <div class="ct-media-body-meta"> <ul class="list-unstyled list-inline"> <li><time datetime="2015-02-23">February 23, 2015</time></li> <li><a href="#">Reply</a></li> </ul> </div> </div> <div class="ct-media-body-content"> <p> [text] </p> </div> </div> </div> </div> <div class="ct-subcomment"> <div class="media ct-media"> <div class="media-left"> <a href="#"> <img class="media-object ct-media-object" src="assets/images/demo-content/commentPerson.png" alt=""> </a> </div> <div class="media-body ct-media-body"> <div class="ct-media-bodyHeader"> <div class="ct-media-body-title"> <span><a href="#"><h6 class="media-heading ct-media-heading">Caroline Zoe</h6></a> says:</span> </div> <div class="ct-media-body-meta"> <ul class="list-unstyled list-inline"> <li><time datetime="2015-02-23">February 23, 2015</time></li> <li><a href="#">Reply</a></li> </ul> </div> </div> <div class="ct-media-body-content"> <p> [text] </p> </div> </div> </div> </div> </div> |
Was this article helpful ?
Info box
Info Box by default contains image with title and text content.
There are several layout variation for InfoBox:
– ct-infoBox
— ct-infoBox–type1
— ct-infoBox–type2
— ct-infoBox–type3
– ct-infoBox-media
— ct-infoBox-media–left
— ct-infoBox-media–right
Which can be added to the following HTML markup:
|
1 2 3 4 5 6 7 8 9 10 11 12 13 14 15 16 17 18 19 20 21 |
<div class="ct-infoBox ct-infoBox--type1"> <div class="ct-infoBox-media ct-infoBox-media--left"> <figure> <img class="ct-infoBox-image--square" src="assets/images/demo-content/aboutimage1.png" alt=""> </figure> </div> <div class="ct-infoBox-content"> <div class="ct-infoBox-title"> <h3>why choose us?</h3> </div> <div class="ct-infoBox-text"> <p> [content] </p> </div> </div> </div> |
Was this article helpful ?
Icon Box
You can easily change what icon will be displayed in box by changing icon class. Here you will find full set of icons.
Full Icon box HTML markup looks like the following:
|
1 2 3 4 5 6 7 8 9 10 11 12 13 14 15 16 17 |
<article class="ct-iconBox"> <div class="ct-iconBox-icon"> <span><i class="fa fa-headphones"></i></span> </div> <div class="ct-iconBox-text text-center"> <p class="ct-u-colorGray3"> [text] </p> </div> <div class="text-center"> <a href="about-us.html" class="btn btn-lg ct-btn-image btn-warning"><span>Read About Us</span></a> </div> </article> |
Was this article helpful ?
Image Data
With Farm Fresh you can add custom text information on your image. For example you can add there date information.
Use for this the following HTML markup:
|
1 2 3 4 |
<div class="ct-imagedata ct-imagedata--left"> <span class="ct-imagedata-day">2</span> <span class="ct-imagedata-month">Mar</span> </div> |
Element background can be edited with the following CSS:
|
1 2 3 |
.ct-imagedata { background-image: url("../images/GreendataBG.png"); } |
Additionally you can change element alignment and float by editing classes names in HTML with the following variables:
|
1 2 3 4 5 |
ct-imagedata ct-imagedata--left ct-imagedata--right ct-imagedata--floatRight ct-imagedata--floatLeft |
Was this article helpful ?
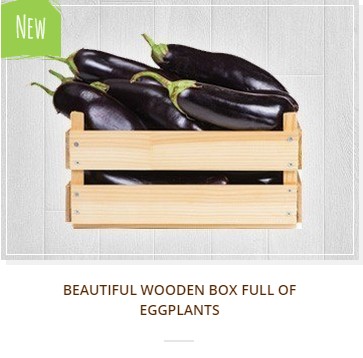
Image Box
Farm Fresh comes with several types of image boxes. All of them creates Images with caption.
Below you will find example of HTML markup to use:
|
1 2 3 4 5 6 7 8 9 10 11 12 13 14 15 16 17 18 19 20 21 22 23 24 25 26 |
<article class="ct-imageBox"> <figure class="ct-imageBox-wrapperOuter"> <a href="single-product.html"> <div class="ct-imageBox-container *ct-imageBox-container-shadow*"> <div class="ct-imageBox-hover *ct-imageBox-hover--type1*"></div> [image] <div class="ct-decoration <strong>ct-decoration--type5</strong> <strong>ct-decoration-decorationBorder</strong>"> <div> <div class="ct-decoration-textContainer"> <div class="ct-decoration-text"> <h5><span>New</span></h5> </div> </div> </div> </div> </div> </a> <figcaption class="ct-imageBox-wrapperInner ct-imageBox-wrapperInner--type1"> [content] </figcaption> </figure> </article> |
The only required class to use is ct-imageBox-container. Other classes can be replaces with the following variations:
- ct-imageDecoration
- none
- ct-decoration-decorationBorder
- ct-imageDecoration–type1
- ct-imageDecoration–type2
- ct-imageDecoration–type3
- ct-imageDecoration–type4
- ct-imageDecoration–type5
- ct-imageBox-container
- ct-imageBox-container-shadow
- ct-imageBox-wrapperInner
- ct-imageBox-wrapperInner-type1
- ct-imageBox-wrapperInner-type2
- ct-imageBox-wrapperInner-type3
- ct-imageBox-wrapperInner-type4
- ct-imageBox-wrapperInner-type5
- ct-imageBox-hover
- none
- ct-imageBox-hover–type1
- ct-imageBox-hover–type2
Was this article helpful ?
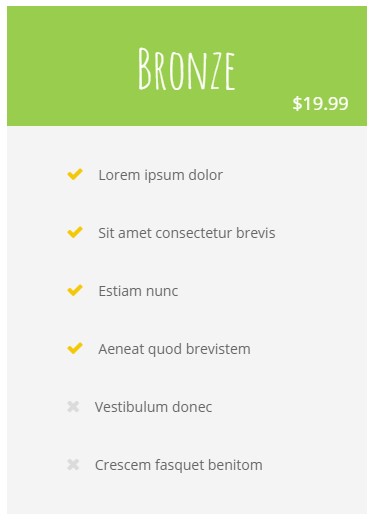
Pricing Tables
Present your prices with easy and clean tables.
It can be added with simple HTML markup:
|
1 2 3 4 5 6 7 8 9 10 11 12 13 14 15 16 17 18 19 20 |
<div class="ct-pricingTable"> <div class="ct-pricingTable-header"> [title] <div class="ct-pricingTable-price"> <span> [price] </span> </div> </div> <div class="ct-pricingTable-container"> [list] </div> </div> |
Was this article helpful ?
Portfolio
Create simple portfolio with filters.
To use filters add the following HTML markup before your portfolio code:
|
1 2 3 4 5 6 7 8 9 10 11 12 13 14 15 16 17 18 19 20 21 22 23 24 |
<div class="ct-gallery-filters"> <div class="ct-gallery-filters-decoration"></div> <ul class="ct-gallery-filters-list list-unstyled list-inline"> <li> <a href="#" class="btn btn-motive btn-sm ct-btn-rounded ct-btn-transparent ct-hover--outlineOut" data-filter="*"><span>new ones</span></a> </li> <li> <a href="#" class="btn btn-motive btn-sm ct-btn-rounded ct-btn-transparent ct-hover--outlineOut" data-filter=".saladsGreens"><span>salads + greens</span></a> </li> <li> <a href="#" class="btn btn-motive btn-sm ct-btn-rounded ct-btn-transparent ct-hover--outlineOut" data-filter=".fresh"><span>fresh</span></a> </li> <li> <a href="#" class="btn btn-motive btn-sm ct-btn-rounded ct-btn-transparent ct-hover--outlineOut" data-filter=".frozen"><span>frozen</span></a> </li> <li> <a href="#" class="btn btn-motive btn-sm ct-btn-rounded ct-btn-transparent ct-hover--outlineOut active" data-filter=".dried"><span>dried</span></a> </li> </ul> </div> |
Main Portfolio container can be created with the following markup:Notice: data-filter in each filter link will be used for filtering. For example: if you want portfolio item to be displayed after clicking on FRESH filter you need to add fresh class to portfolio item, like the following:
|
1 2 3 4 5 6 7 |
<div class="ct-portfolio-container ct-portfolio-masonry ct-portfolio-masonry--col3 ct-gallery"> <article class="ct-portfolio-item ct-gallery-item ct-gallery-item--type1"> [content] </article> </div> |
You can change Portfolio layout with the following classes:
– ct-portfolio-container
——– ct-portfolio-masonry
————— none – you don’t have to add “masonry” class at all
————— ct-portfolio-masonry–col2
————— ct-portfolio-masonry–col3
————— ct-portfolio-masonry–col4
Remember to include the following script on your portfolio page:
|
1 2 3 |
<script src="assets/js/portfolio/jquery.isotope.min.js"></script> <script src="assets/js/portfolio/imagesloaded.js"></script> <script src="assets/js/portfolio/init.js"></script> |
Was this article helpful ?
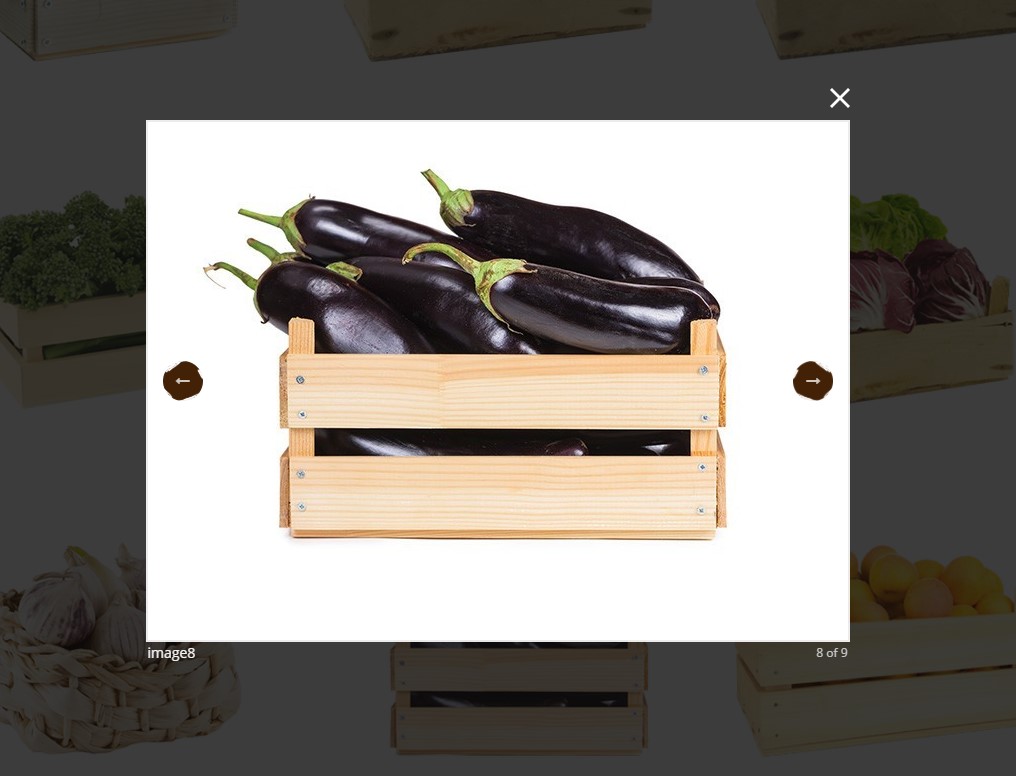
Magnific Popup
If you want to add Magnific Popup effect to your image, you need to wrap image element in link with proper classes, like the following:
|
1 2 3 |
<a class="ct-js-magnificPopupGroup" href="assets/images/demo-content/galleryitem1a.jpg" title="image1"> <img src="assets/images/demo-content/galleryitem1.png" alt=""/> </a> |
And include with HTML page the following script:
|
1 |
<script src="assets/js/magnific-popup/jquery.magnific-popup.min.js"></script> |
Was this article helpful ?
Modal
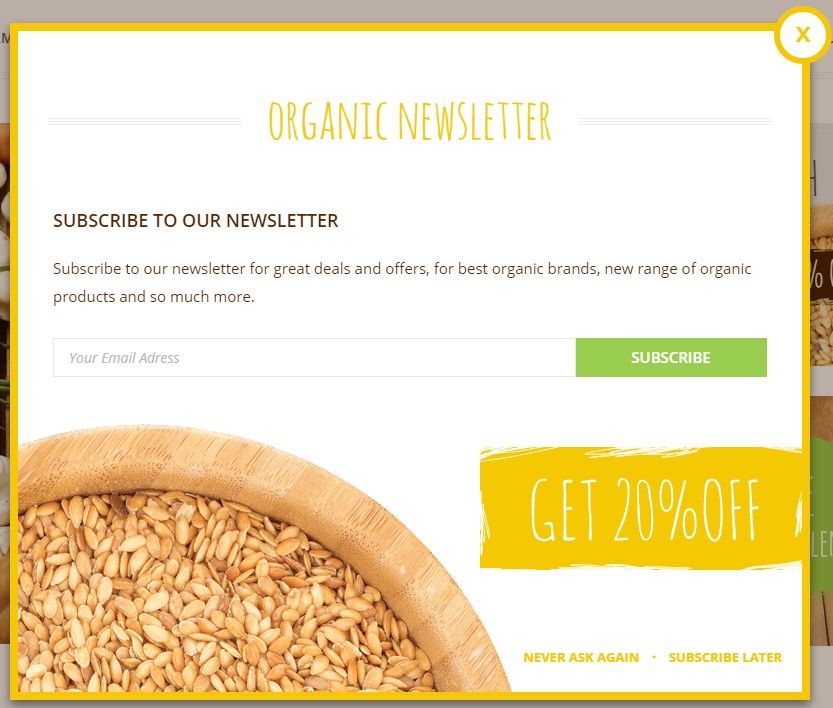
Create popup boxes with the following HTML markup:
|
1 2 3 4 5 6 7 8 9 10 11 12 13 14 15 16 17 18 19 20 21 22 23 24 25 26 27 28 29 30 31 32 33 34 |
<div id="popup" data-toggle="modal" data-target="#modal1"></div> <!-- Modal --> <div class="modal fade ct-modal" id="modal1" tabindex="-1" role="dialog" data-bg-image="assets/images/demo-content/image2a.png"> <div class="modal-dialog ct-modalDialog"> <div class="modal-content ct-modalContent"> <div class="modal-header ct-modalHeader"> <button type="button" class="close" data-dismiss="modal" aria-label="Close"><span aria-hidden="true">x</span></button> [title] </div> <div class="modal-body ct-modalBody"> <div class="ct-modalBody-header"> [content] </div> <div class="ct-modalBody-content"> [content] </div> </div> <div class="modal-footer ct-modalFooter" data-discount-image="assets/images/demo-content/discount.png"> [content] </div> </div> </div> </div> |
Was this article helpful ?
Heading
Every section can start with heading, created with the following HTML:
|
1 2 3 4 5 6 7 |
<h3 class="ct-headline text-center"> <span class="ct-headline-container ct-u-colorMotive"> <span class="ct-headline-line ct-headline-line--left"></span> [text] <span class="ct-headline-line ct-headline-line--right"></span> </span> </h3> |
You can change heading alignment without using CSS styles, just add one of the following classes to HTML markup:
– ct-headline
— text-center
— text-left
— text-right
Was this article helpful ?
Blockquote
Do you want to your motto or favourite quote?
It’s simple just use the following HTML with your custom text:
|
1 2 3 4 5 6 7 |
<div class="ct-blockquote"> <blockquote> [content] </blockquote> </div> |
Was this article helpful ?
Divider
Organize your page content with the simple divider:
|
1 |
<div class="ct-divider ct-divider--big"></div> |
You can select if you want to use big or small divider by editing class name in HTML markup:
- ct-divider–small
- ct-divider–big
Was this article helpful ?
Buttons
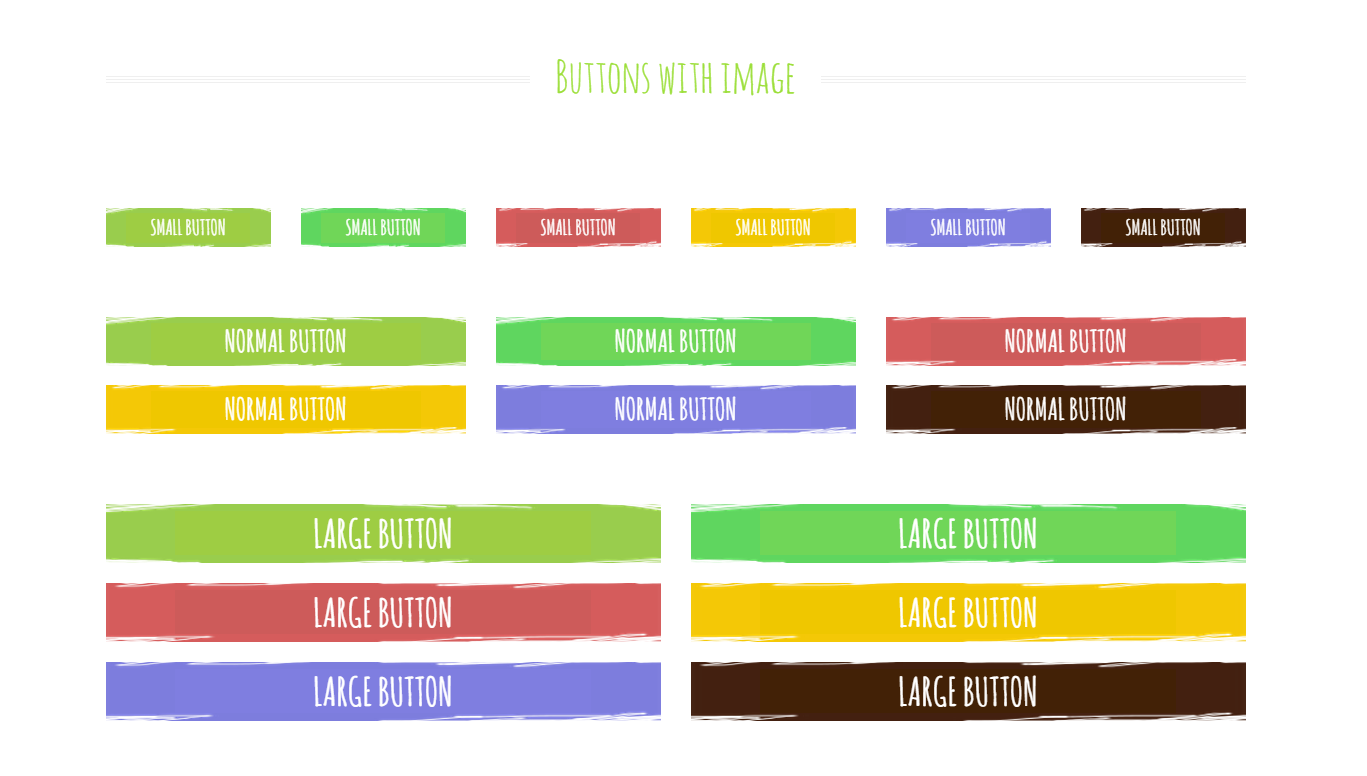
Check all of available buttons on our demo page
Below you will find button HTML markup:
|
1 |
<a href="#" class="btn btn-success btn-block ct-btn-default"><span>Normal Button</span></a> |
You can edit button size with default bootstrap sizing – here you will find more information.
There are also three button types, which come with the Farm Fresh. They can be also selected with CSS classes:
- ct-btn-link
- ct-btn-default
- ct-btn-image
Was this article helpful ?
Javascript
All javascripts are placed in folder /js. In main.js file we implement all functions calls.
This theme uses following Javascript scripts:
- chart.min
- jquery.mb-comingsoon.min
- jquery.countTo
- jquery.stellar.min
- gmap3.min
- headroom http://wicky.nillia.ms/headroom.js/
- jQuery.headroom
- jquery.magnific-popup.min
- jquery.pagescroller.lite
- imagesloaded
- jquery.isotope.min
- slick.min http://kenwheeler.github.io/slick/
jquery.appear
This plugin call function when element appear in viewport. This is used in custom animation, progress bars, counter timer.
Documentation: https://github.com/bas2k/jquery.appear/
|
1 2 3 4 5 6 7 8 9 10 11 12 13 |
if (jQuery().appear) { if (device.mobile()) { // disable animation on mobile jQuery("body").removeClass("withAnimation"); } else { jQuery('.withAnimation .animated').appear(function () { jQuery(this).each(function () { jQuery(this).addClass('activate'); jQuery(this).addClass($(this).data('fx')); }); }, {accY: -150}); } } |
Was this article helpful ?
Charts
There are several types of charts, which you can use to display your statistics data.
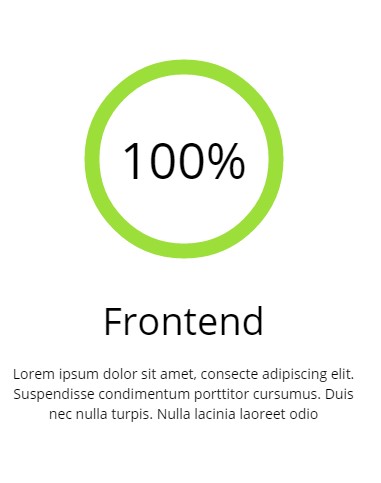
Circle
Values and colors of Circle Chart can be edited with data-attributes in HTML code:
|
1 2 3 4 5 6 7 8 9 10 11 12 13 14 15 16 17 18 |
<div class="ct-graphBox ct-graphBox--default"> <div class="ct-graphBox-graph"> <canvas width="150" height="150" class="ct-js-pieChart" data-ct-percentage="95" data-ct-middleSpace="85" data-ct-secondColor="#eeeeee" data-ct-firstColor="#9cdf3a"></canvas> <span class="ct-graphBox-graphPercentage">95%</span> </div> <div class="ct-graphBox-content"> <h4 class="ct-graphBox-title"> Graphic Design </h4> <p> Lorem ipsum dolor sit amet, consecte adipiscing elit. Suspendisse condimentum porttitor cursumus. Duis nec nulla turpis. Nulla lacinia laoreet odio </p> </div> </div> |
Don’t forget to use also the following script for this:
|
1 2 3 4 5 6 7 8 9 10 11 12 13 14 15 16 17 18 19 20 21 22 23 24 25 26 27 28 29 30 31 32 |
<script src="assets/js/charts/Chart.min.js"></script> <script> $('.ct-js-pieChart').each(function () { var $this = $(this); var $color = validatedata($(this).attr('data-ct-firstColor'), "#2b8be9"); var $color2 = validatedata($(this).attr('data-ct-secondColor'), "#eeeeee"); var $cutout = validatedata($(this).attr('data-ct-middleSpace'), 90); var $stroke = validatedata($(this).attr('data-ct-showStroke'), false); var $margin = validatedata($(this).attr('data-ct-margin'), false); $(this).parent().css('margin-left',$margin + 'px'); $(this).parent().css('margin-right',$margin + 'px'); var options = { responsive: true, percentageInnerCutout: $cutout, segmentShowStroke: $stroke, showTooltips: false } var doughnutData = [{ value: parseInt($this.attr('data-ct-percentage'), 10), color: $color, label: false }, { value: parseInt(100 - $this.attr('data-ct-percentage'), 10), color: $color2 }]; if (($().appear) && ($("body").hasClass("cssAnimate"))) { $('.ct-js-pieChart').appear(function () { var ctx = $this[0].getContext("2d"); window.myDoughnut = new Chart(ctx).Doughnut(doughnutData, options); }); } else { var ctx = $this[0].getContext("2d"); window.myDoughnut = new Chart(ctx).Doughnut(doughnutData, options); } }) </script> |
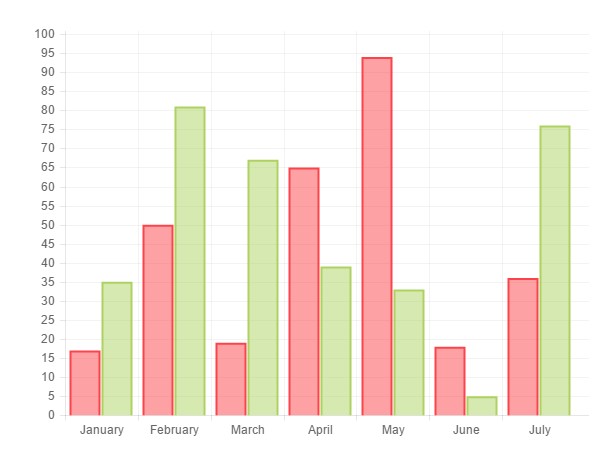
Bar chart
Please use simple HTML markup for bar chart:
|
1 2 3 |
<div> <canvas id="barchart" height="450" width="600"></canvas> </div> |
You can modify all settings via the following Javascript:
|
1 2 3 4 5 6 7 8 9 10 11 12 13 14 15 16 17 18 19 20 21 22 23 24 25 26 27 28 29 30 31 32 33 34 35 |
<script src="assets/js/charts/Chart.min.js"></script> <script> var randomScalingFactor = function () { return Math.round(Math.random() * 100) }; var barChartData = { labels: ["January", "February", "March", "April", "May", "June", "July"], datasets: [ { fillColor: "rgba(252,67,73,0.5)", strokeColor: "#fc4349", highlightFill: "#fc4349", highlightStroke: "#fc4349", data: [randomScalingFactor(), randomScalingFactor(), randomScalingFactor(), randomScalingFactor(), randomScalingFactor(), randomScalingFactor(), randomScalingFactor()] }, { fillColor: "rgba(173,210,96,0.5)", strokeColor: "#add260", highlightFill: "#add260", highlightStroke: "#add260", data: [randomScalingFactor(), randomScalingFactor(), randomScalingFactor(), randomScalingFactor(), randomScalingFactor(), randomScalingFactor(), randomScalingFactor()] } ] } window.onload = function () { var ctx1 = document.getElementById("barchart").getContext("2d"); window.myBar = new Chart(ctx1).Bar(barChartData, { responsive: true }); } </script> |
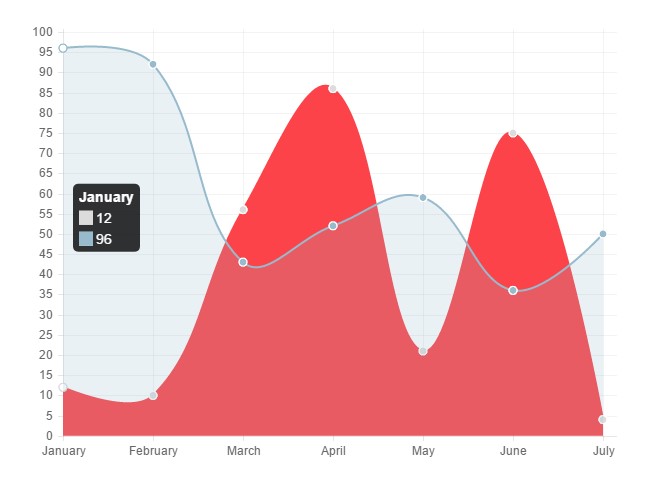
Line Chart
Analogously to Bart charts, you can use Line chart with simple HTML markup:
|
1 |
<canvas id="linechart" height="450" width="600"></canvas> |
And edit all parameters with the following Javascript:
|
1 2 3 4 5 6 7 8 9 10 11 12 13 14 15 16 17 18 19 20 21 22 23 24 25 26 27 28 29 30 31 32 33 34 35 36 37 38 39 40 41 42 43 |
<script src="assets/js/charts/Chart.min.js"></script> <script> var randomScalingFactor = function () { return Math.round(Math.random() * 100) }; var lineChartData = { labels: ["January", "February", "March", "April", "May", "June", "July"], datasets: [ { label: "My First dataset", fillColor: "#fc4349", strokeColor: "#fc4349", highlightFill: "#fc4349", highlightStroke: "#fc4349", pointColor: "rgba(220,220,220,1)", pointStrokeColor: "#fff", pointHighlightFill: "#fff", pointHighlightStroke: "rgba(220,220,220,1)", data: [randomScalingFactor(), randomScalingFactor(), randomScalingFactor(), randomScalingFactor(), randomScalingFactor(), randomScalingFactor(), randomScalingFactor()] }, { label: "My Second dataset", fillColor: "rgba(151,187,205,0.2)", strokeColor: "rgba(151,187,205,1)", pointColor: "rgba(151,187,205,1)", pointStrokeColor: "#fff", pointHighlightFill: "#fff", pointHighlightStroke: "rgba(151,187,205,1)", data: [randomScalingFactor(), randomScalingFactor(), randomScalingFactor(), randomScalingFactor(), randomScalingFactor(), randomScalingFactor(), randomScalingFactor()] } ] } window.onload = function () { var ctx1 = document.getElementById("linechart").getContext("2d"); window.myLine = new Chart(ctx1).Line(lineChartData, { responsive: true }); } </script> |
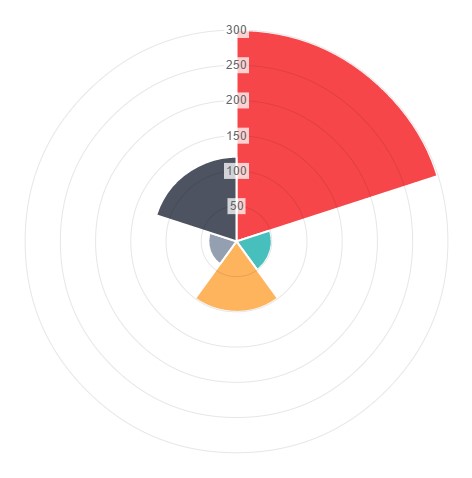
Polar Chart
Insert the polar chart with the following HTML markup:
|
1 |
<canvas id="polararea" height="450" width="600"></canvas> |
Polar chart can be customized with the following Javascript:
|
1 2 3 4 5 6 7 8 9 10 11 12 13 14 15 16 17 18 19 20 21 22 23 24 25 26 27 28 29 30 31 32 33 34 35 36 37 38 39 40 41 42 43 44 45 46 47 48 |
<script src="assets/js/charts/Chart.min.js"></script> <script> var randomScalingFactor = function () { return Math.round(Math.random() * 100) }; var polarData = [ { value: 300, color: "#F7464A", highlight: "#FF5A5E", label: "Red" }, { value: 50, color: "#46BFBD", highlight: "#5AD3D1", label: "Green" }, { value: 100, color: "#FDB45C", highlight: "#FFC870", label: "Yellow" }, { value: 40, color: "#949FB1", highlight: "#A8B3C5", label: "Grey" }, { value: 120, color: "#4D5360", highlight: "#616774", label: "Dark Grey" } ]; window.onload = function () { var ctx1 = document.getElementById("polararea").getContext("2d"); window.myPolarArea = new Chart(ctx1).PolarArea(polarData, { responsive: true }); } </script> |
Was this article helpful ?
Counters
Count to
Add your custom values with the data-attributes in the following HTML markup:
|
1 2 3 4 5 6 7 8 9 10 11 12 13 |
<div class="ct-counter"> <div class="ct-counter-icon"> <i class="fa fa-desktop"></i> </div> <span class="ct-counter-number ct-js-counter" data-ct-to="459.984" data-ct-speed="1500" data-ct-decimals="3"> 0 </span> <div class="ct-counter-text"> <h5><span>Pixels Crafted So Far</span></h5> </div> </div> |
Available data-attributes to edit are:
- data-ct-to,
- data-ct-from,
- data-ct-speed,
- data-ct-decimals
For proper counter work you need to include the following script:
|
1 |
<script src="assets/js/counter/jquery.countTo.js"></script> |
Comming Soon
The date and speed can be edited in the following Javascript:
|
1 2 3 4 |
<script src="assets/js/counter/jquery.mb-comingsoon.min.js"></script> <script type="text/javascript"> $('#counter').mbComingsoon({expiryDate: new Date(2015, 3, 14, 0, 0), speed: 950}); </script> |
Full HTML markup:
|
1 |
<div class="row centered text-center ct-u-paddingBoth30" id="counter"></div> |
Was this article helpful ?
Progress bar
Indicate progress with Progress Bars!
You can edit bars values and colors with data-attributes used with the following HTML markup:
|
1 2 3 4 5 6 7 8 9 10 11 12 13 14 |
<div class="ct-progressBar"> <div class="ct-progressBar-content"> <div class="progress"> <div class="progress-bar animating" role="progressbar" data-percentage="51" aria-valuenow="90" aria-valuemin="0" aria-valuemax="100"> <span>WebDesign</span> <div class="ct-progressBar-percent"> <span>51%</span> </div> </div> </div> </div> </div> |
The following script is responsible for proper work of Progress Bars:
|
1 2 3 4 5 6 7 8 9 10 11 12 13 14 15 16 17 18 19 20 21 22 23 24 25 26 27 |
if (jQuery().appear && jQuery("body").hasClass("cssAnimate")) { jQuery('.progress').appear(function () { var $this = jQuery(this); $this.each(function () { var $innerbar = $this.find(".progress-bar"); var percentage = $innerbar.attr("data-percentage"); $innerbar.addClass("animating").css("width", percentage + "%"); $innerbar.on('transitionend webkitTransitionEnd oTransitionEnd otransitionend MSTransitionEnd', function () { $innerbar.find(".pull-right").fadeIn(900); }); }); }, {accY: -100}); } else { jQuery('.progress').each(function () { var $this = jQuery(this); var $innerbar = $this.find(".progress-bar"); var percentage = $innerbar.attr("data-percentage"); $innerbar.addClass("animating").css("width", percentage + "%"); $innerbar.on('transitionend webkitTransitionEnd oTransitionEnd otransitionend MSTransitionEnd', function () { $innerbar.find(".pull-right").fadeIn(900); }); }); } |
Was this article helpful ?
Configure your twiiter credentials in assets/twitter/config.php. Here you will find information how to generate required Keys and Tokens.
Once your config.php is setup you can embed your tweets with the following HTML markup:
|
1 |
<div class="ct-js-twitter ct-twitter" data-snap-ignore="true"></div> |
You need to embed also twitter script on page with Twitter:
|
1 |
<script src="assets/twitter/js/jquery.tweet.js"></script> |
Notice: live Twitter feed requires enabled PHP, so it won’t be displayed correctly on your localhost nor on servers, which are not supporting PHP.
Was this article helpful ?
Sources & Credits
The following sources and files have been used to build up this theme
- Twitter Bootstrap – http://twitter.github.com/bootstrap/
- jQuery – http://www.jquery.com
Was this article helpful ?


