Invious – Responsive HTML5 Template
Thank you for purchasing this theme. If you have any questions that are beyond the scope of this help file, please feel free to start new ticket on this page. Thanks so much!
Scope of free support
We can help you with:
- Responding to questions or problems regarding the item and its features
- Fixing any discovered item’s bugs
- Providing updates to ensure compatibility with new software versions
Was this article helpful ?
HTML Structure
This theme is built upon bootstrap framework and is fully responsive. It adapts to window resolution and looks good on all devices including iPad and iPhone.
See for yourself (resize your browser).
If you would like to read more
about bootstrap framework click here :
Grid System and Single row structure
The default Bootstrap grid system utilizes 12 columns. It’s responsive grid and adapts to viewport. Below 767px viewports, the columns become fluid and stack vertically. The fluid grid system uses percents instead of pixels for column widths. Each row always include 12 columns (for example col-md-8 + col-md-4 = col-md-12).
Bootstrap documentation: here
Basic grid HTML:
|
1 2 3 4 5 6 7 8 9 10 11 12 13 14 15 16 17 18 19 20 21 22 23 24 25 26 27 |
<div class="row"> <div class="col-md-1">.col-md-1</div> <div class="col-md-1">.col-md-1</div> <div class="col-md-1">.col-md-1</div> <div class="col-md-1">.col-md-1</div> <div class="col-md-1">.col-md-1</div> <div class="col-md-1">.col-md-1</div> <div class="col-md-1">.col-md-1</div> <div class="col-md-1">.col-md-1</div> <div class="col-md-1">.col-md-1</div> <div class="col-md-1">.col-md-1</div> <div class="col-md-1">.col-md-1</div> <div class="col-md-1">.col-md-1</div> </div> <div class="row"> <div class="col-md-8">.col-md-8</div> <div class="col-md-4">.col-md-4</div> </div> <div class="row"> <div class="col-md-4">.col-md-4</div> <div class="col-md-4">.col-md-4</div> <div class="col-md-4">.col-md-4</div> </div> <div class="row"> <div class="col-md-6">.col-md-6</div> <div class="col-md-6">.col-md-6</div> </div> |
Page structure
Below you will find default page structure :
|
1 2 3 4 5 6 7 8 9 10 11 12 13 14 15 16 17 18 19 20 21 22 23 24 25 26 27 28 29 30 31 32 33 34 35 36 |
<!DOCTYPE html> <html> <head> [css] </head> <body> [header] [main menu] <!-- main container --> <div id="wrapper"> [component 1] <!-- fullwidth element --> </div> [fullwidth parallax] <div class="container"> <!-- / fullwidth element --> [component 6] </div> <!-- / main container --> [footer] [javascripts] </body> </html> |
Was this article helpful ?
CSS Files and Structure
If you would like to edit the color, font, or style of any elements, you would do the following:
|
1 |
#primaryContent a {color: #someColor;} |
If you find that your new style is not overriding, it is most likely because of a specificity problem. Scroll down in your CSS file and make sure that there isn’t a similar style that has more weight.
I.E.
|
1 |
#wrap #primaryContent a {color: #someColor;} |
So, to ensure that your new styles are applied, make sure that they carry enough “weight” and that there isn’t a style lower in the CSS file that is being applied after yours.
Colors
The theme includes a css file wich you can use to edit the colors.
You just need to add the corresponding CSS file to the head of the page like this:
|
1 2 3 4 5 |
<head> (..) <link rel="stylesheet" type="text/css" href="css/motive.css"> (..) </head> |
Main Menu structure
Just change brand name, upload your logo to images/content/ folder and you’re ready to go!
|
1 2 3 4 5 6 7 8 9 10 11 12 13 14 15 16 17 18 19 20 21 22 23 24 25 26 27 28 29 30 31 32 33 |
<nav class="navbar ct-navbar navbar-default yamm ct-navbar--fadeIn" role="navigation"> <div class="container"> <div class="ct-navbarContainer"> <div class="navbar-header"> <a class="navbar-brand" href="index.html"><img id="ct-js-logo" src="assets/images/demo-content/logo.png" alt="FISHtank"></a> <!-- + --> </div> <ul class="nav navbar-nav"> <li role="presentation" class="dropdown"> <a class="dropdown-toggle" href="about.html" role="button" aria-expanded="true"> Home <span class="caret"></span> </a> <ul class="dropdown-menu"> <li> <div class="yamm-content"> </div> </li> </ul> </li> <li><a href="contact.html">Contact Us</a></li> </ul> <ul class="nav navbar-nav yamm ct-navbar--right"> <li><a href="login.html">My Account</a></li> </ul> </div> </div> </nav> |
In order to create mega menus read the documentation here:
Icons
We’ve included 360+ font icons.
Awesome Icons – http://fontawesome.io/icons/
HTML markup:
|
1 2 |
<!-- Awesome Icons --> <i class="fa fa-cog"></i> |
CSS Files & Structure
We’ve included 2 files.
bootstrap.css contains Bootstrap 3 Library.
style.css file contains general styles.
1. Variables
2. Bootstrap
3. Mixins
4. Typography
5. Button hover effects
6. animate.css
7. Yamm
8. Image hover effects
9. Counter
10. Owl
11. Media section
12. Buttons
13. Morph buttons
14. Divided
15. Menu
16. Social icons
17. Forms
18. Widget
19. Icon box
20. Portfolio
21. Blockquote
22. Person Box
23. Progress Bar
24. Breadcrumbs
25. Call to action
26. Color Box
27. Media object
28. Blog
29. Blog sidebar
30. Blog Post
31. Pagination
32. List switcher
33. Comment
34. Contact
35. Error Page
36. Testimonals
37. Tables
38. Pricing tables
39. Toggables
40. Twitter
41. Footer
42. Maps
43. Utilities
44. Base Style
45. To Top arrow
46. Intro Effect
47. Magnific
Utilities
Utility classes are low-level structural and positional traits. Utilities can be applied directly to any element, multiple utilities can be used tohether and utilities can be used alongsie component classes.
Utilities are intended for frequently used CSS properties and patterns, like: floats, containing floats, vertical alignemnt, text tryncation. Relying on utilities can help to reduce repetition and provide consistend implementations.
- Invious uses utilities for the following categories:
- Typography
- Display Types
- Paddings
- Margins
- Line height
- Borders
- Colors
- Transform
- Section elements
Was this article helpful ?
Javascript
All javascripts are placed in folder /js. In main.js file we implement all functions calls.
This theme uses following Javascript files:
- jquery-1.11.2
- jquery.easing.1.3
- jquery.browser
- jquery.appear
- bootstrap
- device
- classie
- contact-form
- jquery.tweet
- jquery.stellar/ct-mediaSection
- uiMorphingButton_fixed (http://tympanus.net/codrops/2014/05/12/morphing-buttons-concept/)
- snap (https://github.com/jakiestfu/Snap.js/)
- progresBar
- headroom (http://wicky.nillia.ms/headroom.js/)
- owl.carousel (http://owlgraphic.com/owlcarousel/#how-to)
- jquery.isotope
- jquery.magnific-popup
- gmap3
- Chart
- jquery.countTo
- jquery.mb-comingsoon
- progressicons
Google Map (GMAP3 Plugin)
This is google map with custom marker, you can define couple parameters:
- data-location – address to show
- data-height – map height (if undefined height will be 220px)
- data-offset – by how many map should be repositioned from marker center point (default -30)
It uses gmap3 plugin.
Documentation: here
HTML Markup:
|
1 |
<div class="ct-googleMap" data-location="Narbutta 24, Warsaw" data-zoom="15" data-height="500"></div> |
All javascript code can be found in js/main.js file.
jquery.appear
This plugin call function when element appear in viewport. This is used in custom animation, progress bars, counter timer.
Documentation: https://github.com/bas2k/jquery.appear/
|
1 2 3 4 5 6 7 8 9 10 11 12 13 |
if (jQuery().appear) { if (device.mobile()) { // disable animation on mobile jQuery("body").removeClass("withAnimation"); } else { jQuery('.withAnimation .animated').appear(function () { jQuery(this).each(function () { jQuery(this).addClass('activate'); jQuery(this).addClass($(this).data('fx')); }); }, {accY: -150}); } } |
Was this article helpful ?
Slider
There are three available types of slider. You can use it with the following variations:
- ct-owl–type1
- ct-owl–type2
- ct-owl–type3
Use the simple HTML markup:
|
1 2 3 4 5 6 7 8 9 10 11 12 13 |
div class="ct-js-owl ct-owl--type1" data-items="1" data-autoPlay="true" data-pagination="false" data-navigation="true" data-autoHeight="true"> <div class="item"> [content] </div> <div class="item"> [content] </div> </div> |
Don’t forget to include on the page the following javascripts:
|
1 2 |
<script src="assets/js/owl.carousel/owl.carousel.min.js"></script> <script src="assets/js/owl.carousel/init.js"></script> |
Was this article helpful ?
Toggleable
TABS
|
1 2 3 4 5 6 7 8 9 10 11 12 13 14 15 16 17 18 19 20 21 22 23 24 25 26 27 28 |
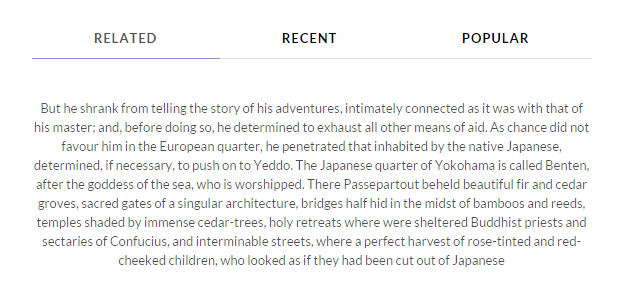
<div class="ct-tab"> <div class="tabs-container ct-tab-container"> <ul class="nav nav-tabs nav-justified ct-tab-navbar" role="tablist" id="myTab"> <li class="active"><a href="#related" role="tab" data-toggle="tab">Related</a></li> <li><a href="#recent" role="tab" data-toggle="tab">Recent</a></li> <li><a href="#popular" role="tab" data-toggle="tab">Popular</a></li> </ul> <div class="tab-content ct-tab-content"> <div class="tab-pane active" id="related"> [content] </div> <div class="tab-pane" id="recent"> [content] </div> <div class="tab-pane" id="popular"> [content] </div> </div> </div> </div> |
ACCORDION
|
1 2 3 4 5 6 7 8 9 10 11 12 13 14 15 16 17 18 19 20 21 22 23 24 25 26 27 28 29 30 31 32 33 34 35 36 37 38 39 40 41 42 43 44 45 46 47 48 49 50 51 52 53 54 55 56 |
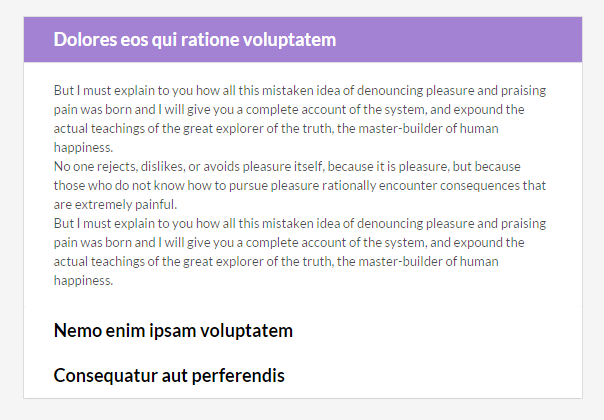
<div class="panel-group ct-accordion" id="accordion"> <div class="panel panel-default ct-accordion-panel"> <div class="panel-heading ct-accordion-heading"> <h4 class="panel-title ct-accordion-title"> <a data-toggle="collapse" data-parent="#accordion" href="#collapseOne"> [heading] </a> </h4> </div> <div id="collapseOne" class="panel-collapse collapse in"> <div class="panel-body ct-accordion-body"> [content] </div> </div> </div> <div class="panel panel-default ct-accordion-panel"> <div class="panel-heading ct-accordion-heading"> <h4 class="panel-title ct-accordion-title"> <a data-toggle="collapse" data-parent="#accordion" href="#collapseTwo" class="collapsed"> [heading] </a> </h4> </div> <div id="collapseTwo" class="panel-collapse collapse "> <div class="panel-body ct-accordion-body"> [content] </div> </div> </div> <div class="panel panel-default ct-accordion-panel"> <div class="panel-heading ct-accordion-heading"> <h4 class="panel-title ct-accordion-title"> <a data-toggle="collapse" data-parent="#accordion" href="#collapseThree" class="collapsed"> [heading] </a> </h4> </div> <div id="collapseThree" class="panel-collapse collapse"> <div class="panel-body ct-accordion-body"> [content] </div> </div> </div> </div> |
Was this article helpful ?
Progress bar
SIMPLE
|
1 2 3 4 5 6 7 8 9 10 11 12 13 14 15 |
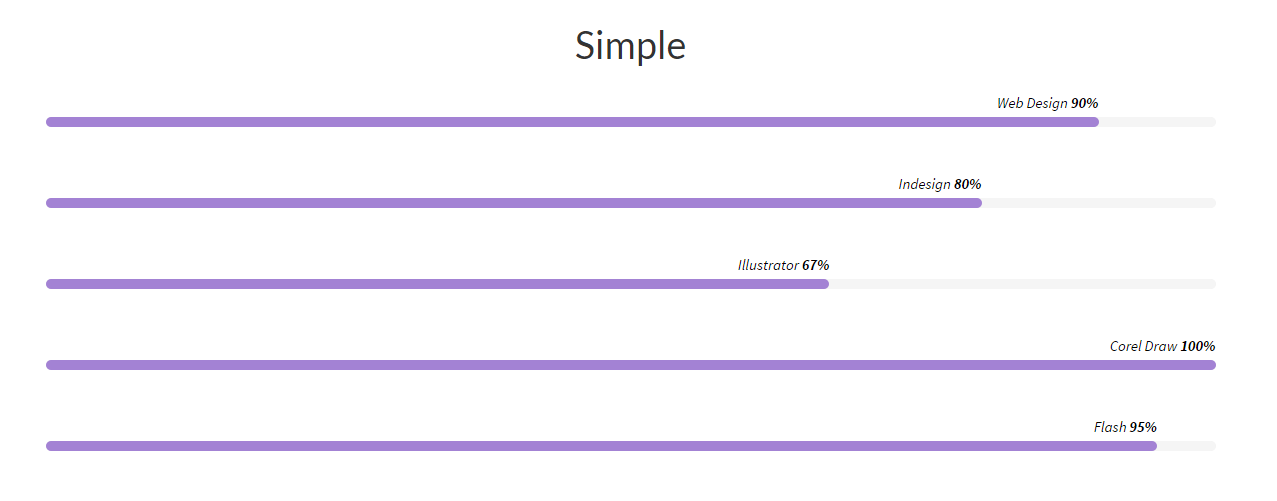
<div class="ct-progressBar"> <header class="ct-u-hideText"> <h4>Progress Bar</h4> </header> <div class="ct-progressBar-content"> <div class="progress"> <div class="progress-bar animating" role="progressbar" data-percentage="90" aria-valuenow="90" aria-valuemin="0" aria-valuemax="100"> <span>Web Design <strong>90%</strong></span> </div> </div> </div> </div> |
EXTENDED
|
1 2 3 4 5 6 7 8 9 10 11 12 13 14 15 16 |
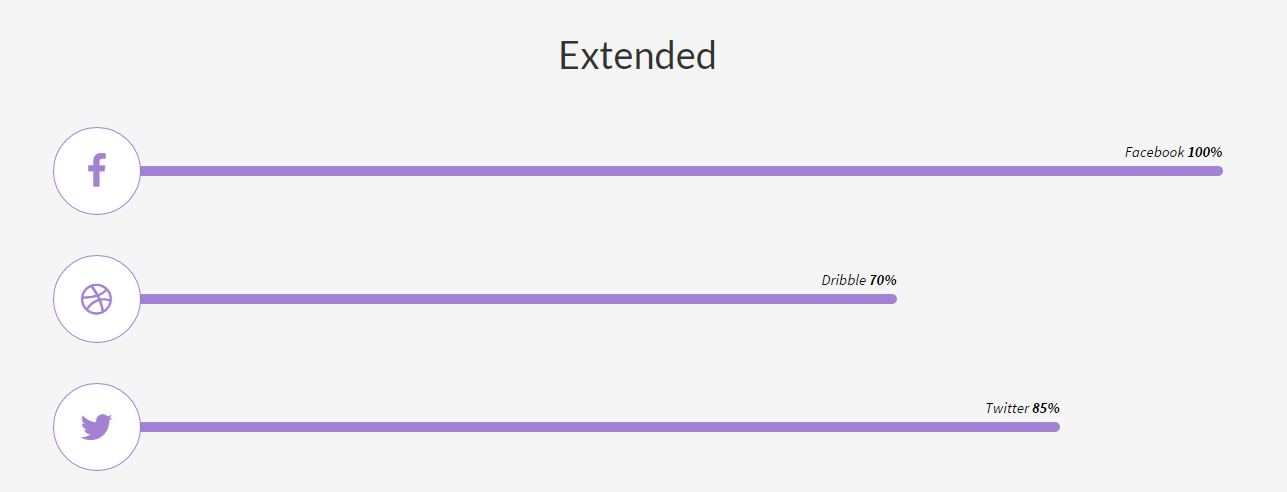
<div class="ct-progressBar"> <div class="ct-progressBar-content ct-u-paddingBottom40"> <div class="media"> <div class="media-left"> <a href="#" class="ct-progressBar-icon ct-hover--outlineOut"><i class="fa fa-facebook"></i></a> </div> <div class="media-body media-middle ct-u-width100per"> <div class="progress"> <div class="progress-bar animating" role="progressbar" data-percentage="100" aria-valuenow="100" aria-valuemin="0" aria-valuemax="100"> <span>Facebook <strong>100%</strong></span> </div> </div> </div> </div> </div> </div> |
Don’t forget about javascript:
|
1 |
<script src="assets/js/progresBar/init.js"></script> |
Was this article helpful ?
Progress icons
HTML markup:
|
1 2 3 |
<div class="progress-icons" data-font-size="90" data-icon-color="#F00A0A" data-active="11" data-total="15" data-icon="fa-male" data-delay="200"> </div> |
Don’t forget to include the following javascript file:
|
1 |
<script src="assets/js/progressicons/init.js"></script> |
Was this article helpful ?
Charts
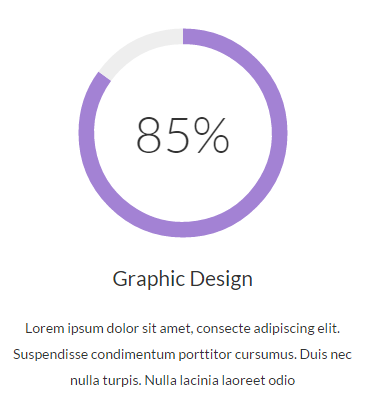
Circle
HTML markup:
|
1 2 3 4 5 6 7 8 9 10 11 12 13 14 15 16 17 18 |
<div class="ct-graphBox ct-graphBox--default"> <div class="ct-graphBox-graph"> <canvas width="150" height="150" class="ct-js-pieChart" data-ct-percentage="85" data-ct-middleSpace="85" data-ct-secondColor="#eeeeee" data-ct-firstColor="#a382d4"></canvas> <span class="ct-graphBox-graphPercentage">85%</span> </div> <div class="ct-graphBox-content"> <h4 class="ct-graphBox-title"> Graphic Design </h4> <p> Lorem ipsum dolor sit amet, consecte adipiscing elit. Suspendisse condimentum porttitor cursumus. Duis nec nulla turpis. Nulla lacinia laoreet odio </p> </div> </div> |
Script:
|
1 2 |
<script src="assets/js/charts/Chart.min.js"></script> <script src="assets/js/charts/init.js"></script> |
Bar
HTML markup:
|
1 |
<canvas id="barchart" height="450" width="600"></canvas> |
Script:
|
1 2 3 4 5 6 7 8 9 10 11 12 13 14 15 16 17 18 19 20 21 22 23 24 25 26 27 28 29 30 31 32 33 34 35 |
<script src="assets/js/charts/Chart.min.js"></script> <script src="assets/js/charts/init.js"></script> <script> var randomScalingFactor = function () { return Math.round(Math.random() * 100) }; var barChartData = { labels: ["January", "February", "March", "April", "May", "June", "July"], datasets: [ { fillColor: "rgba(252,67,73,0.5)", strokeColor: "#fc4349", highlightFill: "#fc4349", highlightStroke: "#fc4349", data: [randomScalingFactor(), randomScalingFactor(), randomScalingFactor(), randomScalingFactor(), randomScalingFactor(), randomScalingFactor(), randomScalingFactor()] }, { fillColor: "rgba(173,210,96,0.5)", strokeColor: "#add260", highlightFill: "#add260", highlightStroke: "#add260", data: [randomScalingFactor(), randomScalingFactor(), randomScalingFactor(), randomScalingFactor(), randomScalingFactor(), randomScalingFactor(), randomScalingFactor()] } ] } window.onload = function () { var ctx1 = document.getElementById("barchart").getContext("2d"); window.myBar = new Chart(ctx1).Bar(barChartData, { responsive: true } </script> |
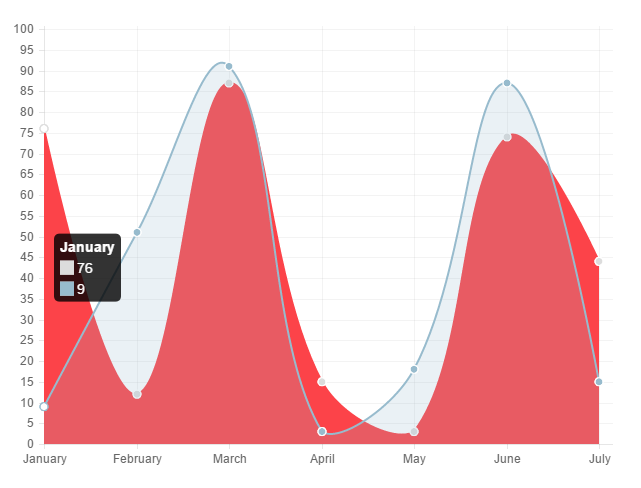
Line
HTML markup:
|
1 |
<canvas id="polararea" height="450" width="600"></canvas> |
Edit all values with Javascript:
|
1 2 3 4 5 6 7 8 9 10 11 12 13 14 15 16 17 18 19 20 21 22 23 24 25 26 27 28 29 30 31 32 33 34 35 36 37 38 39 40 41 42 43 44 |
<script src="assets/js/charts/Chart.min.js"></script> <script src="assets/js/charts/init.js"></script> <script> var randomScalingFactor = function () { return Math.round(Math.random() * 100) }; var lineChartData = { labels: ["January", "February", "March", "April", "May", "June", "July"], datasets: [ { label: "My First dataset", fillColor: "#fc4349", strokeColor: "#fc4349", highlightFill: "#fc4349", highlightStroke: "#fc4349", pointColor: "rgba(220,220,220,1)", pointStrokeColor: "#fff", pointHighlightFill: "#fff", pointHighlightStroke: "rgba(220,220,220,1)", data: [randomScalingFactor(), randomScalingFactor(), randomScalingFactor(), randomScalingFactor(), randomScalingFactor(), randomScalingFactor(), randomScalingFactor()] }, { label: "My Second dataset", fillColor: "rgba(151,187,205,0.2)", strokeColor: "rgba(151,187,205,1)", pointColor: "rgba(151,187,205,1)", pointStrokeColor: "#fff", pointHighlightFill: "#fff", pointHighlightStroke: "rgba(151,187,205,1)", data: [randomScalingFactor(), randomScalingFactor(), randomScalingFactor(), randomScalingFactor(), randomScalingFactor(), randomScalingFactor(), randomScalingFactor()] } ] } window.onload = function () { var ctx2 = document.getElementById("linechart").getContext("2d"); window.myLine = new Chart(ctx2).Line(lineChartData, { responsive: true }); } </script> |
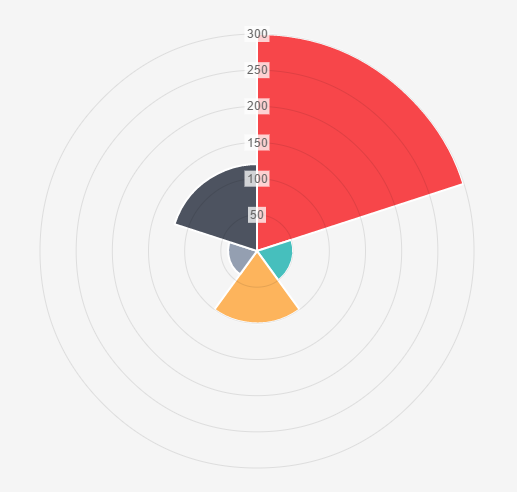
Polar
HTML markup:
|
1 |
<canvas id="polararea" height="450" width="600"></canvas> |
Script:
|
1 2 3 4 5 6 7 8 9 10 11 12 13 14 15 16 17 18 19 20 21 22 23 24 25 26 27 28 29 30 31 32 33 34 35 36 37 38 39 40 41 42 43 44 45 46 47 48 49 50 |
<script src="assets/js/charts/Chart.min.js"></script> <script src="assets/js/charts/init.js"></script> <script> var randomScalingFactor = function () { return Math.round(Math.random() * 100) }; var polarData = [ { value: 300, color: "#F7464A", highlight: "#FF5A5E", label: "Red" }, { value: 50, color: "#46BFBD", highlight: "#5AD3D1", label: "Green" }, { value: 100, color: "#FDB45C", highlight: "#FFC870", label: "Yellow" }, { value: 40, color: "#949FB1", highlight: "#A8B3C5", label: "Grey" }, { value: 120, color: "#4D5360", highlight: "#616774", label: "Dark Grey" } ]; window.onload = function () { var ctx3 = document.getElementById("polararea").getContext("2d"); window.myPolarArea = new Chart(ctx3).PolarArea(polarData, { responsive: true } </script> |
Was this article helpful ?
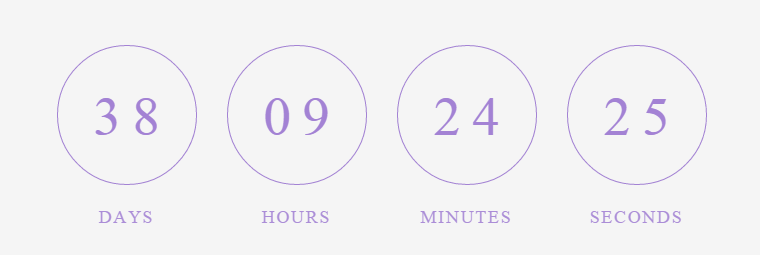
Coming Soon Counter
Your page is still under construction? Don’t worry! You can always keep visitors informed with Coming Soon Counter.
Use the following HTML markup:
|
1 |
<div class="row centered text-center ct-u-paddingBoth30" id="counter"></div> |
And define counter values in javascript:
|
1 2 3 4 5 6 7 8 |
<script src="assets/js/counter/jquery.countTo.js"></script> <script src="assets/js/counter/init.js"></script> <script src="assets/js/counter/jquery.mb-comingsoon.min.js"></script> <script type="text/javascript"> $('#counter').mbComingsoon({expiryDate: new Date(2015, 2, 24, 0, 0), speed: 950}); </script> |
Was this article helpful ?
Count To
Create awesome counters with simple HTML markup:
|
1 2 3 4 5 6 7 8 9 10 |
<div class="col-sm-3 ct-u-paddingTop30"> <div class="ct-counterBox"> <span class="ct-counterBox-number ct-js-counter" data-ct-to="48" data-ct-speed="5000"> 0 </span> <h5>Pizza's eaten</h5> </div> </div> |
Don’t forget to include the following javascript:
|
1 2 |
<script src="assets/js/counter/jquery.countTo.js"></script> <script src="assets/js/counter/init.js"></script> |
Was this article helpful ?
Navbar
|
1 2 3 4 5 6 7 8 9 10 11 12 13 14 15 16 17 18 19 20 21 22 23 24 25 26 27 28 29 30 31 32 33 34 35 36 37 38 39 40 41 42 43 44 45 46 47 48 49 50 51 52 53 |
<nav class="navbar ct-u-backgroundWhite " role="navigation"> <div class="ct-u-hideText"> <h2 class="ct-u-hideText">Main Menu</h2> </div> <div class="container-fluid navbar-menu"> <!-- Brand and toggle get grouped for better mobile display --> <div class="navbar-header"> [logo] </div> <!-- Collect the nav links, forms, and other content for toggling --> <div class="header-search pull-right"> <form class="form-inline" role="search"> <div class="input-group"> <input type="text" class="form-control search-input" placeholder="Search"> <span class="input-group-btn"> <button type="submit" class="btn btn-primary btn-search">Submit</button> </span> </div> </form> </div> <div class="collapse navbar-collapse"> <ul class="nav navbar-nav yamm list-unstyled ct-navbar--fadeIn"> <li class="dropdown"> [content] </li> <li class="dropdown yamm-fw"> <a href="features-grid.html">Features </a> <ul class="dropdown-menu"> <li class="yamm-inner"> <div class="yamm-content"> [content] </div> </li> </ul> </li> </ul> </div> <!-- /.navbar-collapse --> </div> <!-- /.container --> </nav> |
- ct-headroom–scrollUpMenu
- ct-headroom–scrollUpTopBar
- ct-headroom–scrollUpBoth
- ct-headroom–fixedTopBar
- ct-headroom–fixedMenu
- ct-headroom–fixedBoth
- ct-headroom–hideMenu
- ct-navbar–transparent
You can also use smaller navbar type by adding the following class to .navbar:
- navbar-makeSmaller
Was this article helpful ?
Breadcrumbs
Make your website navigation more efficient with our breadcrumbs.
Create breadcrumbs with simple HTML markup:
|
1 2 3 4 5 6 7 8 9 10 11 12 13 14 15 |
<section class="ct-breadcrumbs"> <div class="container"> <div> <div class="ct-breadcrumbs-pageTitle"> <h3><small>Progress Bar</small></h3> </div> <div class="ct-breadcrumbs-list"> <ul class="list-unstyled list-inline"> <li><a href="index.html">Features</a></li> <li>Progress Bar</li> </ul> </div> </div> </div> </section> |
Was this article helpful ?
Portfolio item
Use the following HTML markup to display single portfolio item:
|
1 2 3 4 5 6 7 8 9 10 11 12 13 14 15 16 17 18 19 20 21 22 23 24 25 26 27 28 29 30 31 32 33 34 35 36 37 38 39 |
<article class="ct-gallery-item ct-portfolio-item webdesign"> <header class="ct-u-hideText"> <h2 class="ct-u-hideText">Gallery item</h2> </header> <div class="ct-portfolio-item-outer"> <div class="ct-portfolio-item-media"> <a href="#"> <figure class="ct-imageBox effect-apollo"> <div class="ct-imageBox-image"> [image] </div> <figcaption> [content or empty] </figcaption> </figure> </a> </div> <div class="ct-portfolio-item-inner"> <header class="ct-portfolio-header"> <div class="ct-portfolio-title"> [title or none] <p> [text or none] </p> </div> </header> </div> </div> </article> |
Was this article helpful ?
Portfolio
You can display your portfolio item in several different ways with the following CSS variations:
- default
- ct-portfolio-masonry
- ct-portfolio-masonry–col2
- ct-portfolio-masonry–col3
- ct-portfolio-masonry–col4
HTML markup:
|
1 2 3 4 5 6 7 8 9 10 11 12 13 14 15 16 17 18 19 20 21 22 23 |
<section class="ct-gallery ct-portfolio-container ct-portfolio-masonry ct-portfolio-masonry--col2"> <header class="ct-u-hideText"> <h2 class="ct-u-hideText">Gallery</h2> </header> <article class="ct-gallery-item ct-portfolio-item webdesign"> [content] </article> <article class="ct-gallery-item ct-portfolio-item webdesign"> [content] </article> <article class="ct-gallery-item ct-portfolio-item webdesign"> [content] </article> </section> |
Scripts:
|
1 2 3 4 |
<script src="assets/js/portfolio/infinitescroll.min.js"></script> <script src="assets/js/portfolio/jquery.isotope.min.js"></script> <script src="assets/js/portfolio/imagesloaded.js"></script> <script src="assets/js/portfolio/init.js"></script> |
Was this article helpful ?
Social Icons
Invious comes with number of Social Icons, created with FontAwesome icons set.
You can use it with simple HTML markup:
|
1 2 3 4 5 6 7 8 9 10 11 12 13 14 15 16 17 18 |
<ul class="socialicons socialicons-lg socialicons--white"> <li> <a href="#" data-toggle="tooltip" data-placement="bottom" title="" data-original-title="Vimeo"> <i class="fa fa-vimeo-square"></i> </a> </li> <li> <a href="https://twitter.com/createitpl" data-toggle="tooltip" data-placement="bottom" title="" data-original-title="Twitter"> <i class="fa fa-twitter"></i> </a> </li> <li> <a href="https://www.facebook.com/createITpl" data-toggle="tooltip" data-placement="bottom" title data-original-title="Facebook"> <i class="fa fa-facebook"></i> </a> </li> </ul> |
There are several size and color options:
- socialicons-sm
- socialicons-md
- socialicons-lg
- socialicons–white
- socialicons–gray
- socialicons–darkGray
- socialicons–darkGray2
Was this article helpful ?
Display your twitter feed with simple HTML markup:
|
1 2 3 4 5 6 7 8 9 10 |
<div class="twitterContainer ct-u-paddingBoth10"> <header class="text-center ct-u-marginBottom40 ct-u-ff--1"> <h6><small class="ct-fw-300 text-uppercase ct-u-Creme ct-u-ls-2">Latest Tweet</small></h6> </header> <div class="ct-js-twitter ct-twitter"></div> <div class="text-center ct-u-marginTop10"> <a href="#" class="btn btn-motive ct-btn-inverse btn-lg ct-btn-rounded ct-hover--outlineOut"><span>CreateIT</span></a> </div> </div> |
Don’t forget to include also script for this:
|
1 |
<script src="assets/twitter/js/jquery.tweet.js"></script> |
And here is the result:
Was this article helpful ?
Tables
HTML markup:
|
1 2 3 4 5 6 7 8 9 10 11 12 13 14 15 16 |
<div class="ct-table"> <div class="table-responsive"> <table class="table"> <thead> [head content] </thead> <tbody> [body content] </tbody> </table> </div> </div> |
You can adjust table look, with Bootstrap variations:
- table-responsive,
- table-striped,
- table-bordered,
- table-hover
Was this article helpful ?
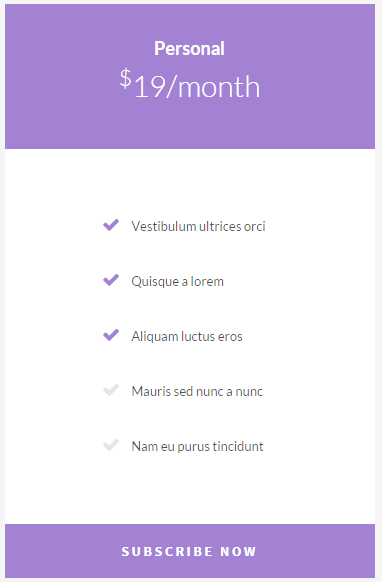
Pricing Table
HTML markup:
|
1 2 3 4 5 6 7 8 9 10 11 12 13 14 15 16 17 18 19 20 21 22 23 24 25 26 27 28 29 30 31 32 33 34 |
<article class="ct-pricingTable"> <div class="ct-pricingTable-header"> <div> <h5><small>Personal</small></h5> <p> <sup>$</sup>19/month </p> </div> </div> <div class="ct-pricingTable-container"> <ul class="list-unstyled"> <li class="active"> <p><i class="fa fa-check"></i>Vestibulum ultrices orci</p> </li> <li class="active"> <p><i class="fa fa-check"></i>Quisque a lorem</p> </li> <li class="active"> <p><i class="fa fa-check"></i>Aliquam luctus eros</p> </li> <li> <p><i class="fa fa-check"></i>Mauris sed nunc a nunc</p> </li> <li> <p><i class="fa fa-check"></i>Nam eu purus tincidunt</p> </li> </ul> </div> <div class="ct-pricingTable-footer"> <a class="btn btn-motive ct-btn-block" href=""><span>Subscribe Now</span></a> </div> </article> |
Was this article helpful ?
Buttons
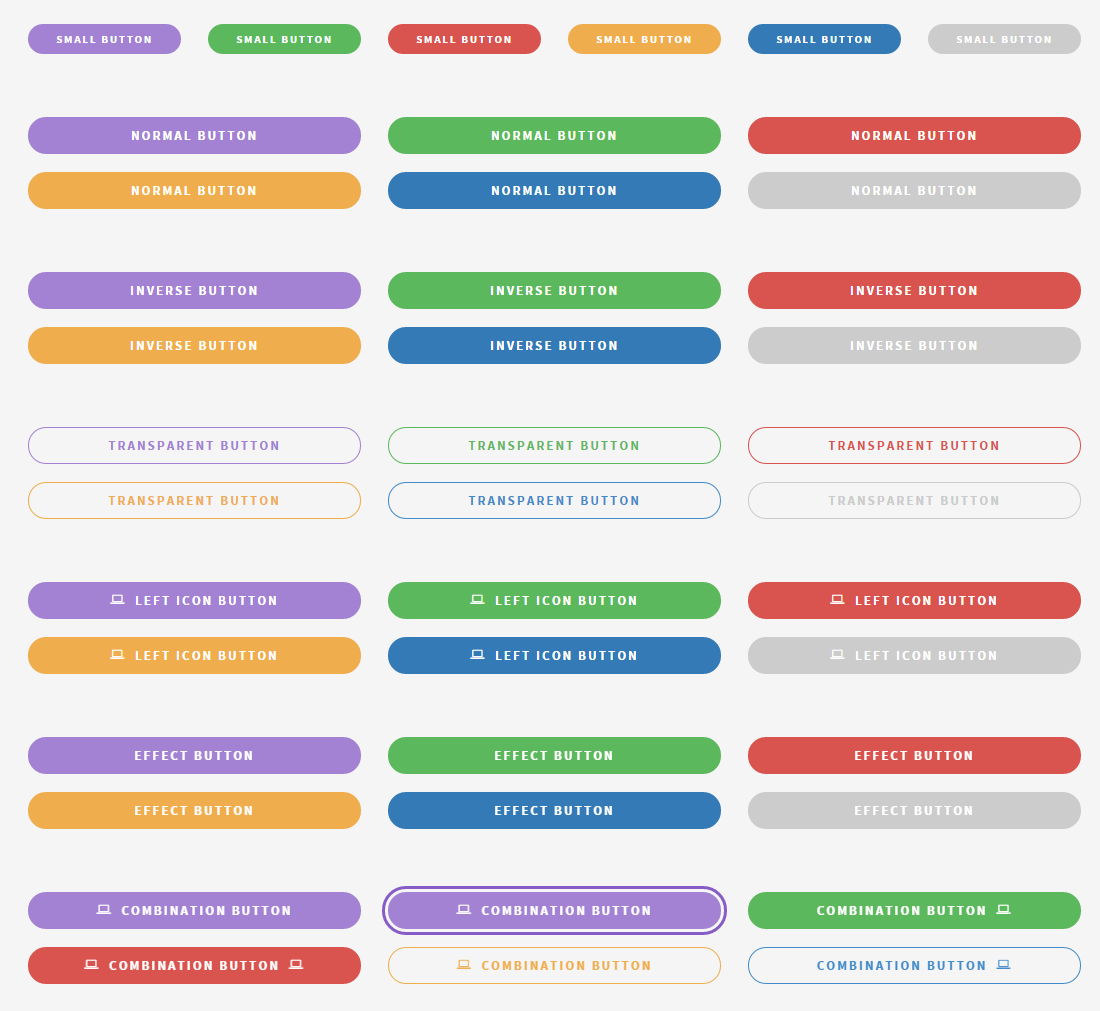
Invious comes with number of buttons types
You can use any of them with the simple HTML markup:
|
1 |
<a href="#" class="btn btn-lg btn-motive ct-btn-inverse ct-btn-rounded ct-hover--outlineOut"><i class="fa fa-file-text-o"></i><span>Learn More About Us</span></a> |
Just change types with the following options:
- ct-btn-inverse
- ct-btn-rounded
- ct-btn-transparent
- ct-btn-block
- ct-btn-link
- ct-hover–outlineOut
You can also use one of default Bootstrap parameters for buttons, like size and colors – find out more here.
Was this article helpful ?
Morph button
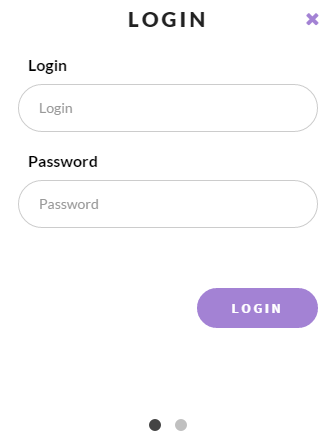
Use Morph button for Login/Register options or Email in Person Box. After click on it will display form window and move to another place on the page.
|
1 2 3 4 5 6 7 8 9 10 11 12 13 14 15 16 |
<div class="ct-mbMorphButtonContainer ct-js-mbMorphButton ct-personBox-morph"> <button class="btn btn-motive ct-btn-rounded ct-hover--outlineOut"> <i class="fa fa-envelope cw-mail"></i> </button> <div class="ct-mbMorphButton-wrapper-outer"> <div class="ct-mbMorphButton-wrapper-inner"> <span class="ct-mbMorphIconClose"><i class="fa fa-times"></i></span> [content] </div> </div> <div class="ct-mbMorphButton-overlay"></div> </div> |
And script:
|
1 |
<script src="assets/less/ButtonComponentMorph/js/mbMorphButton.js"></script> |
See it in the action here
Was this article helpful ?
Forms
Contact Form
HTML markup:
|
1 2 3 4 5 6 7 8 9 10 11 12 13 14 15 16 17 18 19 20 21 22 23 24 25 26 27 28 29 30 31 32 33 34 35 36 37 38 39 40 41 42 43 44 45 46 47 48 49 50 51 52 53 54 55 56 57 58 59 60 61 62 63 64 65 66 67 68 69 70 71 |
<div class="ct-comment"> <div class="successMessage ct-alert ct-alert--success"> <div class="ct-alert-header"> <div class="ct-alert-title"> <h4><small>Success</small></h4> </div> <div class="ct-alert-closeIcon"> <i class="fa fa-times"></i> </div> </div> <div class="ct-alert-content"> <p> Success </p> </div> </div> <div class="errorMessage ct-alert ct-alert--danger"> <div class="ct-alert-header"> <div class="ct-alert-title"> <h4><small>Danger</small></h4> </div> <div class="ct-alert-closeIcon"> <i class="fa fa-times"></i> </div> </div> <div class="ct-alert-content"> <p> Error </p> </div> </div> <form class="form-horizontal validateIt" role="form" action="assets/form/send.php" method="POST"> <div class="row"> <div class="col-md-4"> <div class="form-group"> <label for="name" class="col-md-3 control-label">Name:*</label> <div class="col-md-9"> <input type="text" class="form-control" required="" name="field[]" id="name" placeholder="Name"> </div> </div> <div class="form-group"> <label for="email" class="col-md-3 control-label">E-mail:*</label> <div class="col-md-9"> <input type="email" class="form-control" required="" name="field[]" id="email" placeholder="e-mail"> </div> </div> <div class="form-group"> <div class="ct-contact-btn col-md-9 col-md-offset-3"> <button type="submit" class="btn btn-motive ct-btn-rounded ct-hover--outlineOut ct-contact-btn"><span>Submit</span><i class="fa fa-send"></i></button> </div> </div> </div> <div class="col-md-8"> <div class="form-group"> <label for="email" class="col-md-2 control-label">Your comment:*</label> <div class="col-md-10"> <textarea class="form-control" rows="8" required="" name="field[]" placeholder="Type any text"></textarea> </div> </div> </div> </div> </form> </div> |
Script:
|
1 |
<script src="assets/form/js/contact-form.js"></script> |
Newsletter
HTML markup:
|
1 2 3 4 5 6 7 8 9 10 |
<div class="ct-newsletter"> <form class="form-inline" role="form" action="assets/form/send.php" method="POST"> <div class="input-group"> <input type="text" class="form-control" required="" name="field[]" placeholder="E-mail adress"> <span class="input-group-btn"> <button class="btn btn-motive" type="submit"><i class="fa fa-send"></i></button> </span> </div> </form> </div> |
Script:
|
1 |
<script src="assets/form/js/contact-form.js"></script> |
Common Problems
Where I can edit my contact form/newsletter email addres?
You can define where we should send messages from your contact form and newsletter in file HTML/assets/form/config.php
Add your email address instead of recipient@mail.com and it’s ready to use!
Was this article helpful ?
Blockquote
There are three types of blockquotes:
- ct-quote–type1
- ct-quote–type2
- ct-quote–type3
To create any of them use the simple HTML markup:
|
1 2 3 4 5 6 |
<div class="ct-quote--type1"> <blockquote class="text-center"> <p class="ct-u-colorDark">Various versions have evolved over the years, sometimes by accident, sometimes on purpose</p> <a href="#"><cite>VINCENT THOMPSON <span>CREATIVE MIND</span></cite></a> </blockquote> </div> |
Was this article helpful ?
Google Map
HTML markup:
|
1 2 3 |
<div class="ct-googleMap-contsainer"> <div class="ct-googleMap" data-height="280" data-location="Narbutta 24, Warsaw" data-zoom="15"></div> </div> |
Required javascript files:
|
1 2 3 |
<script src="http://maps.google.com/maps/api/js?sensor=false"></script> <script src="assets/js/gmap/gmap3.min.js"></script> <script src="assets/js/gmap/init.js"></script> |
Was this article helpful ?
Color Box
Check out our beautiful color boxes here
Create a simple container with background color and content. Additionally you can add here up or down arrow in several positions.
Use the simple HTML markup:
|
1 2 3 4 5 6 7 8 9 |
<div class="ct-colorBox ct-colorBox--lighten10 ct-colorBox--before"> <div class="ct-colorBox-wrapper"> <div class="ct-colorBox-wrapperInner"> [content] </div> </div> </div> |
And extend options with the several variations:
- ct-colorBox–lighten10
- ct-colorBox–lighten20
- ct-colorBox–darken10
- ct-colorBox–darken20
- ct-colorBox–after
- ct-colorBox–before
- ct-colorBox-arrow
- ct-colorBox-arrow–top
- ct-colorBox-arrow–bottom
- ct-colorBox-arrow–left
- ct-colorBox-arrow–right
- ct-colorBox-arrow–center
- ct-colorBox-arrow–btPrev
- ct-colorBox-arrow–btNext
Was this article helpful ?
Call To action
Present your content in new way with Call To Action box.
It can be done with simple HTML markup:
|
1 2 3 4 5 6 7 8 9 10 11 12 13 |
<div class="ct-callToAction"> <div class="ct-callToAction-inner"> <div class="ct-callToAction-title"> <p> Passepartout wandered for several hours in the midst of this motley crowd, looking in </p> </div> <div class="ct-callToAction-btn"> <a href="#" class="btn btn-lg btn-motive ct-btn-inverse ct-btn-rounded ct-hover--outlineOut"><i class="fa fa-comments"></i><span>Let'a Talk</span></a> </div> </div> </div> |
Was this article helpful ?
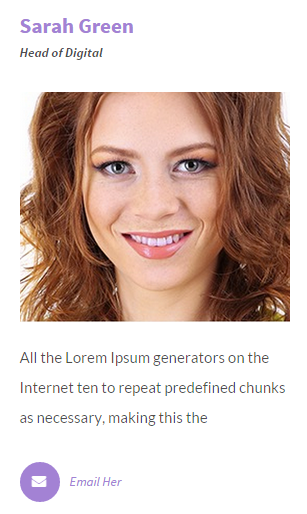
Person Box
Introduce your team members with pretty person boxes.
Use for this simple HTML markup:
|
1 2 3 4 5 6 7 8 9 10 11 12 13 14 15 16 17 18 19 20 21 22 23 24 25 26 27 28 29 30 31 32 33 34 35 36 37 38 |
<article class="ct-personBox"> <header class="ct-personBox-title"> <h4><a href="#">Sarah Green</a></h4> <p>Head of Digital</p> </header> <figure class="ct-personBox-images ct-hover ct-js-hover ct-hover-type14"> <a href="#"><img src="assets/images/demo-content/peoplecomp_03.png" alt="peoplecomp_03" /></a> </figure> <div class="ct-personBox-text"> <p>All the Lorem Ipsum generators on the Internet ten to repeat predefined chunks as necessary, making this the</p> <div class="ct-personBox-email ct-morph-button ct-morph-button-modal ct-morph-button-modal-2 ct-morph-button-fixed"> <button type="button" class="btn btn-motive ct-btn-rounded ct-btn-NavbarMenu ct-hover--outlineOut"><i class="fa fa-envelope cw-mail"></i></button> <div class="ct-morph-content"> <div> <div class="content"> <span class="icon icon-close"><i class="fa fa-times"></i></span> <h4 class="ct-fw-900 text-uppercase">Ask Me</h4> <form> <div class="form-group"> <label for="ct-personBox-text3">Message</label> <textarea class="form-control" id="ct-personBox-text3" rows="3" placeholder="Message"></textarea> </div> <div class="form-group"> <label for="ct-personBox-email3">Email address</label> <input type="email" class="form-control" id="ct-personBox-email3" placeholder="Enter email"> </div> <button type="submit" class="btn btn-motive ct-btn-rounded ct-hover--outlineOut ct-u-marginTop15 pull-right">Send</button> </form> </div> </div> </div> </div><!-- morph-button --> <span class="ct-js-emailPerson">Email Her</span> </div> </article> |
Was this article helpful ?
Icon box
You can use three types of Icon Boxes with the following CSS varaitions:
- ct-iconBox–type1
- ct-iconBox–type2
- ct-iconBox–type3
HTML markup:
|
1 2 3 4 5 6 7 8 9 10 11 12 13 14 15 16 17 |
<article class="ct-iconBox ct-iconBox--type1"> <div class="ct-iconBox-header"> <div class="ct-iconBox-logo"> <span class="ct-iconBox-logo ct-hover--outlineOut"><i class="fa fa-eye"></i></span> </div> <div class="ct-iconBox-title"> <div> <h6>Who Were Playing In The</h6> </div> </div> </div> <div class="ct-iconBox-text"> <p>Priests were passing in processions, beating their dreary tambourines; police and custom-house officers with pointed hats</p> </div> <a class="btn btn-motive btn-sm ct-btn-rounded ct-btn-transparent ct-hover--outlineOut" href=""><i class="fa fa-file-text-o"></i><span>Read More</span></a> </article> |
Was this article helpful ?
Sources & Credits
The following sources and files have been used to build up this theme
- Twitter Bootstrap – http://twitter.github.com/bootstrap/
- jQuery – http://www.jquery.com
Was this article helpful ?


