Looks Good – Responsive HTML5 Template
Thank you for purchasing this theme. If you have any questions that are beyond the scope of this help file, please feel free to start new ticket on this page. Thanks so much!
Scope of free support
We can help you with:
- Responding to questions or problems regarding the item and its features
- Fixing any discovered item’s bugs
- Providing updates to ensure compatibility with new software versions
Was this article helpful ?
HTML Structure
This theme is built upon bootstrap framework and is fully responsive. It adapts to window resolution and looks good on all devices including iPad and iPhone.
See for yourself (resize your browser).
If you would like to read more
about bootstrap framework click here :
Grid System and Single row structure
The default Bootstrap grid system utilizes 12 columns. It’s responsive grid and adapts to viewport. Below 767px viewports, the columns become fluid and stack vertically. The fluid grid system uses percents instead of pixels for column widths. Each row always include 12 columns (for example col-md-8 + col-md-4 = col-md-12).
Bootstrap documentation: here
Basic grid HTML:
|
1 2 3 4 5 6 7 8 9 10 11 12 13 14 15 16 17 18 19 20 21 22 23 24 25 26 27 |
<div class="row"> <div class="col-md-1">.col-md-1</div> <div class="col-md-1">.col-md-1</div> <div class="col-md-1">.col-md-1</div> <div class="col-md-1">.col-md-1</div> <div class="col-md-1">.col-md-1</div> <div class="col-md-1">.col-md-1</div> <div class="col-md-1">.col-md-1</div> <div class="col-md-1">.col-md-1</div> <div class="col-md-1">.col-md-1</div> <div class="col-md-1">.col-md-1</div> <div class="col-md-1">.col-md-1</div> <div class="col-md-1">.col-md-1</div> </div> <div class="row"> <div class="col-md-8">.col-md-8</div> <div class="col-md-4">.col-md-4</div> </div> <div class="row"> <div class="col-md-4">.col-md-4</div> <div class="col-md-4">.col-md-4</div> <div class="col-md-4">.col-md-4</div> </div> <div class="row"> <div class="col-md-6">.col-md-6</div> <div class="col-md-6">.col-md-6</div> </div> |
Page structure
Below you will find default page structure :
|
1 2 3 4 5 6 7 8 9 10 11 12 13 14 15 16 17 18 19 20 21 22 23 24 25 26 27 28 29 30 31 32 33 34 35 36 |
<!DOCTYPE html> <html> <head> [css] </head> <body> [header] [main menu] <!-- main container --> <div id="wrapper"> [component 1] <!-- fullwidth element --> </div> [fullwidth parallax] <div class="container"> <!-- / fullwidth element --> [component 6] </div> <!-- / main container --> [footer] [javascripts] </body> </html> |
Was this article helpful ?
CSS files and structure
If you would like to edit the color, font, or style of any elements, you would do the following:
|
1 |
#primaryContent a {color: #someColor;} |
If you find that your new style is not overriding, it is most likely because of a specificity problem. Scroll down in your CSS file and make sure that there isn’t a similar style that has more weight.
I.E.
|
1 |
#wrap #primaryContent a {color: #someColor;} |
So, to ensure that your new styles are applied, make sure that they carry enough “weight” and that there isn’t a style lower in the CSS file that is being applied after yours.
Colors
The theme includes a css file wich you can use to edit the colors.
You just need to add the corresponding CSS file to the head of the page like this:
|
1 2 3 4 5 |
<head> (..) <link rel="stylesheet" type="text/css" href="css/motive.css"> (..) </head> |
Icons
We’ve included 360+ font icons.
Awesome Icons – http://fontawesome.io/icons/
HTML markup:
|
1 2 |
<!-- Awesome Icons --> <i class="fa fa-cog"></i> |
CSS Files & Structure
We’ve included 2 files.
bootstrap.css contains Bootstrap 3 Library.
style.css file contains general styles.
- Snap mobile
- Frame box
- Image pointers
- Pricing lists
- Contact
- Popup
- Sliders
- Animations
- To Top button
- Navigations blog
- Services list
- Blog post
- Blos single post
- Gallery
- Person box
- Comments
- Google Map
- Loader
- Forms
- Buttons
- Media sections
Was this article helpful ?
Media Sections
Looks Good allows you to create three types of Media Sections. To each type you can add any content you want.
Parallax
HTML markup:
|
1 2 3 4 5 6 7 8 9 10 11 12 13 14 15 16 17 |
<section class="ct-mediaSection ct-u-paddingBoth70 ct-u-colorWhite" data-stellar-background-ratio="0.3" data-height="500" data-type="parallax" data-bg-image="assets/images/demo-content/gallery_bigimage9.jpg" data-bg-image-mobile="assets/images/demo-content/gallery_bigimage9.jpg"> <div class="ct-mediaSection-inner"> <div class="container"> <div class="row"> <div class="col-sm-4"> <h5 class="ct-sectionTitle text-uppercase ct-u-text--white"> Parallax Section </h5> <br> data-type="parallax"<br> data-height="650" </div> </div> </div> </div> |
Kemburns
HTML markup:
|
1 2 3 4 5 6 7 8 9 10 11 12 13 14 15 16 17 18 19 20 21 22 |
<section class="ct-mediaSection ct-u-paddingBoth70 ct-u-colorWhite" data-height="500" data-type="kenburns" data-bg-image-mobile="assets/images/demo-content/gallery_bigimage10.jpg"> <div class="ct-mediaSection-kenburnsImageContainer"> <img src="assets/images/demo-content/gallery_bigimage10.jpg" alt="demo image"> <img src="assets/images/demo-content/gallery_bigimage10.jpg" alt="demo image"> <img src="assets/images/demo-content/gallery_bigimage10.jpg" alt="demo image"> </div> <div class="ct-mediaSection-inner"> <div class="container"> <div class="row"> <div class="col-sm-4"> <h5 class="ct-sectionTitle text-uppercase ct-u-text--white"> Kenburns Section </h5> <br> data-type="kenburns"<br> data-height="650" </div> </div> </div> </div> </section> |
Video
HTML markup:
|
1 2 3 4 5 6 7 8 9 10 11 12 13 14 15 16 17 18 19 20 21 22 |
<section class="ct-mediaSection ct-u-paddingBoth70 ct-u-colorWhite" data-height="700" data-type="video" data-bg-image-mobile="assets/images/demo-content/macaroon3.jpg"> <div class="ct-mediaSection-video embed-responsive embed-responsive-16by9"> <iframe src="https://player.vimeo.com/video/47707314?autoplay=1&title=0&byline=0&portrait=0" width="500" height="281" frameborder="0" webkitallowfullscreen mozallowfullscreen allowfullscreen></iframe> <p><a href="https://vimeo.com/47707314">COSMETIC</a> from <a href="https://vimeo.com/user12756525">vambee</a> on <a href="https://vimeo.com">Vimeo</a>.</p> </div> <div class="ct-u-displayTable"> <div class="ct-mediaSection-inner"> <div class="container"> <div class="row"> <div class="col-sm-4"> <h5 class="ct-sectionTitle text-uppercase ct-u-text--white"> Video Section </h5> <br> data-type="video"<br> data-height="650" </div> </div> </div> </div> </div> </section> |
Remember to include plugin jquery.stellar.min.js to page where you are using media sections for proper element working.
Was this article helpful ?
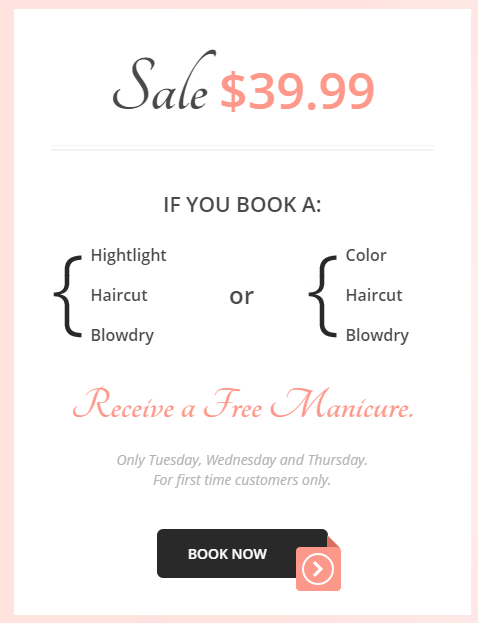
Service List
HTML markup:
|
1 2 3 4 5 6 7 8 9 10 11 12 13 14 15 16 17 18 19 |
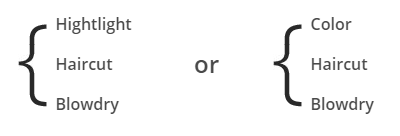
<div class="ct-u-displayTableVertical"> <div class="ct-u-displayTableCell"> <ul class="ct-serviceLists list-unstyled"> <li class="ct-fw-600">Hightlight</li> <li class="ct-fw-600">Haircut</li> <li class="ct-fw-600">Blowdry</li> </ul> </div> <div class="ct-u-displayTableCell text-center"> <span class="ct-u-fontSize24 ct-fw-600 ct-u-lineHeight0">or</span> </div> <div class="ct-u-displayTableCell"> <ul class="ct-serviceLists list-unstyled"> <li class="ct-fw-600">Color</li> <li class="ct-fw-600">Haircut</li> <li class="ct-fw-600">Blowdry</li> </ul> </div> </div> |
Was this article helpful ?
Sliders
All sliders in Looks Good are created with OWL Slider plugin – here you will find plugins documentation.
Also each page, where you are including the slider should have attached the following script:
owl.carousel.min.js
Below you will find general HTML markup for slider:
|
1 2 3 4 5 6 7 8 9 10 11 12 13 14 15 16 17 18 19 20 |
<div class="ct-js-owl" data-items="5" data-navigation="false" data-autoPlay="true" data-single="false" data-pagination="false" data-snap-ignore="true"> <div class="item"> <img src="assets/images/demo-content/partners_buisness5.png" class="grayscale grayscale-fade" alt=""> </div> <div class="item"> <img src="assets/images/demo-content/partners_buisness4.png" class="grayscale grayscale-fade" alt=""> </div> <div class="item"> <img src="assets/images/demo-content/partners_buisness3.png" class="grayscale grayscale-fade" alt=""> </div> <div class="item"> <img src="assets/images/demo-content/partners_buisness2.png" class="grayscale grayscale-fade" alt=""> </div> <div class="item"><img src="assets/images/demo-content/partners_buisness5.png" class="grayscale grayscale-fade" alt=""> </div> <div class="item"><img src="assets/images/demo-content/partners_buisness3.png" class="grayscale grayscale-fade" alt=""> </div> <div class="item"><img src="assets/images/demo-content/partners_buisness1.png" class="grayscale grayscale-fade" alt=""> </div> </div> |
There are 4 types of sliders:
Example of usage can be found here.
Add class:ct-pagination–BottomLeft – to create navigation at the bottom left side.
Add to the HTML markup class:
ct-navigation–variation1 – to create navigation in the middle of the slide.
Was this article helpful ?
Slider boxes
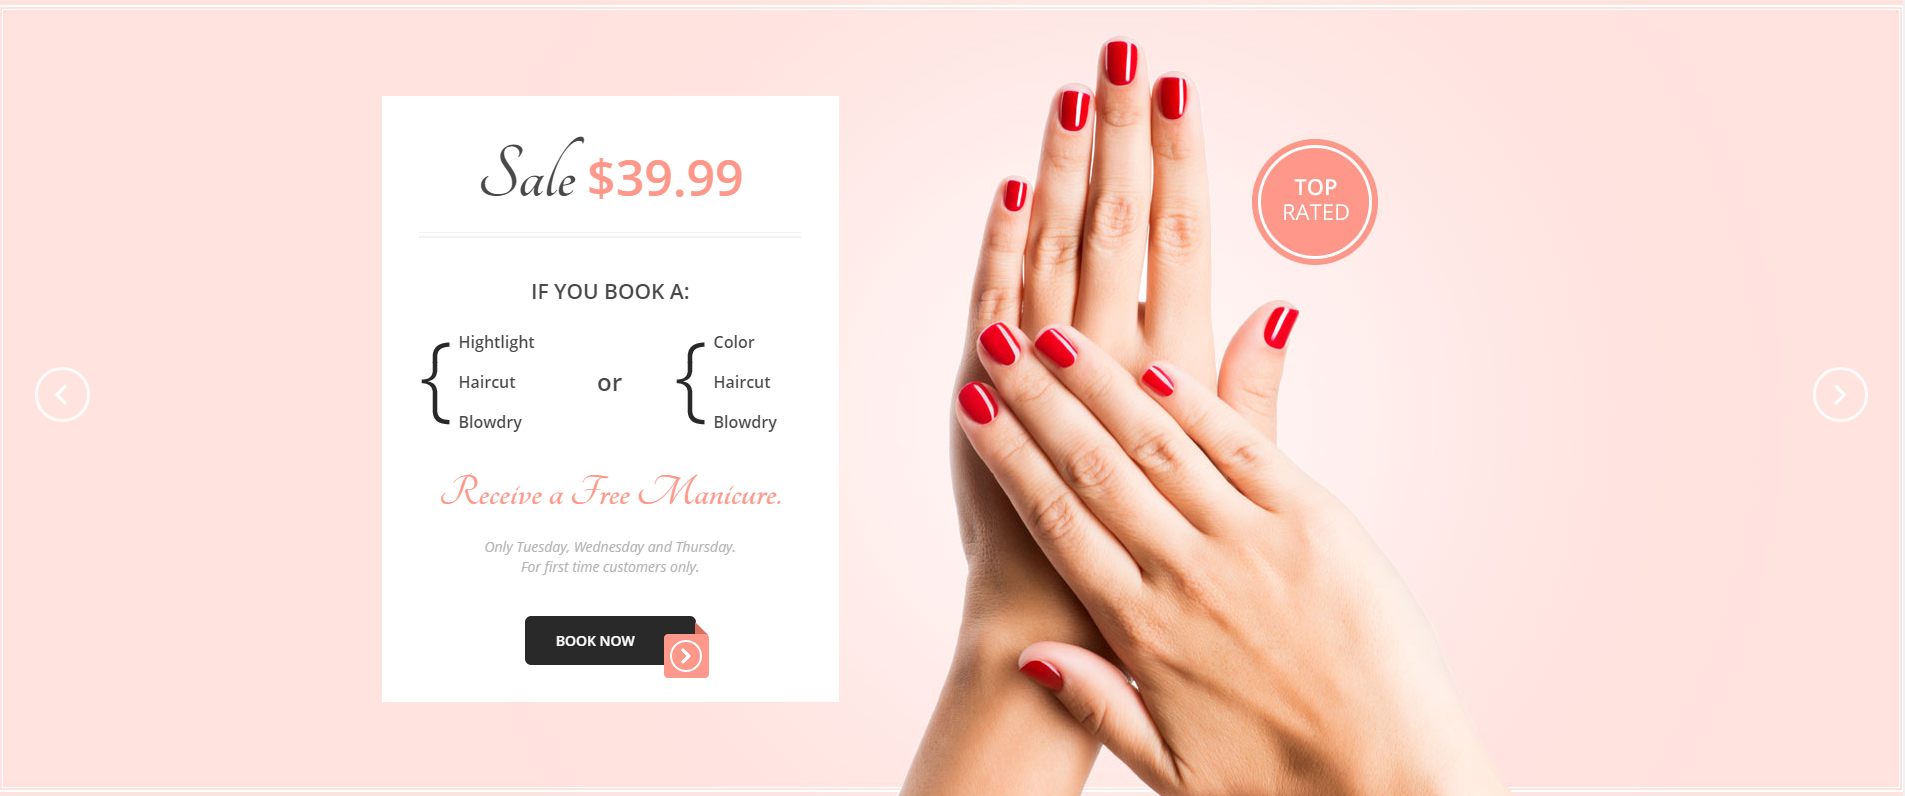
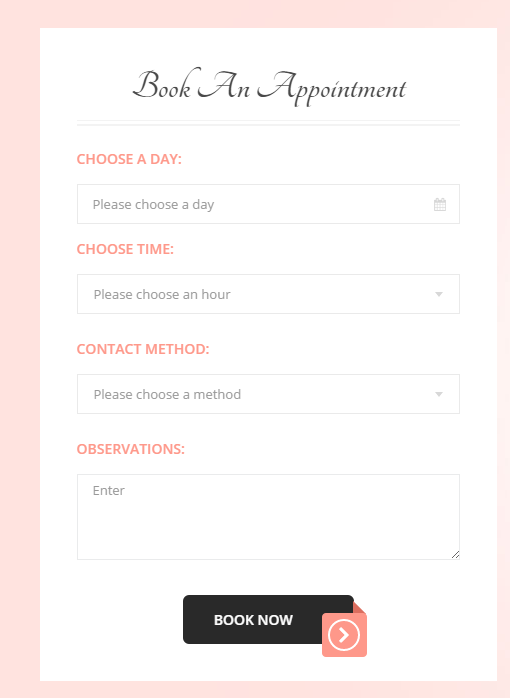
Looks Good comes with predefined boxes, which can be added in main slider:
HTML markup:
|
1 2 3 4 5 6 7 8 9 10 11 12 13 14 15 16 17 18 19 20 21 22 23 24 25 26 27 28 29 30 31 32 33 34 35 36 37 38 39 40 41 42 43 44 45 46 47 48 49 50 |
<div class="ct-box"> <div class="text-center"> <h3 class="ct-header--stretch ct-header--doubleBorderBottom ct-u-fontType2 ct-fw-700 ct-u-fontSize40 ct-u-marginBoth0"> Book An Appointment </h3> </div> <form role="form" action="" method="post" class="contactForm validateIt ct-u-paddingTop40" data-email-subject="Contact Form" data-show-errors="true"> <div class="form-group date ct-js-datetimePicker"> <label for="dayTime1" class="control-label text-uppercase ct-u-fontSize14 ct-fw-600 ct-u-motiveColor ct-u-paddingBottom10">choose a day:</label> <input type="text" class="form-control" placeholder="Please choose a day" id="dayTime1"> <input type="submit" value=""> </div> <div class="form-group"> <label for="hourTime" class="control-label text-uppercase ct-u-fontSize14 ct-fw-600 ct-u-motiveColor ct-u-paddingBottom10">choose time:</label> <select class="ct-selectTime" id="hourTime"> <option></option> <option value="8">08:00 am</option> <option value="9">09:00 am</option> <option value="10">10:00 am</option> <option value="11">11:00 am</option> <option value="12">12:00 am</option> <option value="13">13:00 pm</option> <option value="14">14:00 pm</option> <option value="15">15:00 pm</option> <option value="16">16:00 pm</option> <option value="17">17:00 pm</option> <option value="18">18:00 pm</option> <option value="17">19:00 pm</option> <option value="18">20:00 pm</option> </select> </div> <div class="form-group"> <label for="contact-method" class="control-label text-uppercase ct-u-fontSize14 ct-fw-600 ct-u-motiveColor ct-u-paddingBottom10 ct-u-paddingTop10">contact method:</label> <select class="ct-selectContact"> <option></option> <option value="8">Email</option> <option value="9">Self-Serve</option> <option value="10">Phone</option> <option value="11">In Person</option> </select> </div> <div class="form-group"> <label for="obs" class="control-label text-uppercase ct-u-fontSize14 ct-fw-600 ct-u-motiveColor ct-u-paddingBottom10 ct-u-paddingTop10">Observations:</label> <textarea type="text" class="form-control ct-inputCode" rows="4" placeholder="Enter" id="obs"></textarea> </div> <div class="text-center ct-u-paddingTop20"> <a href="#" class="btn btn-sm btn-arrow"><span>book now</span></a> </div> </form> </div> |
Notice: to define email address, where contact should send emails – edit /form/config.php file with your email.
Was this article helpful ?
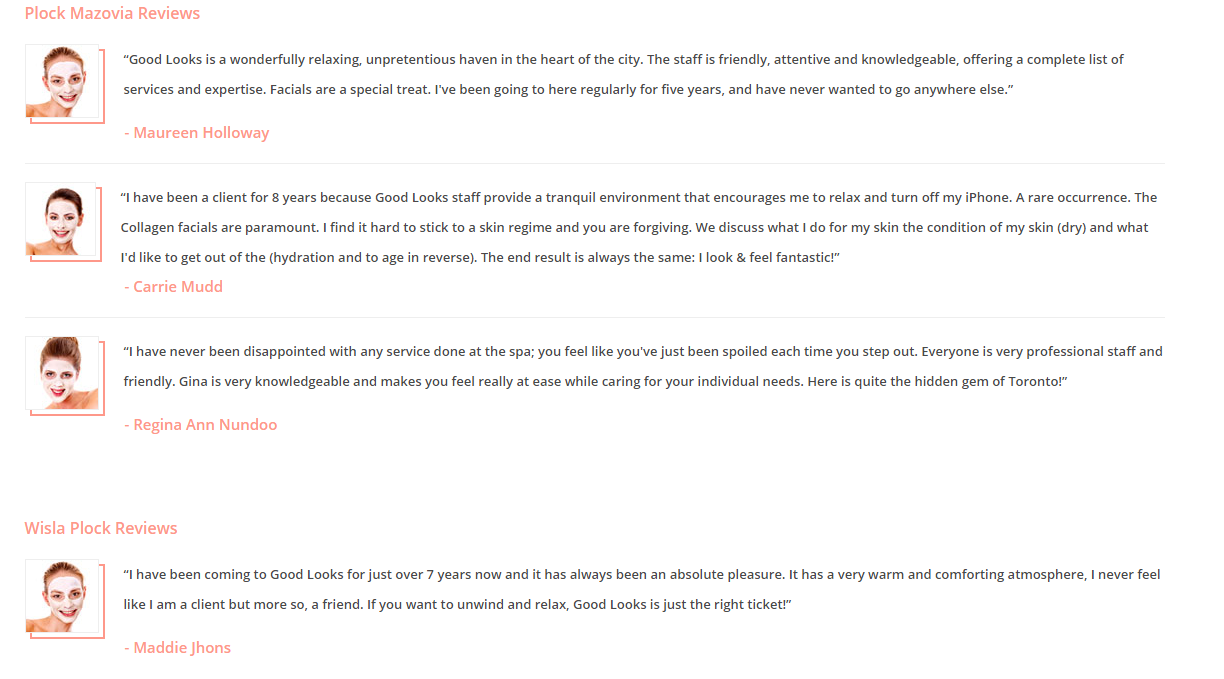
Testimonials
There are three variations of testiomonials. Each can be enable with one of the following CSS classes added to HTML markup:
- ct-testimonials–left – align testimonials to the left hand side,
- ct-testimonials–right – align testimonials to the right hand side,
- ct-testimonials – without frame
- ct-testimonials–frame – with frame
General HTML markup to edit:
|
1 2 3 4 5 6 7 8 9 10 11 12 |
<div class="ct-testimonials ct-testimonials--frame ct-testimonials--left"> <header class="ct-u-motiveColor ct-fw-600 ct-u-fontSize16 ct-u-paddingBottom20">Plock Mazovia Reviews</header> <div class="ct-testimonials-image"> <img src="assets/images/demo-content/testimonials-person1.jpg" alt="" /> </div> <div class="ct-testimonials-content ct-fw-600"> <q>Good Looks is a wonderfully relaxing, unpretentious haven in the heart of the city. The staff is friendly, attentive and knowledgeable, offering a complete list of services and expertise. Facials are a special treat. I've been going to here regularly for five years, and have never wanted to go anywhere else.</q> <div class="clearfix"></div> <span class="ct-u-motiveColor ct-u-fontSize15 ct-fw-600">- Maureen Holloway</span> </div> </div> |
Was this article helpful ?
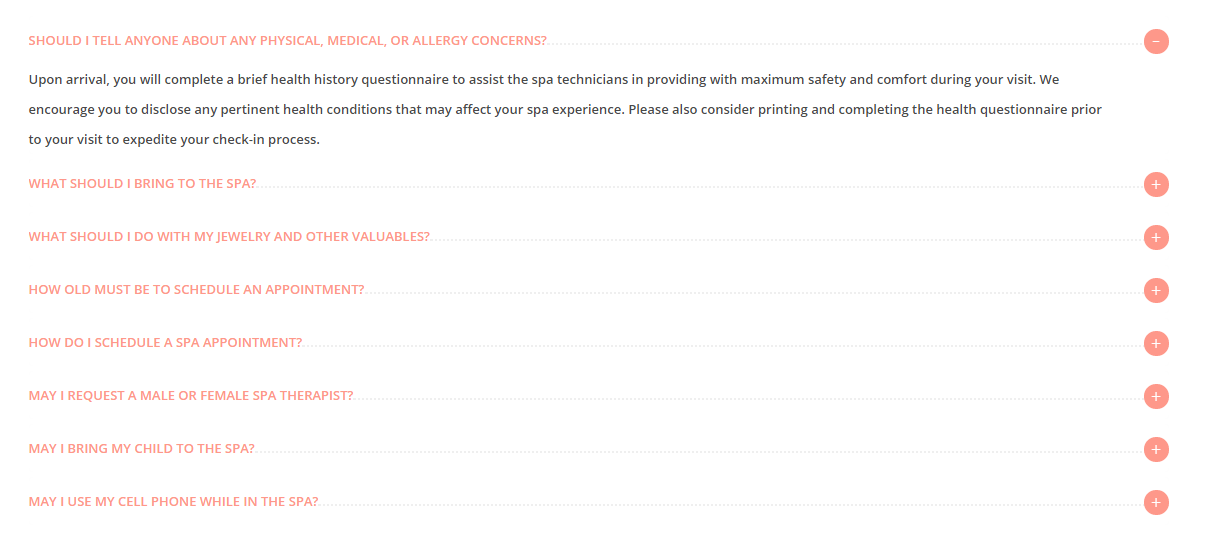
Accordion
Accordion can be created with the following HTML markup:
|
1 2 3 4 5 6 7 8 9 10 11 12 13 14 15 16 17 18 |
<div class="panel-group" id="accordion" role="tablist" aria-multiselectable="true"> <div class="panel panel-default"> <div class="panel-heading" role="tab" id="headingOne"> <a data-toggle="collapse" data-parent="#accordion" href="#collapseOne" aria-expanded="true" aria-controls="collapseOne"> <h4 class="panel-title"> should i tell anyone about any physical, medical, or allergy concerns? </h4> </a> </div> <div id="collapseOne" class="panel-collapse collapse in" role="tabpanel" aria-labelledby="headingOne"> <div class="panel-body"> Upon arrival, you will complete a brief health history questionnaire to assist the spa technicians in providing with maximum safety and comfort during your visit. We encourage you to disclose any pertinent health conditions that may affect your spa experience. Please also consider printing and completing the health questionnaire prior to your visit to expedite your check-in process. </div> </div> </div> </div> |
Was this article helpful ?
Blog
There are several types of blog posts, which can be used for you blog:
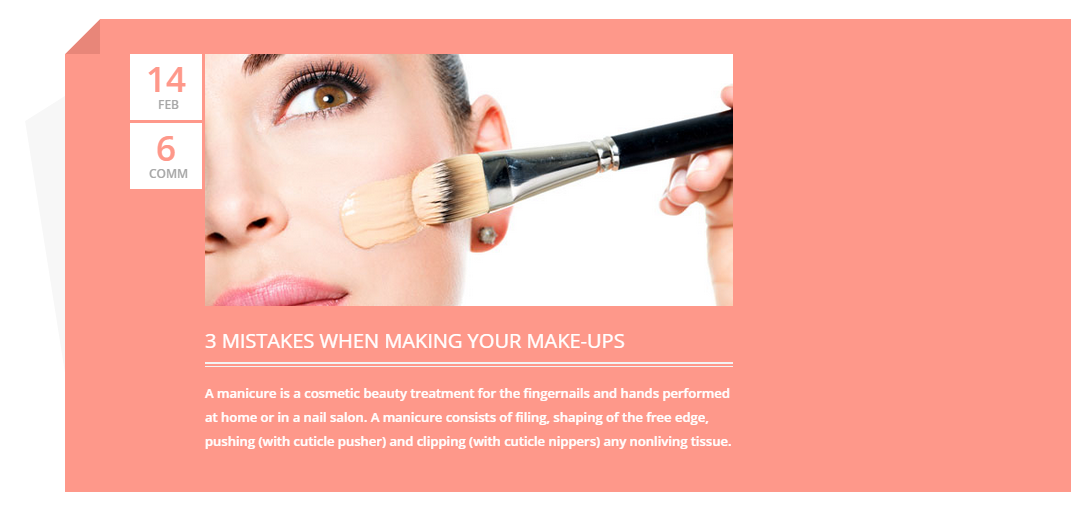
Featured post
HTML markup:|
1 2 3 4 5 6 7 8 9 10 11 12 13 14 15 16 17 18 19 20 21 22 23 24 25 26 27 28 29 30 |
<div class="ct-featuredBox"> <span></span> <article class="ct-articleBox"> <div class="ct-articleBox-date"> <div class="ct-articleBox-dateDay"> 14 </div> <div class="ct-articleBox-dateMonth"> feb </div> <div class="ct-articleBox-dateDay"> 6 </div> <div class="ct-articleBox-dateMonth"> comm </div> </div> <div class="ct-articleBox-media"> <img src="assets/images/demo-content/featured_post-image.jpg" alt="Post Image" /> </div> <div class="ct-articleBox-titleBox"> <a href="#"><h5>3 mistakes when making your make-ups</h5></a> </div> <div class="ct-articleBox-description ct-u-paddingTop20"> <p class="ct-header ct-header--doubleBorderTop"> A manicure is a cosmetic beauty treatment for the fingernails and hands performed at home or in a nail salon. A manicure consists of filing, shaping of the free edge, pushing (with cuticle pusher) and clipping (with cuticle nippers) any nonliving tissue. </p> </div> </article> </div> |
Blog post:
1) Simple post with picture
2.) Video post
3.) Gallery post with pagination
4.) Text post
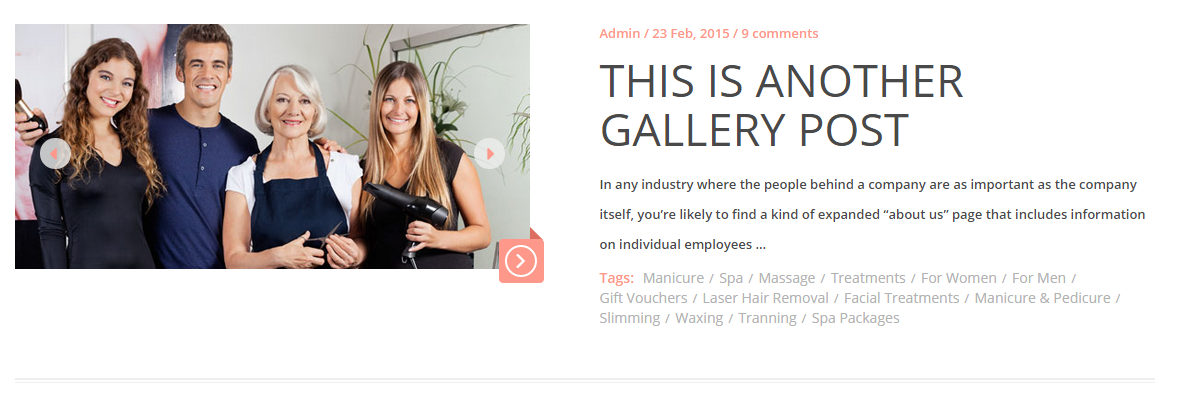
5.) Different gallery post with navigation
6.) Post with quote
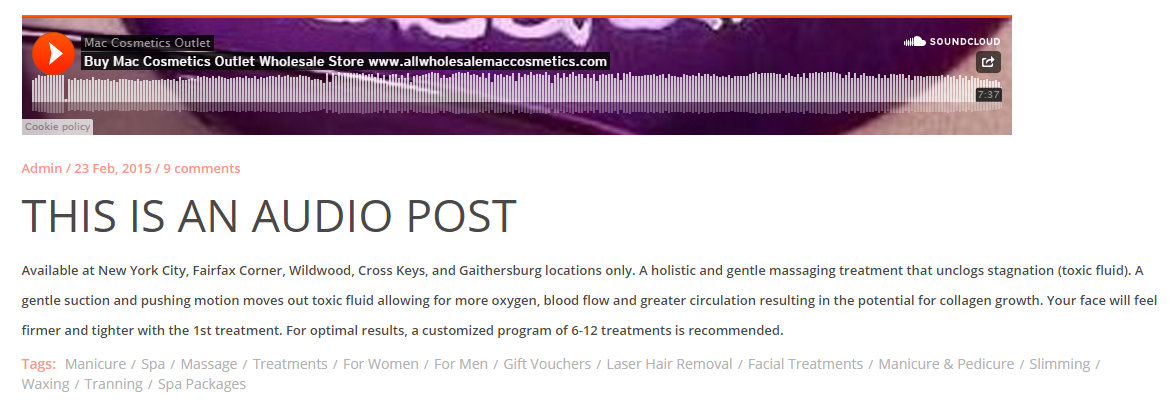
7.) Audio post
Basic HTML markup:
|
1 2 3 4 5 6 7 8 9 10 11 12 13 14 15 16 17 18 19 20 21 22 23 24 25 26 27 28 29 30 31 32 33 34 35 36 37 38 39 40 41 42 43 |
<article class="ct-articleBox"> <div class="row"> <div class="col-lg-6 col-md-6"> <div class="ct-articleBox-media"> <img src="assets/images/demo-content/blog-image1.jpg" alt="" /> <div class="btn-arrow"> <a class="" href="blog-single.html"><span></span></a> </div> </div> </div> <div class="col-lg-6 col-md-6"> <div class="ct-articleBox-meta"> Admin / 25 Feb, 2015 / 3 comments </div> <h2 class="ct-articleBox-header "> <a href="blog-single.html">this is a simple post</a> </h2> <p class="ct-articleBox-description"> If you can tolerate a little discomfort, the benefits of waxing may be well worth the effort. Sure, the process could take you about two hours the first time. And the stinging sensation after ripping wax off your legs may make you ask... </p> <span class="ct-u-motiveColor ct-u-fontSize14 ct-fw-600">Tags: </span> <ul class="ct-blogTags list-inline list-unstyled"> <li><a href="#">Manicure</a></li> <li><a href="#">Spa</a></li> <li><a href="#">Massage</a></li> <li><a href="#">Treatments</a></li> <li><a href="#">For Women</a></li> <li><a href="#">For Men</a></li> <li><a href="#">Gift Vouchers</a></li> <li><a href="#">Laser Hair Removal</a></li> <li><a href="#">Facial Treatments</a></li> <li><a href="#">Manicure & Pedicure</a></li> <li><a href="#">Slimming</a></li> <li><a href="#">Waxing</a></li> <li><a href="#">Tranning</a></li> <li><a href="#">Spa Packages</a></li> </ul> <div class="clearfix"></div> </div> </div> </article> |
Was this article helpful ?
Single post page
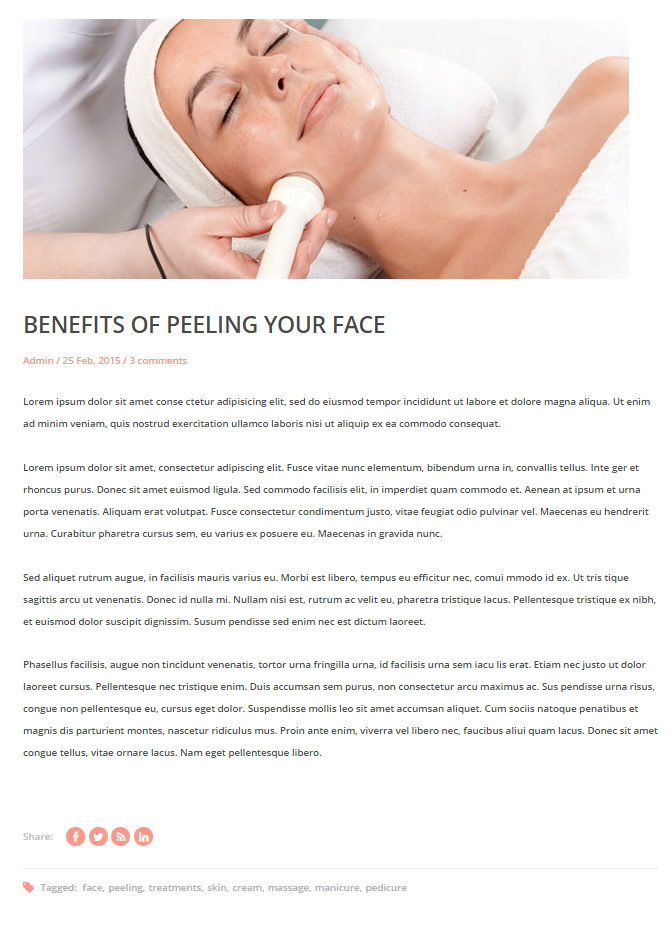
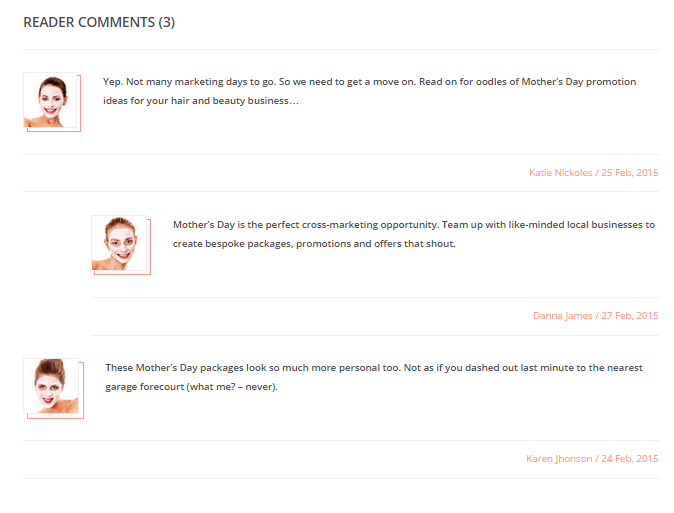
There are several elements you will find on blog single page:
HTML markup:
|
1 2 3 4 5 6 7 8 9 10 11 12 13 14 15 16 17 18 19 20 21 22 23 24 25 26 27 28 29 30 31 32 33 34 35 36 37 38 39 40 41 42 43 44 45 46 47 48 49 |
<article class="ct-articleBox ct-articleBox--singlePage"> <div class="ct-articleBox-media"> <img src="assets/images/demo-content/blog-single-image.jpg" alt="Image Blog" /> </div> <h2 class="ct-articleBox-header"> Benefits of peeling Your face </h2> <div class="ct-articleBox-meta"> Admin / 25 Feb, 2015 / 3 comments </div> <p class="ct-articleBox-description"> Lorem ipsum dolor sit amet conse ctetur adipisicing elit, sed do eiusmod tempor incididunt ut labore et dolore magna aliqua. Ut enim ad minim veniam, quis nostrud exercitation ullamco laboris nisi ut aliquip ex ea commodo consequat.</p> <p class="ct-articleBox-description">Lorem ipsum dolor sit amet, consectetur adipiscing elit. Fusce vitae nunc elementum, bibendum urna in, convallis tellus. Inte ger et rhoncus purus. Donec sit amet euismod ligula. Sed commodo facilisis elit, in imperdiet quam commodo et. Aenean at ipsum et urna porta venenatis. Aliquam erat volutpat. Fusce consectetur condimentum justo, vitae feugiat odio pulvinar vel. Maecenas eu hendrerit urna. Curabitur pharetra cursus sem, eu varius ex posuere eu. Maecenas in gravida nunc.</p> <p class="ct-articleBox-description">Sed aliquet rutrum augue, in facilisis mauris varius eu. Morbi est libero, tempus eu efficitur nec, comui mmodo id ex. Ut tris tique sagittis arcu ut venenatis. Donec id nulla mi. Nullam nisi est, rutrum ac velit eu, pharetra tristique lacus. Pellentesque tristique ex nibh, et euismod dolor suscipit dignissim. Susum pendisse sed enim nec est dictum laoreet.</p> <p class="ct-articleBox-description">Phasellus facilisis, augue non tincidunt venenatis, tortor urna fringilla urna, id facilisis urna sem iacu lis erat. Etiam nec justo ut dolor laoreet cursus. Pellentesque nec tristique enim. Duis accumsan sem purus, non consectetur arcu maximus ac. Sus pendisse urna risus, congue non pellentesque eu, cursus eget dolor. Suspendisse mollis leo sit amet accumsan aliquet. Cum sociis natoque penatibus et magnis dis parturient montes, nascetur ridiculus mus. Proin ante enim, viverra vel libero nec, faucibus aliui quam lacus. Donec sit amet congue tellus, vitae ornare lacus. Nam eget pellentesque libero.</p> <div class="ct-shareBox ct-u-borderBottom"> <span class="ct-shareBox-title">Share:</span> <ul class="ct-socials ct-socials--roundedBox list-unstyled list-inline ct-u-paddingBottom15"> <li><a href="https://www.facebook.com/createITpl" data-toggle="tooltip" data-placement="top" title="Facebook"><i class="fa fa-facebook fa-lg"></i></a></li> <li><a href="https://twitter.com/createitpl" data-toggle="tooltip" data-placement="top" title="Twitter"><i class="fa fa-twitter fa-lg"></i></a></li> <li><a href="#" data-toggle="tooltip" data-placement="top" title="Rss"><i class="fa fa-rss fa-lg"></i></a></li> <li><a href="#" data-toggle="tooltip" data-placement="top" title="Linkedin"><i class="fa fa-linkedin fa-lg"></i></a></li> </ul> </div> <i class="fa fa-tag fa-lg ct-u-paddingRight5 ct-u-paddingTop20 ct-u-motiveColor"></i> <span class="ct-u-greyColor ct-fw-600">Tagged: </span> <ul class="ct-blogTags ct-blogTags-secondType list-inline list-unstyled"> <li><a href="#">face</a></li> <li><a href="#">peeling</a></li> <li><a href="#">treatments</a></li> <li><a href="#">skin</a></li> <li><a href="#">cream</a></li> <li><a href="#">massage</a></li> <li><a href="#">manicure</a></li> <li><a href="#">pedicure</a></li> </ul> </article> |
Was this article helpful ?
Widgets
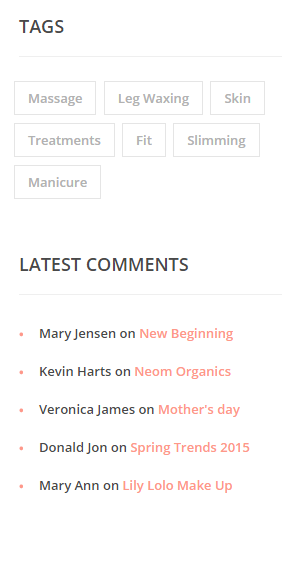
Each widget should have basic widgets classes, like the following:
|
1 2 3 4 5 6 7 8 9 10 11 12 13 14 15 16 17 |
<div class="widget"> <div class="widget-inner"> <h6 class="ct-headerBox ct-u-paddingBottom20 ct-u-borderBottom">popular articles</h6> <ul class="list-unstyled ct-articlesBox"> <li><a href="#">Coming Soon - Bamboo Massage</a></li> <li><a href="#">New Beginnings</a></li> <li><a href="#">Neom Organics</a></li> <li><a href="#">Mother's Day</a></li> <li><a href="#">Spring Trends 2015</a></li <li><a href="#">Lily Lolo Make Up</a></li> <li><a href="#">Anti Ageing Skincare</a></li> <li><a href="#">Wash those March blues away</a></li> <li><a href="#">Nail designs</a></li> <li><a href="#">Looking after your skin this summer</a></li> </ul> </div> </div> |
Was this article helpful ?
Pagination
Use the following HTML markup to create blog posts pagination:
|
1 2 3 4 |
<div class="ct-navigationBlog ct-u-paddingTop30"> <a href="#" class="text-uppercase ct-u-motiveColor pull-left"><i class="fa fa-angle-left fa-lg"></i> older posts</a> <a href="#" class="text-uppercase ct-u-motiveColor pull-right">newer posts <i class="fa fa-angle-right fa-lg"></i></a> </div> |
Was this article helpful ?
Social Buttons
We used two types of social buttons in Looks Good
HTML markup:|
1 2 3 4 5 6 |
<ul class="ct-socials"> <li></li> <li></li> ... <li></li> </ul> |
|
1 2 3 4 5 6 |
<ul class="ct-socials--roundedBox"> <li></li> <li></li> ... <li></li> </ul> |
Was this article helpful ?
Header line
HTML markup:
|
1 2 3 |
<h2 class="ct-header ct-header--doubleBorderTop text-uppercase ct-u-motiveColor"> latest offers </h2> |
You can use several header variations – just add one of the following classes to your HTML markup:
- ct-header
- ct-header–stretch
- ct-header–doubleBorderTop
- ct-header–doubleBorderBottom
Was this article helpful ?
Dotted menu
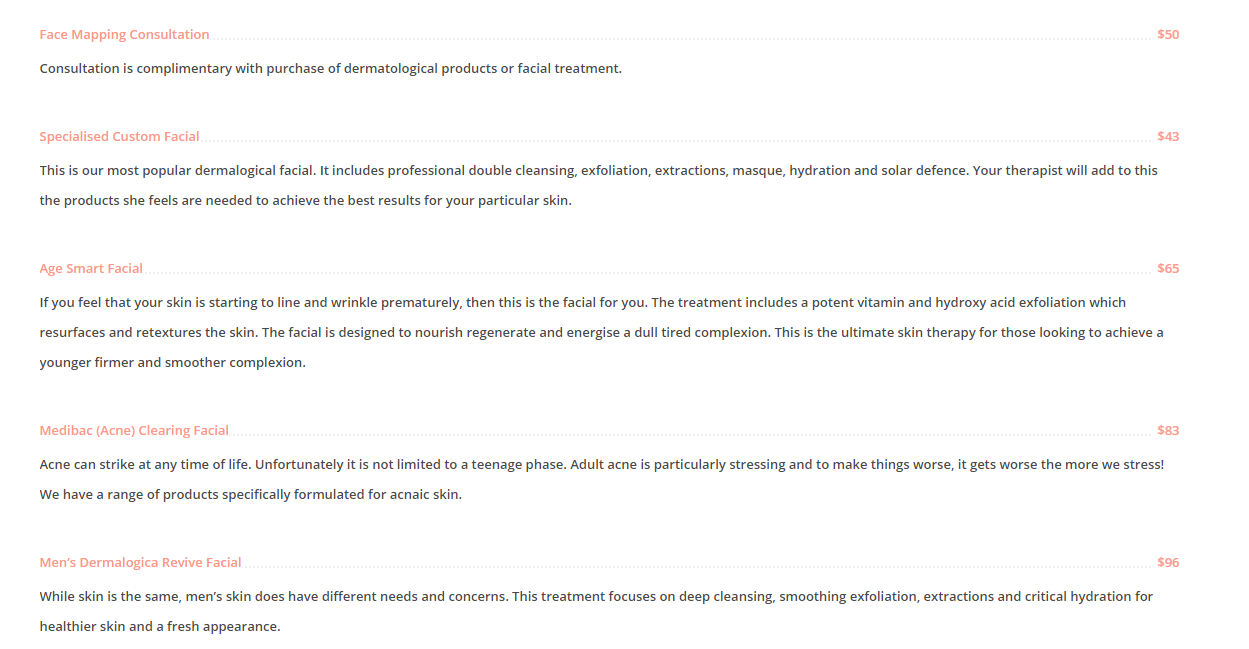
Create a price-list or table of content with simple HTML markup:
|
1 2 3 4 5 6 7 8 9 |
<ul class="ct-dottedBox"> <li class="ct-dottedMenu ct-u-motiveColor"> <div class="ct-dottedBg"></div> <span>Face Mapping Consultation</span> <span>$50</span> <div class="clearfix"></div> <p class="ct-dottedMenuDetails">Consultation is complimentary with purchase of dermatological products or facial treatment.</p> </li> </ul> |
Was this article helpful ?
Gallery
Looks Good comes with three types of Gallery:
Standard gallery (OWL gallery)
Example of HTML markup:
|
1 2 3 4 5 6 7 8 9 10 11 12 13 14 15 16 17 |
<div class="ct-js-owl ct-owl-item--smallPadding ct-js-popupGallery" data-items="6" data-animations="false" data-navigation="true" data-autoPlay="false" data-single="false" data-pagination="false"> <a href="assets/images/demo-content/gallery_bigimage3.jpg" class="ct-js-popup"> <div class="item ct-gallery-itemInner ct-u-displayBlock"> <img src="assets/images/demo-content/gallery-sec-image1.jpg"> </div> </a> <a href="assets/images/demo-content/gallery_bigimage9.jpg" class="ct-js-popup"> <div class="item ct-gallery-itemInner ct-u-displayBlock"> <img src="assets/images/demo-content/gallery-sec-image2.jpg"> </div> </a> <a href="assets/images/demo-content/gallery_bigimage11.jpg" class="ct-js-popup"> <div class="item ct-gallery-itemInner ct-u-displayBlock"> <img src="assets/images/demo-content/gallery-sec-image3.jpg"> </div> </a> </div> |
Masonry Gallery
HTML markup:
|
1 2 3 4 5 6 7 8 9 10 11 12 13 14 15 16 17 18 19 20 21 22 23 24 |
<div id="ct-gallery" class="ct-gallery ct-gallery--col4 ct-js-popupGallery ct-gallery--smallPadding"> <div class="ct-gallery-item ct-gallery-item--masonry ct-gallery-item--default hidden ct-gallery-item--normal facials"> <a href="assets/images/demo-content/gallery_bigimage25.jpg" class="ct-js-popup"> <div class="ct-gallery-itemInner"> <img src="assets/images/demo-content/masonry-image1.jpg" alt="Image"/> </div> </a> </div> <div class="ct-gallery-item ct-gallery-item--masonry ct-gallery-item--default hidden ct-gallery-item--normal facials"> <a href="assets/images/demo-content/gallery_bigimage17.jpg" class="ct-js-popup"> <div class="ct-gallery-itemInner"> <img src="assets/images/demo-content/masonry-image4.jpg" alt="Image"/> </div> </a> </div> <div class="ct-gallery-item ct-gallery-item--masonry ct-gallery-item--default hidden ct-gallery-item--normal facials"> <a href="assets/images/demo-content/gallery_bigimage20.jpg" class="ct-js-popup"> <div class="ct-gallery-itemInner"> <img src="assets/images/demo-content/masonry-image7.jpg" alt="Image"/> </div> </a> </div> </div> |
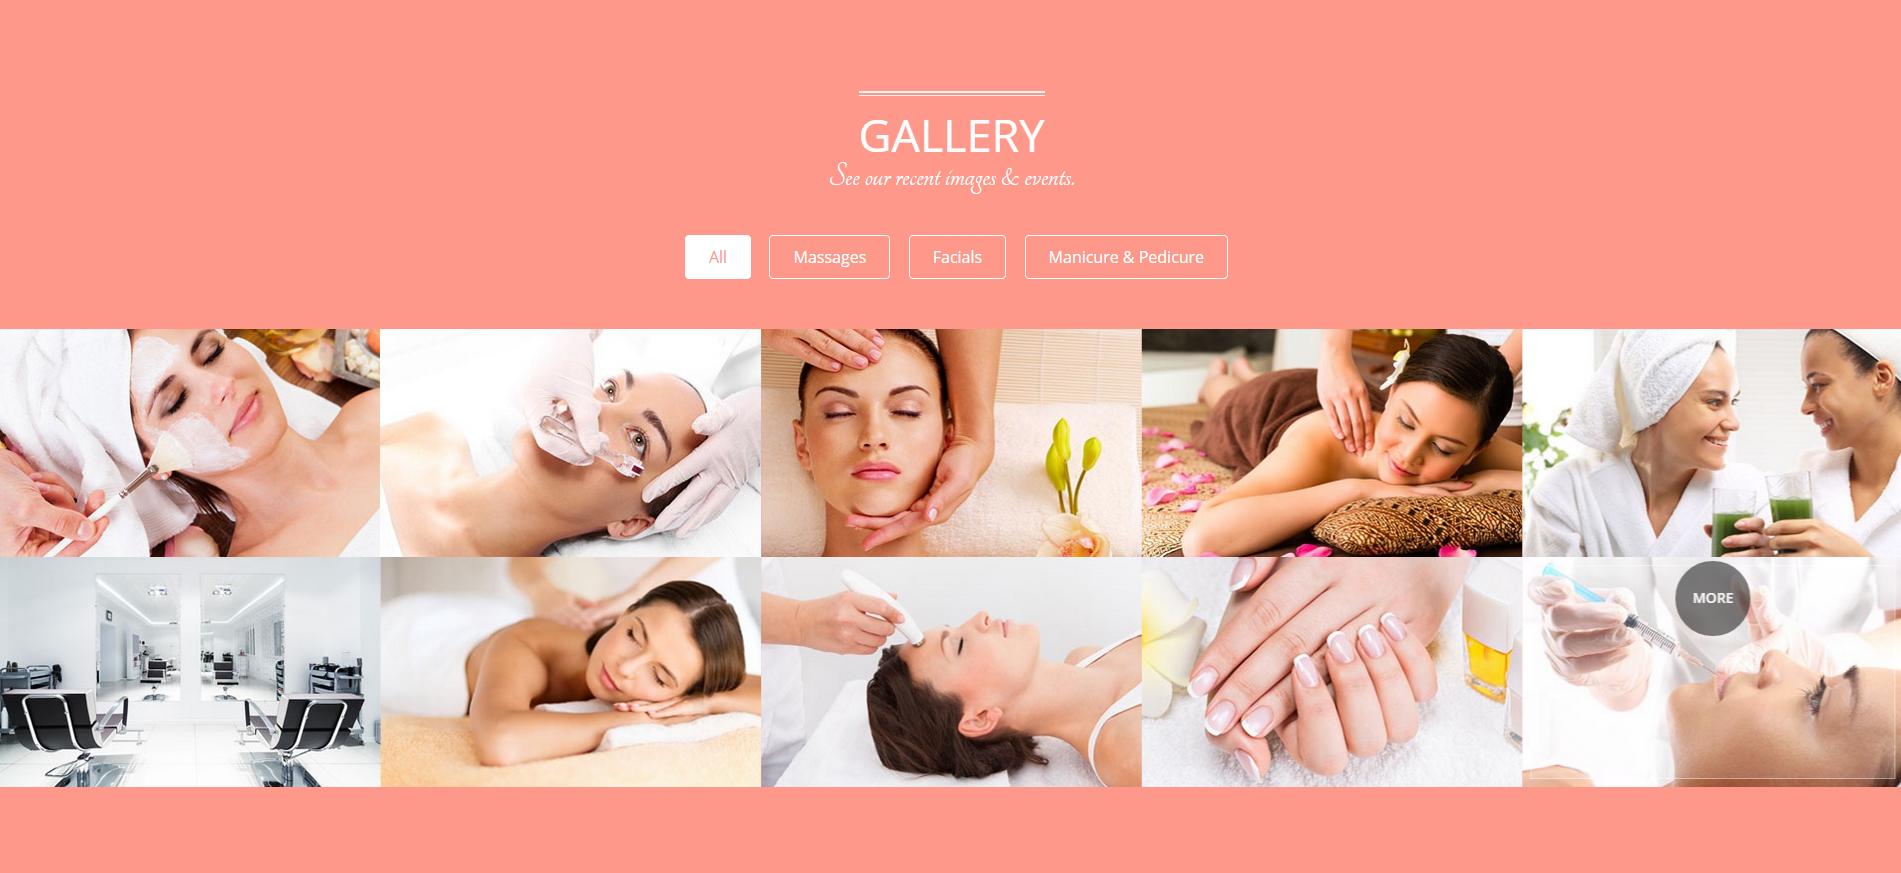
Gallery with filters
HTML markup:
|
1 2 3 4 5 6 7 8 9 10 11 12 13 14 15 16 17 18 19 20 21 22 23 24 25 26 |
<div class="text-center"> <ul class="ct-gallery-filters list-unstyled list-inline"> <li><a data-filter="*" class="active">All</a></li> <li><a data-filter=".massages">Massages</a></li> <li><a data-filter=".facials">Facials</a></li> <li><a data-filter=".manicure">Manicure & Pedicure</a></li> </ul> <div class="clearfix"></div> </div> </div> <div id="ct-gallery" class="ct-gallery ct-gallery--col5 ct-js-popupGallery"> <div class="ct-gallery-item ct-gallery-item--masonry hidden facials"> <a href="assets/images/demo-content/gallery_bigimage1.jpg" class="ct-js-popup"> <div class="ct-gallery-itemInner"> <img src="assets/images/demo-content/gallery-image1.jpg" alt="Image"/> </div> </a> </div> <div class="ct-gallery-item ct-gallery-item--masonry hidden facials"> <a href="assets/images/demo-content/gallery_bigimage2.jpg" class="ct-js-popup"> <div class="ct-gallery-itemInner"> <img src="assets/images/demo-content/gallery-image2.jpg" alt="Image"/> </div> </a> </div> </div> |
Notice:
The following plugins are used in gallery:owl-carousel.js
imagesloaded.js
jquery.isotope.min.js
Was this article helpful ?
Image Box
Image box is simply image with cool hover effect.
HTML markup:
|
1 2 3 |
<div class="ct-imageBox ct-u-displayBlock"> <img src="assets/images/demo-content/welcome-image.jpg" alt="Image" /> </div> |
Available variations – just add selected class to HTML markup:
- ct-imageBox–transparent
- ct-imageBox–doubleLine
Was this article helpful ?
Javascript
All javascripts are placed in folder /js. In main.js file we implement all functions calls.
This theme uses following Javascript files:
- HTML/assets/js/jquery.min.js – Jquery Plugin
- HTML/assets/js/bootstrap.min.js – Bootstrap Plugin
- HTML/assets/js/placeholder.min.js
- HTML/assets/js/easing.1.3.js
- HTML/assets/js/device.min.js
- HTML/assets/js/jquery.browser.min.js
- HTML/assets/js/snap.min.js – Snap Plugin is for responsive menu
- HTML/assets/js/jquery.appear.js
- HTML/assets/js/masonry.min.js – This is using in home page and in gallery
- HTML/assets/plugins/owl/owl.carousel.min.js – slider plugin
- HTML/assets/plugins/owl/init.js
- HTML/assets/js/portfolio/imagesloaded.js – Needed for gallery
- HTML/assets/plugins/magnific-popup/jquery.magnific.min.js – Needed for gallery, using when you want to see a big image after click on thumbnail
- HTML/assets/plugins/magnific-popup/init.js
- HTML/assets/plugins/ct-mediaSection/js/jquery.stellar.min.js
- HTML/assets/plugins/ct-mediaSection/js/init.js
- HTML/assets/js/jquery.gray.js this plugin is for image
- http://maps.google.com/maps/api/js?sensor=false
- HTML/assets/js/gmaps/gmap3.min.js
- HTML/assets/js/gmaps/init.js
- HTML/assets/js/datepicker/moment.js
- HTML/assets/js/datepicker/bootstrap-datetimepicker.min.js – needed to have a small calendar on the page
- HTML/assets/js/headroom/headroom.js – creates effect for menu and topbar
- HTML/assets/js/headroom/jQuery.headroom.js
- HTML/assets/js/headroom/init.js
- HTML/assets/js/select2/select2.js – select input on the page
- HTML/assets/js/main.js – Main scripts
- HTML/assets/js/less.min.js
Google Map (GMAP3 Plugin)
This is google map with custom marker, you can define couple parameters:
- data-location – address to show
- data-height – map height (if undefined height will be 220px)
- data-offset – by how many map should be repositioned from marker center point (default -30)
It uses gmap3 plugin.
Documentation: here
HTML Markup:
|
1 |
<div class="ct-googleMap" data-location="Narbutta 24, Warsaw" data-zoom="15" data-height="500"></div> |
All javascript code can be found in js/main.js file.
jquery.appear
This plugin call function when element appear in viewport. This is used in custom animation, progress bars, counter timer.
Documentation: https://github.com/bas2k/jquery.appear/
|
1 2 3 4 5 6 7 8 9 10 11 12 13 |
if (jQuery().appear) { if (device.mobile()) { // disable animation on mobile jQuery("body").removeClass("withAnimation"); } else { jQuery('.withAnimation .animated').appear(function () { jQuery(this).each(function () { jQuery(this).addClass('activate'); jQuery(this).addClass($(this).data('fx')); }); }, {accY: -150}); } } |
Charts.js
This plugin is used to make graphics.
Documentation: http://www.chartjs.org/
Was this article helpful ?
Contact Form
Template comes with ready to use:
- Contact Form
- Newsletter Form
All needed files are in /form directory.
Remember to includeon page.
To configure form just edit form/config.php and change e-mails to your own :
|
1 2 |
$to = "mail@example.com"; $from = "mail@example.com"; |
That’s it!
Contact Form
HTML Markup:
|
1 2 3 4 5 6 7 8 9 10 11 12 13 14 15 16 17 18 19 20 21 22 23 24 25 26 27 28 29 30 31 32 33 34 35 36 37 38 39 40 41 42 43 |
<div class="ct-contactForm"> <div class="successMessage alert alert-success" style="display: none"> <button type="button" class="close" data-dismiss="alert" aria-hidden="true">×</button> Thank You! </div> <div class="errorMessage alert alert-danger" style="display: none"> <button type="button" class="close" data-dismiss="alert" aria-hidden="true">×</button> Ups! An error occured. Please try again later. </div> <form role="form" action="./assets/form/send.php" method="post" class="contactForm validateIt" data-email-subject="Contact Form" data-show-errors="true"> <div class="row"> <div class="col-md-6"> <div class="form-group"> <input id="contact_name" placeholder="Name" required="" type="text" name="field[]" class="form-control"> <label for="contact_name">Name</label> </div> <div class="form-group"> <input id="contact_email" placeholder="Email" required="" type="email" name="field[]" class="form-control"> <label for="contact_email">Email</label> </div> <div class="form-group"> <input id="contact_subject" placeholder="Subject" required="" type="text" name="field[]" class="form-control"> <label for="contact_subject">Subject</label> </div> </div> </div> <div class="row"> <div class="col-xs-12"> <div class="form-group"> <textarea id="contact_message" placeholder="Message" class="form-control" rows="8" name="field[]" required=""></textarea> <label for="contact_message">Message</label> </div> </div> </div> <div class="row"> <div class="col-xs-12"> <button type="submit" class="btn ct-btn--perspective btn-primary btn-lg text-uppercase pull-right"><i class="fa fa-paper-plane"></i> Send Message </button> </div> </div> </form> </div> |
Was this article helpful ?
Sources & Credits
The following sources and files have been used to build up this theme
- Twitter Bootstrap – http://twitter.github.com/bootstrap/
- jQuery – http://www.jquery.com
Was this article helpful ?


