Fundamentally, the WordPress Theme system is a way to “skin” your weblog. Yet, it is more than just a “skin.” Skinning your site implies that only the design is changed. WordPress Themes can provide much more control over the look and presentation of the material on your website. More information here
Add our theme – Step by step
- Download package from your ThemeForest account – Download section
- Unpack package and locate zip file “theme_name”.zip – this file you will be used in installation
- Choose how you want to install it:
Adding New Themes using the Administration Panel
(You can download Themes directly to your blog by using the Add New Themes option in the Appearance sub-menu.):
- Login to the WordPress Administration Panel
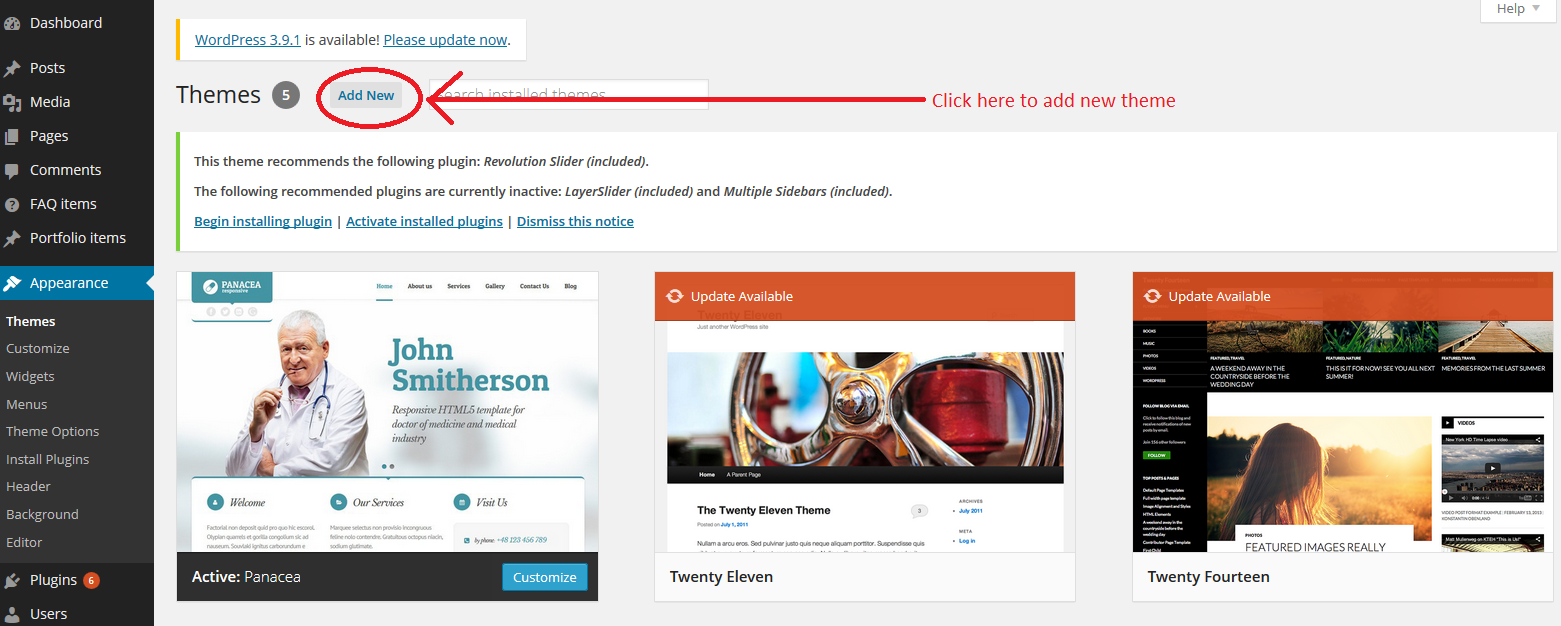
- Select the Appearance > Themes
- Click Add New.
- Either use the Search or Filter options to locate a Theme you would like to use.
- Click on the Preview link to preview the Theme or the Install Now link to upload the Theme to your blog,
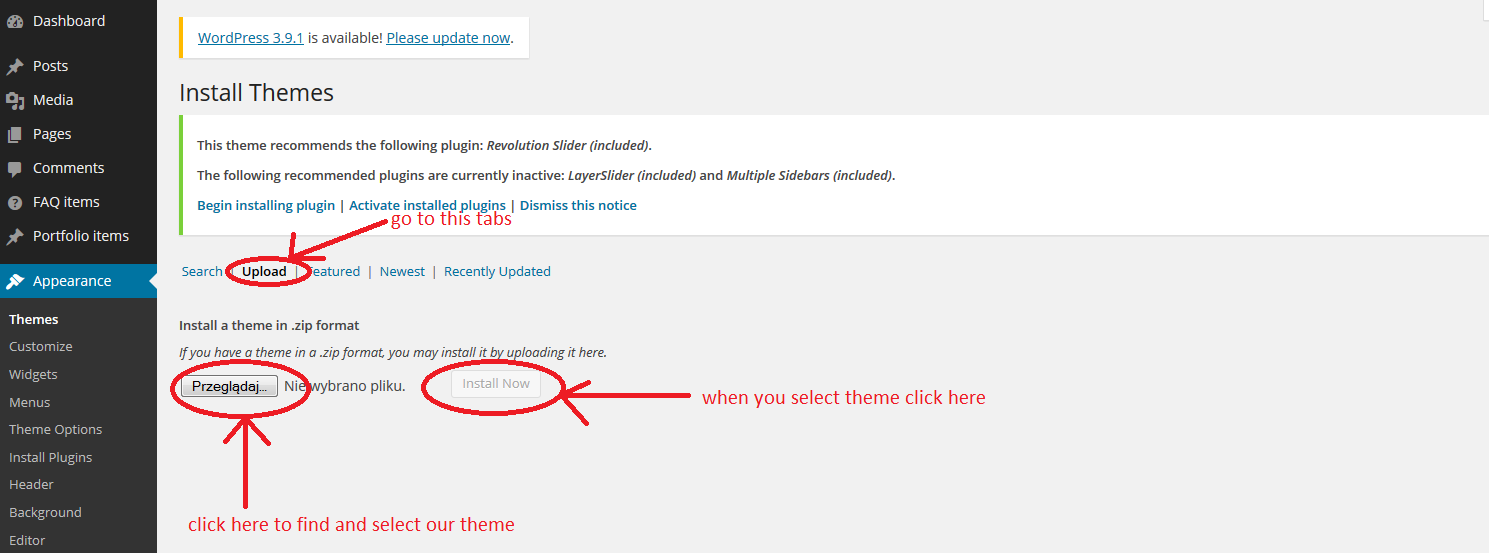
- Or use the Upload link in the top links row to upload a zipped copy of a Theme that you have previously downloaded to your machine.
Adding New Themes Manually (FTP)
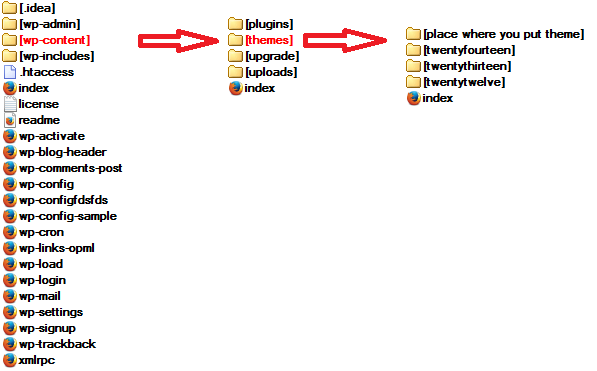
- Using an FTP client to access your host web server and open theme file zip
- Upload the Theme files to the new directory on your host server.
- Follow the instructions below for selecting the new Theme
Selecting the Active Theme
(To select a Theme for your site):
- Log in to the WordPress Administration Panels.
- Select the Appearance panel, then Themes.
- From the Themes panel, roll over the Theme thumbnail image for the Theme you are interested in to see options for that theme.
- You can view more information about any theme by clicking Theme Details.
- A live preview of any Theme (using your blog’s content) can be seen by clicking Live Preview.
- To activate the Theme click the Activate button.


