

Installation and activation
Installation via Administration Panel
When Size Guide files are downloaded from your CodeCanyon account. You can start installation using WordPress administration panel.
Once you’ve logged into your administration panel go to Plugins > Add New
Then:

Chose Upload (1), click Select a file (2), ct-size-guide.zip from your hard drive and click Install Now (3)
Installation via FTP
To install Size Guide via FTP follow step below:
- Step 1 – Unarchive ct-size-guide.zip file
- Step 2 – Access your host web server using FTP client
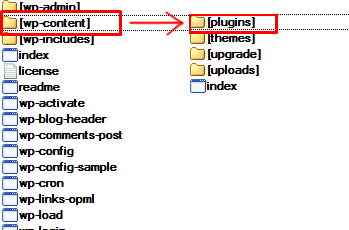
- Step 3 – Find directory wp-content > plugins
- Step 4 – Put folder ct-size-guide.zip in directory wp-content > plugins
Was this article helpful ?
Creating a size guide
Please note that upon plugin activation there are two sample size guides created, for a quick start you can just edit them!
To create a new size guide:
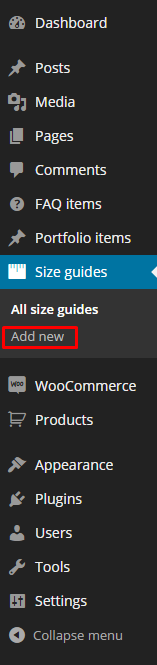
Go to Size guides > Add new in your WordPress Admin Panel
Create a new size guide
Insert a title and content
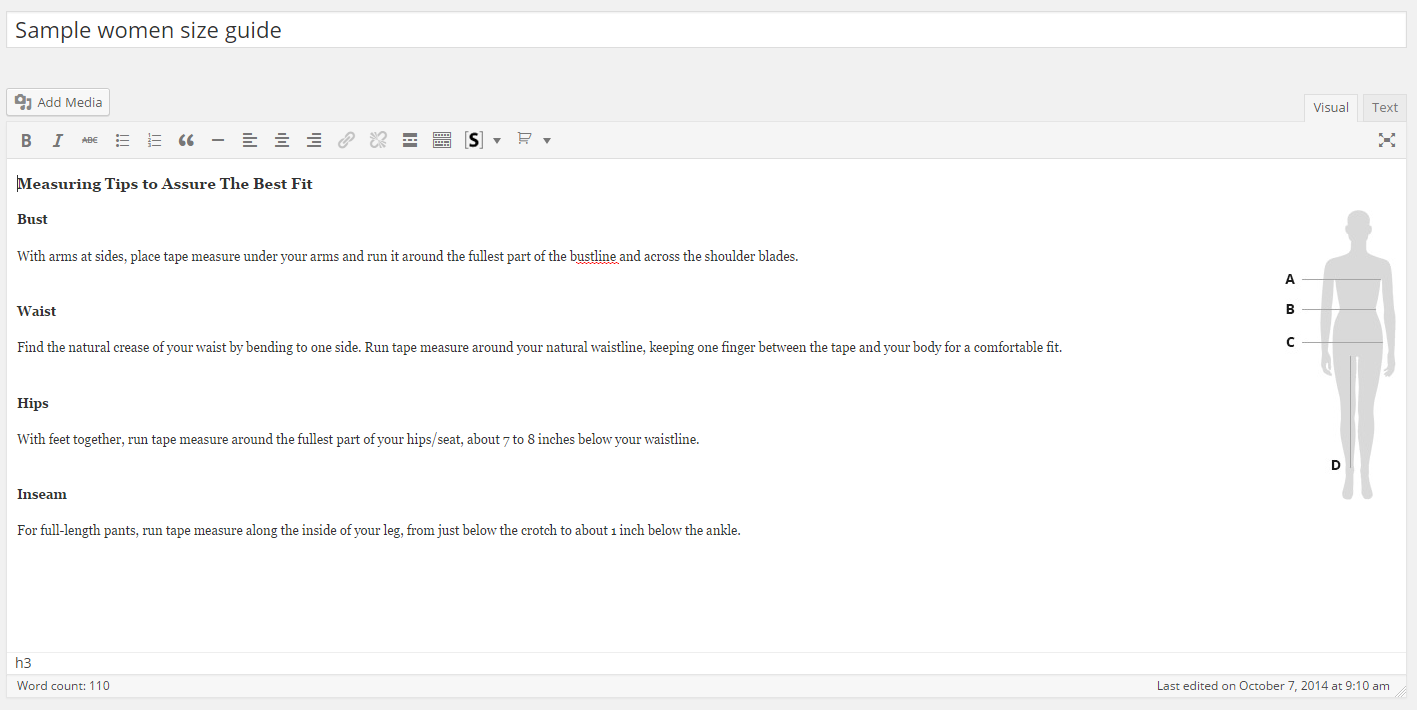
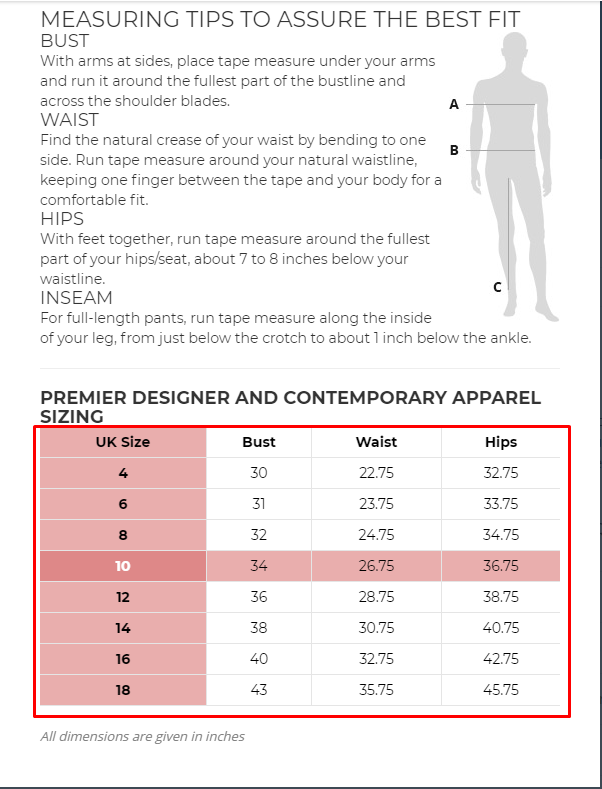
Fill size guide content
Title will be the name of the size guide. In the content, you can for example describe how a customer can measure its sizes properly.
Fill the size guide

Fill the size guide table content
In the sections 1 and 3 you can specify a table header and a caption.
To add/remove columns and rows just use the plus/minus buttons (inside red squares on the screenshot). Right, it’s as simple as that!
Fill table cells by just clicking on them and inputing the text.
Everytime you create a size guide there is a basic 4×4 table attached to make your work easier.
If you wish to add or remove added extra table use the Add Table or the Remove Table button (2)
Publish it and go to the next section
Publish the size guide
Was this article helpful ?
Size guide settings
On every created Size Guide you can either use the global settings or adjust them separately.
Go to WooCommerce > Settings > Size guide tab

WooCommerce > Settings > Size guide tab
Options to choose from:
Style
You can choose one of the existing styles or create a new one (details in Creating a style section):
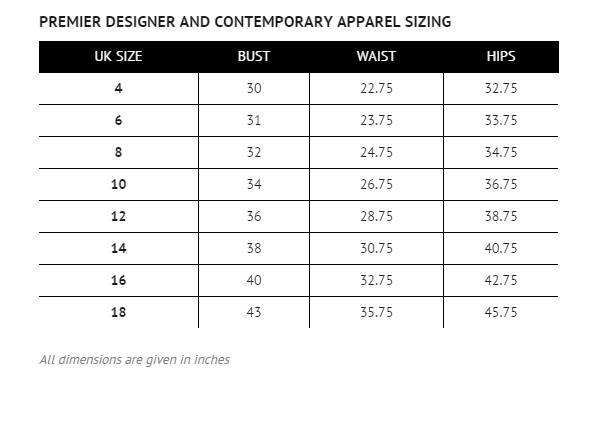
Classic
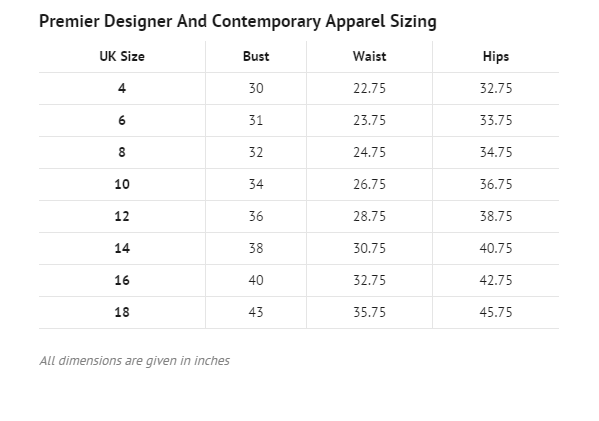
Minimalistic
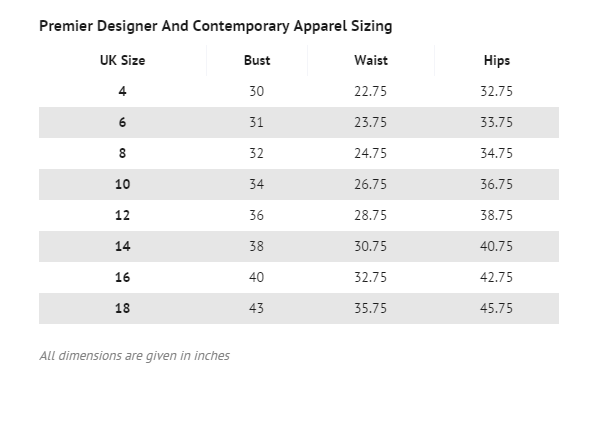
Modern
Hide Size Guide
Check this field to hide size guide when the product is out of stock.
Size guide will be displayed if you allow backorders in products settings.
Open guide with
Choose whether to display a simple link or a button to open the size guide.
Button/link position
You can display it either above the product summary tabs (Description, Reviews etc.), after the ‘add to cart’ button, as a tab or use the [ct_size_guide] shortcode on the Single Product page.
Button/link hook priority
Priority of the action that outputs the button/link. Priority is “Used to specify the order in which the functions associated with a particular action are executed. Lower numbers correspond to earlier execution, and functions with the same priority are executed in the order in which they were added to the action.”
If you choose to display the Size Guide above the product summary tabs or after the ‘add to cart’ button this might help you change the position. The final outcome might depend on other plugins and theme features that use the given hooks. ‘woocommerce_after_add_to_cart_button’ hook is not used often, but the ‘woocommerce_single_product_summary’ is commonly used. The basic actions hooked in (almost) every WooCommerce theme are:
woocommerce_template_single_title – 5
woocommerce_template_single_price – 10
woocommerce_template_single_excerpt – 20
woocommerce_template_single_add_to_cart – 30
woocommerce_template_single_meta – 40
woocommerce_template_single_sharing – 50
where the numbers mean the priority. The lower the digit is, the earlier the action will be executed. For example, if you display the Size Guide above the product summary tabs, you can display it right under the title by setting the priority to 7 (or anywhere between 5 and 10) or after the price by setting it to 15 and so on.
Button/link label
Enter the text to be displayed in the link/button. Default: Size Guide.
Button/link align
Choose if the button should be aligned left or right.
Button/link clearing
Allow or disallow floating elements on the sides of the link/button.
More advanced users: if set to no, this option will add a ‘clearfix’ after the button/link.
Button class
You can add any custom class to the button.
Margins
Set the margins on the sides of the link/button.
Popup overlay color
Set the color of the background behind the Size Guide popup window.
Paddings
Set the paddings inside the Size Guide popup window.
Table hover
Option to enable hover effect on the Size Guide table.
Background for hover line
The BG color of the rows and columns of the cell you are hovering.
Background for hover active cell on hover
The BG color of the cell you are hovering.
Responsive tables
Option to enable/disable the responsive view of the table in the Size Guide.
Size Guide Sample with Hover
Was this article helpful ?
Using Product CSV Import Suite
After updating the plugin to version 2.1 WooCommerce Product Size Guide is compatible with Product CSV Import Suite
Using CSV you will be able to export the content of your size guide items and then open them using office software like Open Office or Microsoft Exel.
After opening the file you will be able to change the content of imported tables by (for example) attaching products to new categories.
Below you can check step-by-step instruction how to use this new feature from exporting product Size guide tables to importing them after adding your custom changes.
DOWNLOADING PRODUCT FILE
1.Go to WooCommerce > CSV Import Suite and in Export Products tab choose Export Products – this way you will get .csv file with all of the product information.

Exporting Size Guide content
2. Open the .csv file using office software you have installed on your computer.
3. Please find AO columnt with the meta:_ct_selectsizeguide here you will find which products ( you will find products name in first column ) are attached to which size guide (ID numbers in the meta:_ct_selectsizeguide)

AO column
ADDING SIZE GUIDE TO PRODUCT
To add size guide to product you need to get the Size Guide ID to do that please:
1. Go to the Size guides and choose the size guide you want to add by choosing Edit

Choose SG
2. In the SizeGuide slug you will find a number – this is the ID we are looking for!

Size Guide ID
3. Go back to the downloaded file and add the ID to the product you want to use this Size Guide and save the changes in the file.

Adding new ID
IMPORT CHANGES
1. The last step is Importing the files with your changes – Go to WooCommerce > CSV Import Suite and in Import Products tab choose Import Products
2. Choose the option Choose File and add the file with your changes

Adding the file
3. Hit the Upload file and import button and it is done!
Was this article helpful ?
Translating Size Guide to Different Languages using WPML Plugin
To use this option, you need to have installed (WordPress Multilingual Plugin) WPML plugin, which you can buy here.
This plugin isn’t part of the Size Guide bundle, to use this function you must have the WPML plugin.
Translating Text Content
To be able to fully integrate the translation functionality of WPML plugin:
- Once you have installed the WPML plugin, go to WPML > Translation Management. Choose the Multilingual Content Setup tab and click on Use the translation editor radio button then save.
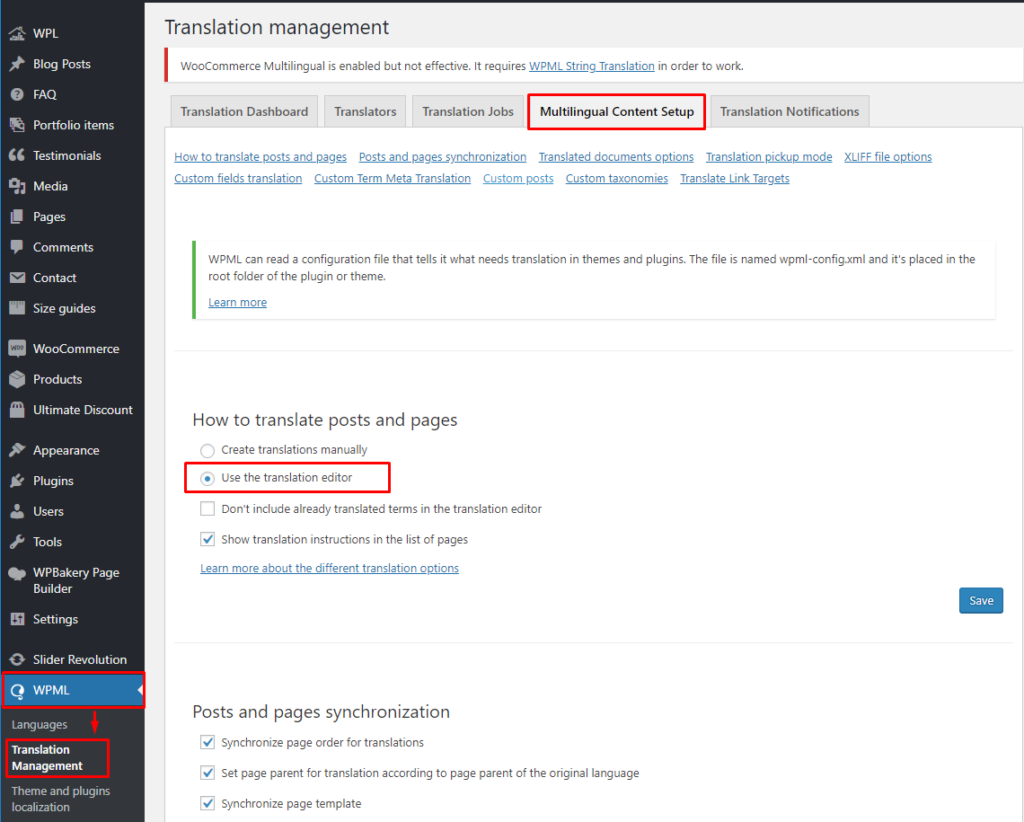
Multilingual Content Setup tab
- Scroll down and look for Custom Fields Translation. Click Show system fields to show all available fields.
- Look for the Size Guide custom field. Then click the Translate radio button beside the custom field.
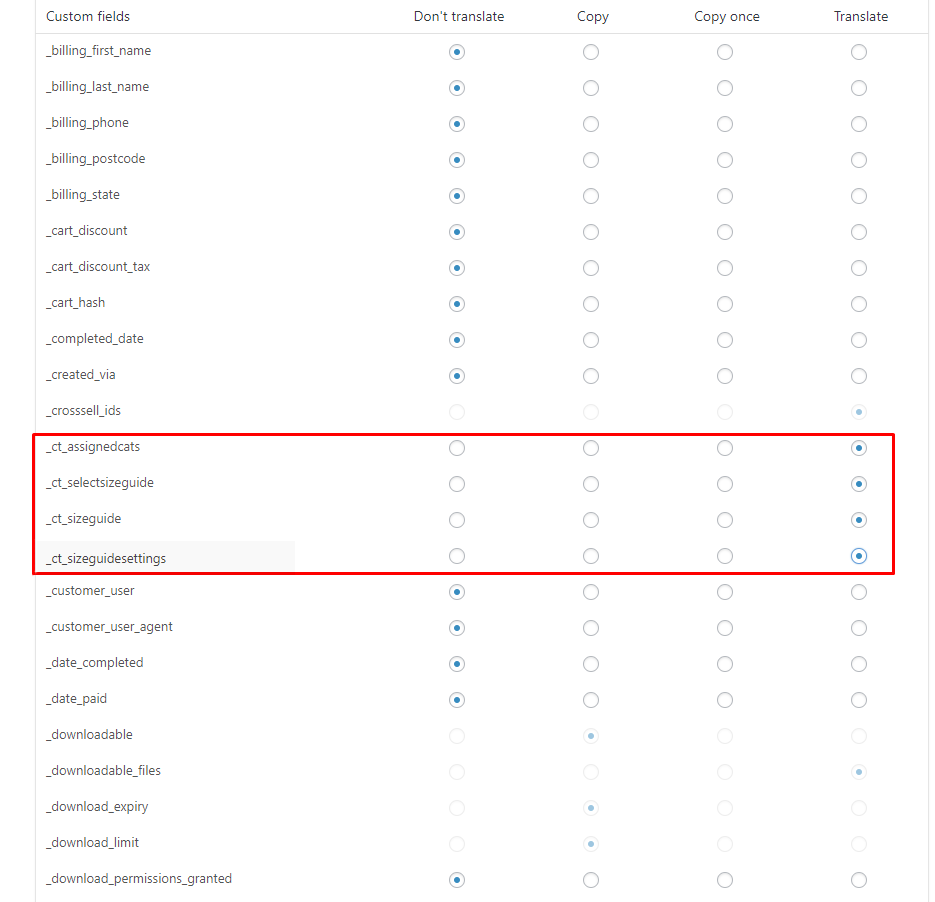
Custom Fields
Custom fields will show when activated/used in the site.
- When you have done all this, go to WooCommerce > WooCommerce Multilingual. You will see all the products available. Choose a product and click on the Plus Sign (+) on the language you would like to add a translation to.
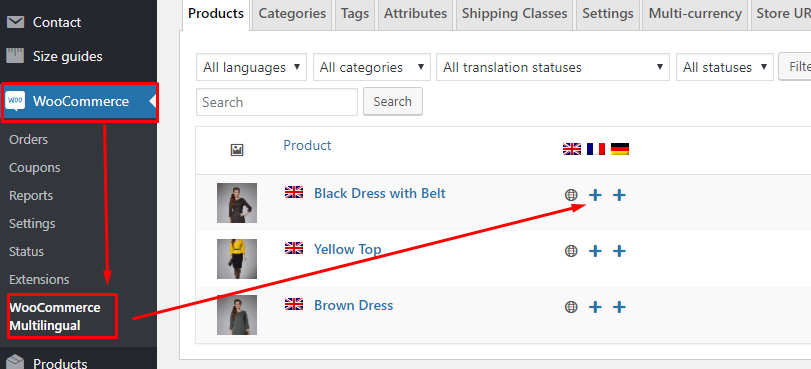
WooCommerce > WooCommerce Multilingual
- You will see the Original (English) version of the text content of the product item and an area to add the translation of the language you chose.
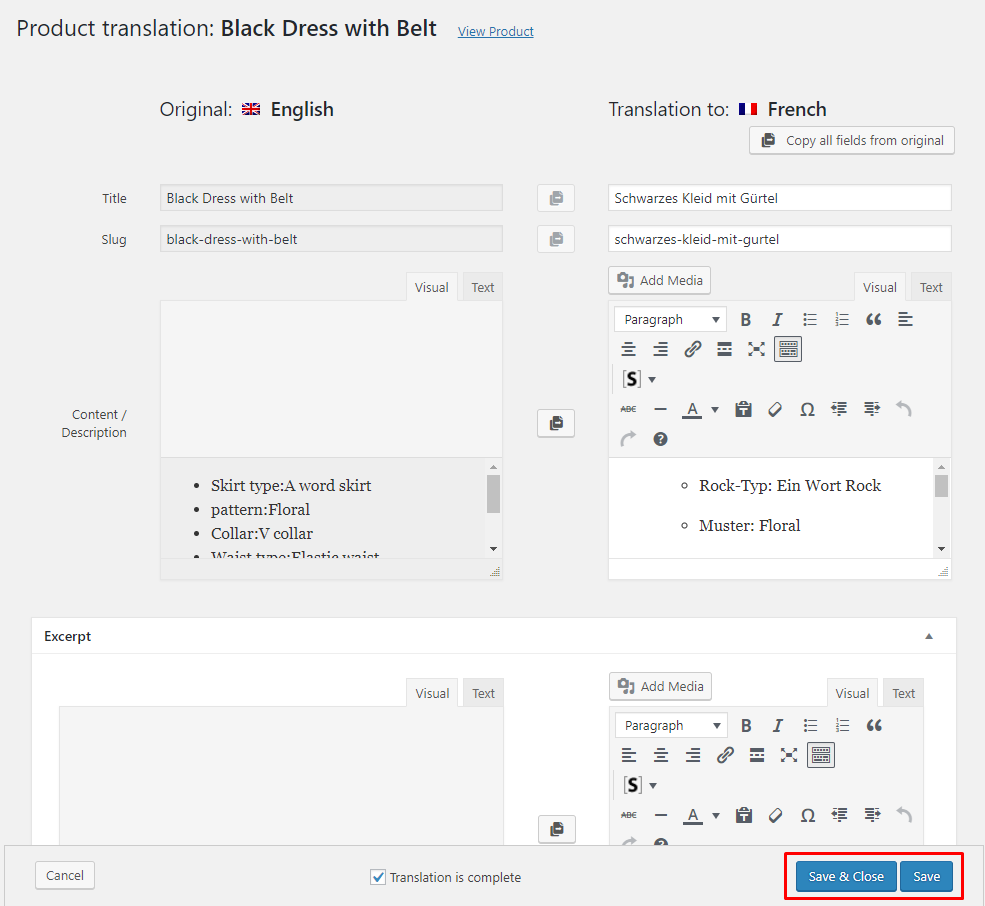
Product Translator
- Add the translation as you see fit, then click the Save button.

Sample

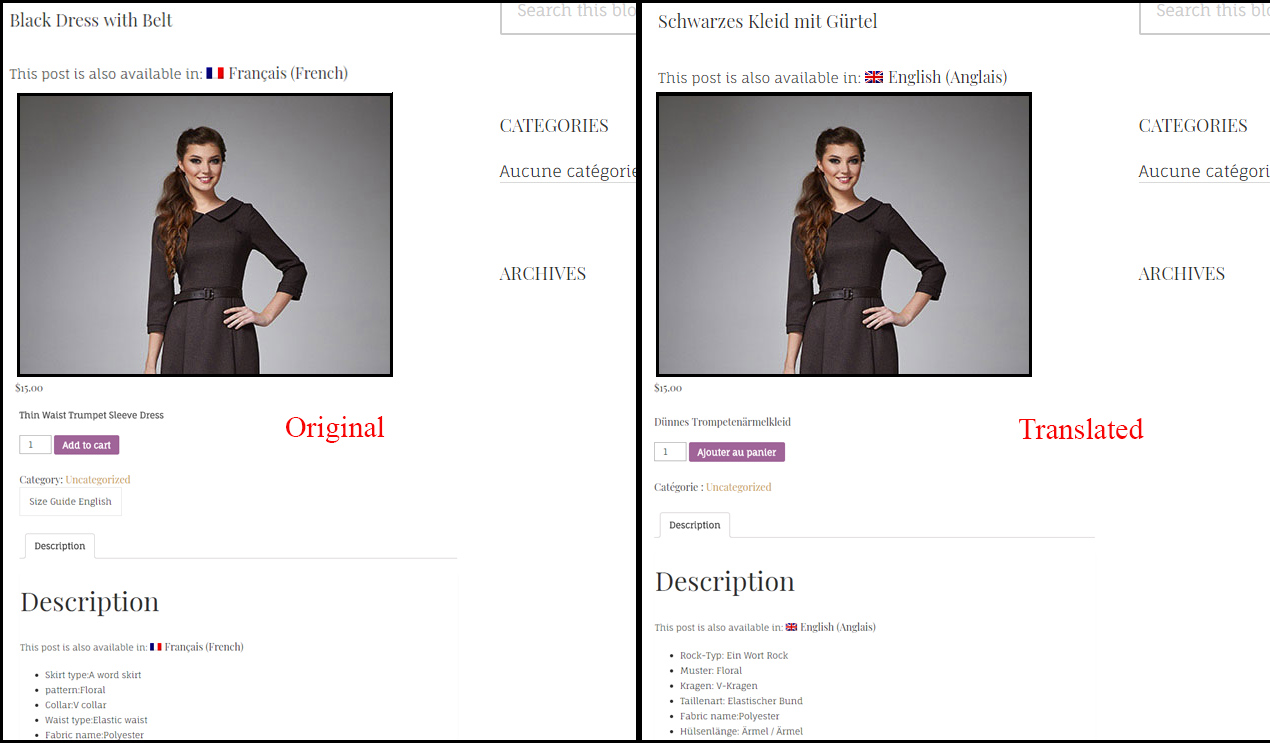
How translate the button
Adding separate size guide label with different languages can be integrated to this plugin.
To make a Size Guide Label with a different language, follow the steps:
- Step 1 – In WooCommerce > Settings > Size guide settings, Add the label that will be used for the Size Guide button/link. This will be used later to label what language is going to be used.

- Step 2 – In WPML > String Translation, look for the button/link associated with the Size Guide, then set the labels for other languages used in the theme.

- Step 3 – Once done, click on Save. The result would be like this:


Was this article helpful ?
Translating SizeGuide to different language using POT file
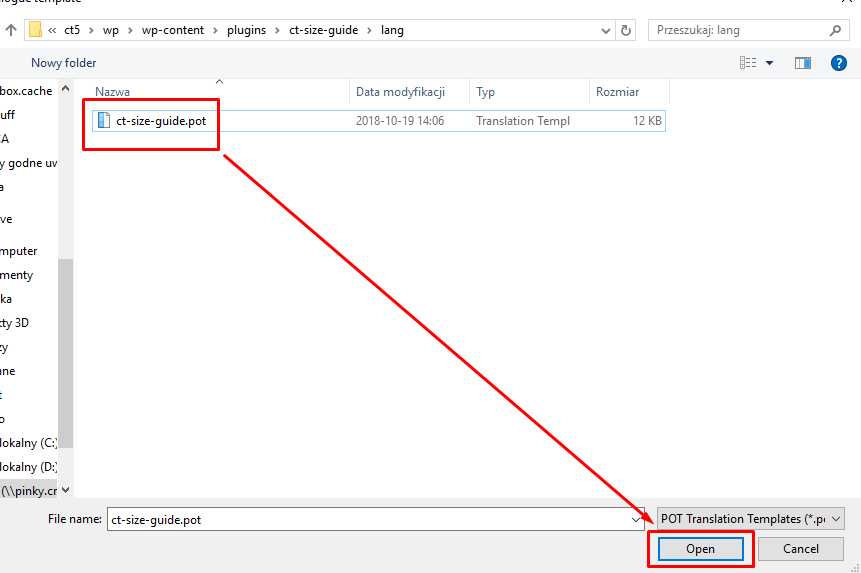
POT is generated from plugin files and contain all phrases from the plugin that can be translated to a different language. The POT file for this plugin is ct-size-guide.pot, and it can be found on path /wp-content/plugins/ct-size-guide/lang/
The translation can be created by a translation editor like Poedit or one of the free to use WordPress plugins like Loco Translate. This way you will be able to create PO (Portable Object) and MO (Machine Object) file from the plugin POT file. But the only file we are able to edit is the PO file. In the PO file, we are saving both English and the translations for this phrases. All translations you created are added there. Saving the changes there will also update the MO file that is used by the plugin.
How to translate plugin using Poedit
-
Install a translation editor from this site Poedit on your computer.
-
Choose the ct-size-guide.pot file to translate.
- You will be asked what language to translate the file into. Choose the language you wish to translate to:
![]()
-
Click on a word from the source text one by one and translate.
-
Once done translating the words in the Source text, save the file.
-
When saving a file, ct-size-guide- should be added to the default file name.
![]()
-
Once saved, it will create a PO and MO file.
-
Copy the PO and MO file to the WordPress language directory located at /wp-content/languages/plugins or /wp-content/plugins/ct-size-guide/lang
-
To activated the created translation please, navigate your dashboard to Settings > General.
-
You will see the General Settings of your site. To activate the translation, look for the Site Language and select the one that you like.
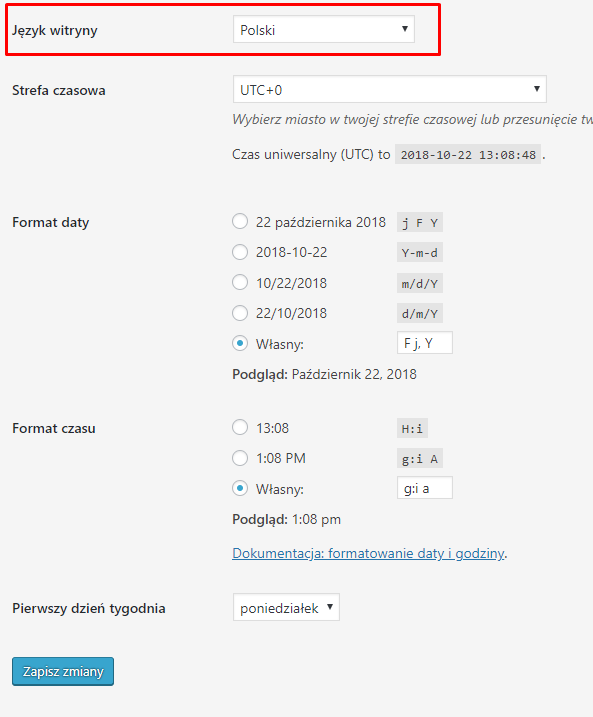
-
After selecting the site language, click the Save Changes button and a loading icon will show. Once the loading icon disappears, the translation should be done.
For more information on how to translate a plugin using Poedit, click this link.
How to translate plugin using Loco Translate
To translate the English text used in our SIze Guide plugin please follow steps below:
- Install and activate the plugin Loco Translate
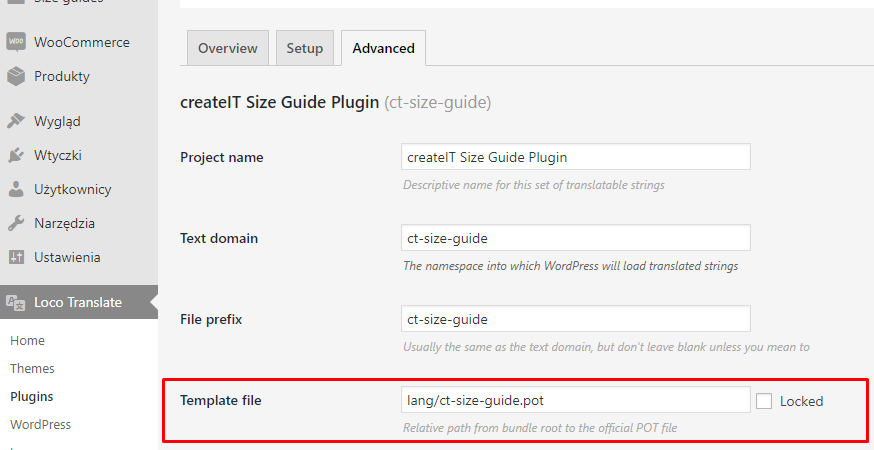
- Then from your Dashboard Go to Loco Translate > Plugins where createIT Size Guide Plugin plugin can be chosen.
- Go to the Advanced tab and set there where you will be able to set the path to POT file: lang/ct-size-guide.pot click Save config button.
- Go back to Overview tab and click the + New language button.
- Then on the next screen, a Country dropdown list will appear, Select The language you want the texts to be translated. e,g: Polish and continue.
- On the next screen, all the English text strings that are inside the plugin will be listed. Select text string from the Source text list and then Add your translated text in the text area below and click save.
![]()
- To activate the created translation please, navigate your dashboard to Settings > General.
- You will see the General Settings of your site. To activate the translation, look for the Site Language and select the one that you like.
- After selecting the site language, click the Save Changes button and a loading icon will show. Once the loading icon disappears, the translation should be done.
For more information please follow created by developers Guides and Tutorials which can be found here: LINK.
Was this article helpful ?
Assigning a size guide to a product
There are two ways to get the size guide displayed:
You can assign a size guide to one category or a few, by selecting a category on the size guide editing screen
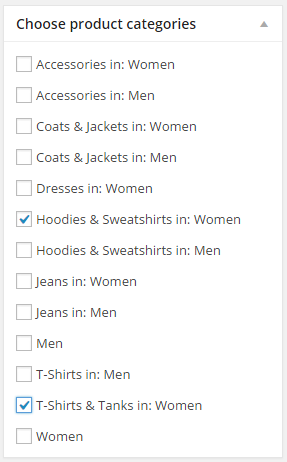
Assign a size guide to a category
Once size guide is assigned to the whole product category or categories you can still disable it for single products by checking option Hide size guide from this product
Or you can assign a size guide to a particular product by using the “Choose size guide” box on the product editing screen:
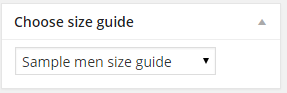
Assign a size guide to a product
If you select a size guide for a particular product, it will be attached to that product even if the products category has its own size guide assigned.
Was this article helpful ?
Adding Size Guide to other pages.
From version 3.5 of the WooCommerce Product Size Guide, available is an option to add the SG tables outside the Single product page. It can be achieved by using Shortcode provided by the plugin.
These shortcodes can be found in the WordPress Dashboard on path Size guides > All size guides
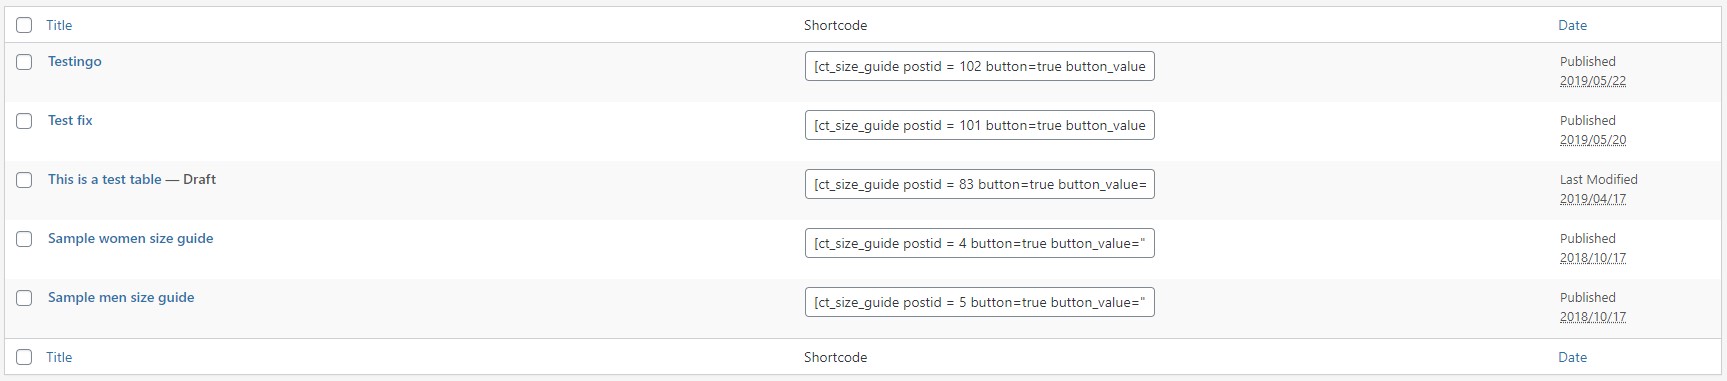
Size guides shortcodes
If the page is using WPBakery Builder the shortcode can be added as a text in Text Block Settings.
where:
postid = 102 // Is the ID of the SG that will be used
button=true // This parameter allows to show the SG as a button (true) or will simply add the table to the page (false)
button_value =”” // When left empty the button will be named Button/link label + SG title. The user also can separately set the text for each button by adding the text between ” “
Was this article helpful ?
Creating a style
You can add your own stylesheet to the settings tab using ct_sizeguide_styles filter.
Example:
add_filter(‘ct_sizeguide_styles’ , ‘add_sizeguide_style’);
function add_sizeguide_style($current){
$StylesheetURL = ‘http://www.example.com/assets/sg_style.css’; //link to the stylesheet
$label = ‘My custom style’; //name of the style to be displayed in the settings
$current[$StylesheetURL] = $label;
return $current;
}
This code should go to your functions.php file (or anywhere else you wish).
If you are developing a theme and want your style to be selected upon the plugin activation, simply change the body of the function to:
$current = array($StylesheetURL => $label) + $current;
return $current;
Was this article helpful ?