With {Theme} comes many custom shortcodes for (Visual Composer) VC that are used to show content created in WPL plugin. Below you will find short information about this Visual Composer elements:
-
Agency Box
This element have a single tab with options to customise the way the agency box will be shown. This element lets you show all the information and the logo used by the Agency.

– Agent ID – it can be checked in WPL in User Manager section by navigating to: WPL > User Manager . Copy one of the WPL’s user Id to the Agency box Settings.


– Style – choose the style of the element: Light or Dark
-
Agents Listing

This element have two tabs with options to customise the way how the multiple profiles of the agents will be visible on the site.

– General Tab –
- Title – set the title for this section
- CSS Class – add custom css class

– Sort and Limit-- Order by – Set the order of the agents.
- Order – Set how the order of the agents are shown.
- Limit – Set limit of the agents visible on the site

Sample Agent Listing
-
Profile Box

This element will let you show all the information about the WPL User chosen by its ID. Profile Box have two available options to customise this element.

– Default profile id – it can be checked in WPL in User Manager section by navigating to: WPL > User Manager . Copy one of the WPL’s user Id to the Agency box Settings.
– Style – choose the style of the element: Light or Dark
-
Properties map with searchbox

This element will let you show all the information about the WPL User chosen by its ID. Profile Box have two available options to customise this element.

- Custom map Style – Use one of custom maps styles available on Snazzy Maps site (this option is not compatible with Map Type control).
- Custom map height – Enter map height (in pixels or leave empty for responsive map).
- Zoom value – Set custom zoom value, eg. 10. Please note the map will automatically expand to show all markers.
- Map Type control
- Scale control – Choose between Yes/No
- Google Maps search control – Choose between Yes/No
- My position control – Choose between Yes/No (Works only with https)
- Use custom markers for this map – choose between Yes/No. This way you can add your own custom markers from Media library. Another way to add your custom markers is via Realtyna. This markers can be added on path WPL > Data structure > Listing Types. You will be able to add there your own markers and assing them to Listing type.

By Properties map element you will display a map with markers showing all of the estate locations. The information of the location can be added on path WPL > Add Listing > Address Map by changing location of the marker. You can also edit the location of already existing property by going to WPL > Listing Manager > Edit > Address Map.

-
Properties mini listing

This element gives the option to show a mini list of properties created in WPL plugin on path WPL > Listing Manager.This element have 4 tabs with options to customise how the list of the properties will be shown.

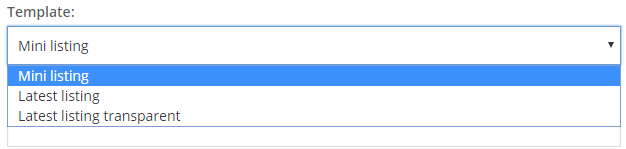
– General Tab –- Template – 1) Mini listing 2) Latest listing 3) Latest listing transparent
- View more text – Add text that’s for View more.
- View more link – Add link that’s for View more.
- CSS class – Add custom CSS class you want to use to style this element.

– Filter Properties –- Kind (only available option: Property)
- Listing – choose which listing will be shown
- Property type – choose visible types
- Listing IDs (Comma Separated) – add which properties will be shown based on the ID
- Agent id – the id of the agent assigned.
- Only Featured – choose between Yes/No
- Only Hot Offer – choose between Yes/No
- Only Open House – choose between Yes/No
- Only Foreclosure – choose between Yes/No

– Sort and Limit –- Order by – Gives you option on the order of the listing.
- Order – Gives you the option on how the listing is shown.
- Number of properties – Set number of properties visible on a single page.
– Buttons –
- Enabled – Choose between Yes/No
- Title – Button visible inside the button
- Link – Set a link for the button.
- Size – Button sizes
- Style – Buttons style
- Transparent {Theme} Style – Choose between Yes/No
- Custom CSS class – Add custom CSS class you want to use to style this element
- Template – 1) Mini listing 2) Latest listing 3) Latest listing transparent
-
Properties listing

This element gives the option to show list of properties created in WPL plugin on path WPL > Listing Manager.
This element have 3 tabs with options to customise how the list of the properties will be shown.

- – General –
- Title – Set title for the list.
- Type listing view – Choose between two views : Grid or List

Grid

List
- CSS Class – Add custom css class you want to use to style this element
- View more text – Change text that will be shown for view more link
- View more link – Add link that for View more
- Columns count in grid view – Set number of columns avaliable for grid view
- Show additional options
- Boxes size
- – Filter Properties –
- Kind (only available option: Property)
- Listing – Choose which listing will be shown
- Property type – Choose visible types
- Listing IDs (Comma Separated) – Add which properties will be shown based on the ID
- Agent id
- Random – Randomise visible list
- Only Featured – Choose between Yes/No
- Only Hot Offer – Choose between Yes/No
- Only Open House – Choose between Yes/No
- Only Foreclosure – Choose between Yes/No
- – Sort and Limit –
- Order by – Gives you option on the order of the listing.
- Order – Gives you the option on how the listing is shown.
- Number of properties – set the number of properties visible on a single page.
-
Properties search

With the use of this element on your site, you will be able to search for estates available on your site. Below you will find information how to customise this elements.
This element isn’t customisable via Visual composer, all the changes to this element can be added by WPL.
For more information on How to Customize the Searchbox, click here.